Do you think IIT Guwahati certified course can help you in your career?
Introduction
If a python programmer wants to create a website using a fast, open-source, full-stack framework, then web2py is the correct framework that fits their bucket. Web2py helps us in developing fast, scalable and portable database-driven web-based applications.
Today, we will briefly look at adding images to the web2py and how to add Authentication to an Image Blog in Web2py.
Web2py
Web2py is an open-source, free full-stack framework written in Python that helps rapidly develop fast, scalable, secure and portable database-driven web-based applications.Web2Py is a full-stack framework as it contains all the tools, components, and APIs essential to building a fully functional web application.Web2Py is compatible with both versions of Python, i.e., python 2. X and Python 3.X.Architecture followed by Web2py is a Modern View Controller followed by many famous web frameworks like Django and Ruby on Rails.
Web2py is built by keeping security in mind and is its very first concern for it. As a Back-End framework, web2py comes with a built-in Data Abstraction Layer that helps developers communicate with different SQL DataBases such as SQLite, PostgreSQL, MySQL, MSSQL, and Oracle, IBM DB2, etc.
Some of the many features of Web2py are its web-based IDE, popular frameworks that inspire it, its foundation on MVC architecture and its high compatibility, and web-based IDE.
Let's start understanding Authentication to an Image Blog in Web2py. Let's look into it. We will also see the implementation and code for adding images to the web2py blog.
After that, we will look at how to add Authentication to an image Blog in Web2py.
Add Images to the Web2py Blog
So now, in this section, we will discuss how to add images to the web2py blog. So before going into anything, let us start from scratch. Start the executable file for Web2py. Now start the server by choosing the password to your network. As shown below.
Web2Py Server Login
Once you click on start server, it will open /welcome/default/index in our web browser. Similar to the screen displayed below
Web2py Default Welcome Window
Now we are all set to start working on the web2py framework. So next step is to get a detailed understanding of how to add images to the web2py blog.
First, create a new application called CodingNinjaImage, and navigate to the edit page.
Web2py Administration Login
Installed Applications
So now, we will create a model representing the persistent data in the application. Create/edit a model file called "db.py" for lack of imagination. Remove the model "menu.py". Corresponding to the "db.py" file, there is an "edit" button.
Edit Window Web2Py
Click on the edit button mentioned above and enter the below code into that file.
db = DAL("sqlite://storage.sqlite")
# Above Line defines a global variable called db that represents the database connection.For above case its an connection to SQLite database


# Here we have defined a table called "image". Method define_table of the db object is used. The first argument of define_table, "image", is the name of the table
db.define_table('image',
                Field('title', unique=True),
                Field('file', 'upload'),
                format = '%(title)s')


# Here we have defined a table called "post". Method define_table of the db object is used. The first argument of define_table, "post", is the name of the table
db.define_table('post',
                Field('image_id', 'reference image'),
                Field('author'),
                Field('email'),
                Field('body', 'text'))


# Validators
# Validator for Title of Image
db.image.title.requires = IS_NOT_IN_DB(db, db.image.title)
# Validator for Image ID
db.post.image_id.requires = IS_IN_DB(db, db.image.id, '%(title)s')
# Validator for author requirement
db.post.author.requires = IS_NOT_EMPTY() # author could not be empty
# Validator for email requirement
db.post.email.requires = IS_EMAIL()
# Validator for body requirement
db.post.body.requires = IS_NOT_EMPTY()


db.post.image_id.writable = db.post.image_id.readable = False
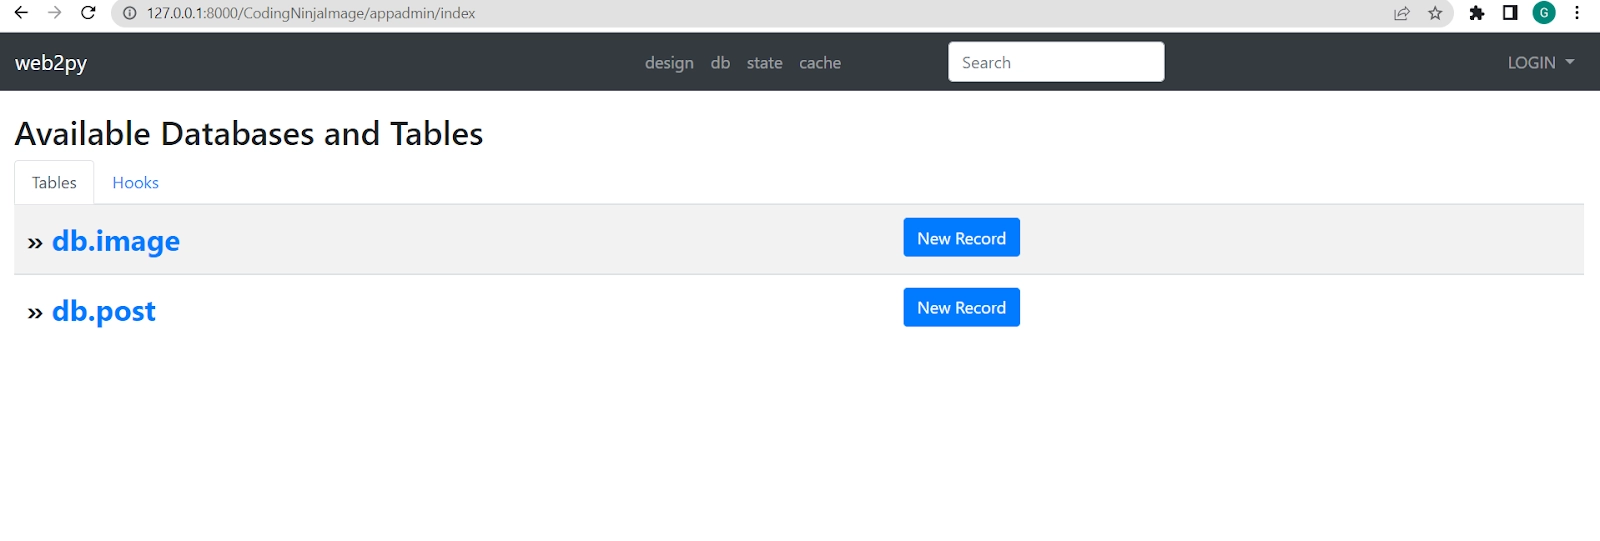
Once we have defined a model and there are no errors, web2py creates an application administration interface to manage the database, which we can access directly via the "database administration" link on the edit page.
Application Databases
This interface is coded in the controller "appadmin.py" and the corresponding view "appadmin.html."If we edit the model and access appadmin again, web2py will generate a SQL file for altering the existing tables. Generated SQL is logged into the "sql.log".We need to go back to our appadmin and should try to insert a new image record.
Creating New Image Record
If we do not get a view, we need to render the dictionary by "views/generic.html" and Proceed by creating a view for our index action. also, edit "default/index.html" in admin, and replace its content with the following
We need to Proceed with creating a view for the index action. So Return to admin, edit "default/index.html" and replace its content with the below file code:
After clicking on the image name link, we are directed to http://127.0.0.1:8000/CodingNinjaImage/default/show/1, which results in an error since the action called "show" is not created in the controller file "default.py".
Invalid Request
So to get the view, let's edit the "default.py" controller by replacing its content with the below code:
def index():
    # To select all imags from the database and index them
    images = db().select(db.image.ALL, orderby=db.image.title)
    return dict(images=images)

def show():
    image = db.image(request.args(0, cast=int)) or redirect(URL('index'))
    db.post.image_id.default = image.id
    form = SQLFORM(db.post)
    if form.process().accepted:
        response.flash = 'your comment is posted'
    comments = db(db.post.image_id == image.id).select(orderby=db.post.id)
    # Return dictionary with image,comments and form
    return dict(image=image, comments=comments, form=form)

def download():
    # This function response to download action
    return response.download(request, db)
You can also try this code with Online Python Compiler
The "default.py" file of the controller in the scaffolding application already defines the "download" action. We will create a new view "default/show.html".So you need to edit the new file and replace its content with the following code:
Now our view will be able to display the image. file by calling the "download" action that is defined inside an <img ... /> tag. If any comments are found, it would loop over them and display each.
Look into the image to see how everything will appear to a visitor.
Final Result
Authentication to an Image Blog in Web2py
Now, if we need to add Authentication to an image blog, the web2py API for Role-Based Access Control is quite sophisticated, So we are limiting ourselves to restricting access to the show action to authenticated users,
To limit web application access only to authenticated users, we need to add Authentication to an image blog which could be done in three steps. In our model, "db.py", we would add:
from gluon.tools import Auth
auth = Auth(db)
auth.define_tables(username=True)
But we would also need to add one more action in our controller:
def user():
    return dict(form=auth())
The above two functions are sufficient to enable register, login, logout, etc., pages. which are enough to add authentication to an image blog . Our default layout will also show options for the corresponding pages in the top right corner.
Login Screen
We could also decorate these functions to whomsoever we want to restrict, for example.
So if there is any first-time user, they require to get register first to be able to login into the blog application. The application also already illustrates the auth object and the user function. The auth object is highly customizable and could also deal with registration permissions, CAPTCHA, email verification, and alternate login methods via plugins.
Web2Py is an open-source, free full-stack framework written in Python that helps rapidly develop fast, scalable, secure and portable database-driven web-based applications.
For what purpose Web2py is used?
Web2py is mainly used to program dynamic websites using Python as a programming language. It contains all the tools, components, and APIs essential to building a fully functional web application.
Which is easier, Web2py or Django?
Web2py differs from Django since it's very compact and easier to learn. Unlike Django, it doesn't have any project-level configuration file.
Web2py Support which version of Python?
Web2Py is compatible with both versions of Python, i.e., python 2. X and Python 3. X
Conclusion
In this article, we have learned how to add Authentication to an image blog in the web2py and briefly explored some basic introductions on web2py with the code execution. Now We expect you to know how to add images to the web2py blog and how to add Authentication to an image blog. Give an upvote to the blog to help other ninjas grow.


 9+ registered

