Do you think IIT Guwahati certified course can help you in your career?
Introduction
HDRI stands for High Dynamic Range Imaging. It is used to sharpen up the image and also for adding more details to your scene. In this blog, we will learn about HDRI and how it can be used inside a Blender.
HDRI
High Dynamic Range Imaging is a technology that helps in expanding the dynamic range of your image and add more details to it.
Dynamic Range
It refers to the range of brightness values that can be captured on a photographic plate or on the matrix of a camera.
If we compare the human eye with modern cameras, the human eye is able to see every detail of an object under any lighting whereas most modern cameras will not be able to capture all of the details of an object as they have a low dynamic range.
HDRI Functionality
HDRI takes several shots of a single scene and combines all those shots into a single image, and tries to make this single image as close as what the eyes of a photographer will see. However, most monitors ( just like cameras ) have a lower dynamic range which is why they cannot render HDR-image to its best advantage. To overcome this, a new technology was introduced known as Tone Mapping.
What Tone-Mapping does is that it compresses the dynamic range of an HDR-image without degrading the quality of the image much. This compressed image is known as LDR-image ( low dynamic range image ), and monitors are able to render this image to its fullest. The quality of the LDR-image is not as good as HDR-image, but it's much better than the original image.
Environment maps or HDRI maps are snapshots of real-world lighting through HDRI, which contains accurate information about lighting. This HDR-image can be used to emit light on our objects in 3d space to make the objects more realistic in 3d render.
Adding HDRI in blender
You can get free HDRI maps from various sites, and you can directly use them in your project to lighten up your 3d scene.
Below are the steps on how you can add HDRI map to your project.
Go to your properties panel and click on world properties.
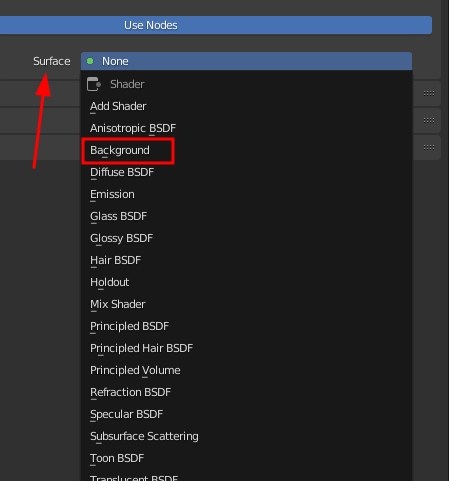
2. Click on Surface > a drop-down menu will appear > Then select Background.
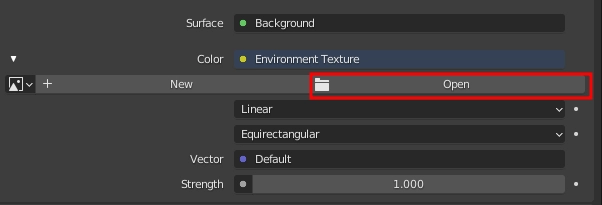
3. A new section will appear > first click on the little greenish circle right next to color > then select environment maps.
4. Next, Click on open > Browse through your files and select the HDRI map file that you have downloaded > click open image.
Your HDRI file has successfully been loaded into your project, now go to your scene and hit Z key on your keyboard. Few options will pop up select Rendered view.
Congratulations, you have successfully loaded the Environment map, and your scene has been lightened up by HDRI map.
FAQs
What is HDRI?
High Dynamic Range Imaging is a technology that can help you to expand the dynamic range of your image, which will add more details to your image.
What does HDRI do in a blender?
It is basically an image format that contains from the deepest shadow up to the brightest highlight information. Using HDR images in a 3D environment will result in very realistic and convincing shadows, highlights, and reflections.
Where can i get HDRI maps?
There are various websites available providing free HDRI files which you can use in your project. Some of them are Poly Haven, Textures.com and many more.
Conclusion
In this article, we learned about HDRI and how to use them in blender.
We hope that this blog has helped you enhance your knowledge regarding HDRI and if you would like to learn more, check out our articles on our website. Do upvote our blog to help other ninjas grow.


 8+ registered

