Do you think IIT Guwahati certified course can help you in your career?
Introduction
We shall now look into some advanced concepts of Azure such as creating and managing access tokens, Setting up and managing access tokens for Teams users, Adding Chat to our App, and Creating and managing Email Communication Service resources in Azure Communication Service.
Creating and managing access tokens
Prerequisites
An active Azure account.
Python 2.7 or 3.6 or later.
An active Communication Services resource and connection string.
Set up your environment
Create a new Python application
We create a new directory in the terminal or command prompt window for our app using:
mkdir access-tokens-quickstart && cd access-tokens-quickstart
2. Then with the use of a text editor, create a file called issue-access-tokens.py in the root directory of project and add the structure for the program.
import os
from azure.communication.identity import CommunicationIdentityClient, CommunicationUserIdentifier
try:
   print("Azure Communication Services - Access Tokens Quickstart")
   # Quickstart code goes here
except Exception as ex:
   print("Exception:")
   print(ex)
Install the package
Install the Azure Communication Services Identity SDK with the help of the pip install command using:
pip install azure-communication-identity
Authenticate the client
Instantiate a CommunicationIdentityClient with your connection string. The following code, added in the try block, retrieves the connection string for the resource from an environment variable called COMMUNICATION_SERVICES_CONNECTION_STRING.
# It shows how to retrieve your connection string from an environment variable.
connection_string = os.environ["COMMUNICATION_SERVICES_CONNECTION_STRING"]
# Instantiating the identity client
client = CommunicationIdentityClient.from_connection_string(connection_string)
Create an identity
We need an identity to create access tokens. We use the create_user method to create a new entry in the directory with a unique Id.
identity = client.create_user()
print("\nCreated an identity with ID: " + identity.properties['id'])
Issue access tokens
To issue an access token for your Communication Services identity, use the get_token method.
# Issue an access token with the "voip" scope for an identity
token_result = client.get_token(identity, ["voip"])
expires_on = token_result.expires_on.strftime("%d/%m/%y %I:%M %S %p")


# Print the details to the screen
print("\nIssued an access token with 'voip' scope that expires at " + expires_on + ":")
print(token_result.token)
Create an identity along with issuing an access token in the same request
To create a Communication identity and issue an access token, we can use the create_user_and_token method simultaneously. The parameter scope defines a set of access token permissions and roles.
# Issue an identity and an access token with the "voip" scope for the new identity
identity_token_result = client.create_user_and_token(["voip"])

# Get the token details from the response
identity = identity_token_result[0]
token = identity_token_result[1].token
expires_on = identity_token_result[1].expires_on.strftime("%d/%m/%y %I:%M %S %p")

# Print the details to the screen
print("\nCreated an identity with ID: " + identity.properties['id'])
print("\nIssued an access token with 'voip' scope that expires at " + expires_on + ":")
print(token)
Refresh access tokens
Use the CommunicationUserIdentifier object to refresh an access token.
The revoke_tokens method is used to invalidate all active access tokens that were issued to the identity.
client.revoke_tokens(identity)
print("\nSuccessfully revoked all access tokens for identity with ID: " + identity.properties['id'])
Delete an identity
After deleting an identity, you revoke all active access tokens and prevent the further issuance of access tokens for the identity.
client.delete_user(identity)
print("\nDeleted the identity with ID: " + identity.properties['id'])
Run the code
From a console prompt, move to the directory that contains the issue-access-tokens.py file, and then type the following python command to run the app.
python ./issue-access-tokens.py
Output:
Azure Communication Services - Access Tokens Quickstart

Created an identity with ID: 8:acs:4ccc92c8-9815-4422-bddc-ceea181dc774_00000006-19e0-2727-80f5-8b3a0d003502

Issued an access token with 'voip' scope that expires at 30/03/21 08:09 09 AM:
<token signature here>

Created an identity with ID: 8:acs:4ccc92c8-9815-4422-bddc-ceea181dc774_00000006-1ce9-31b4-54b7-a43a0d006a52

Issued an access token with 'voip' scope that expires at 30/03/21 08:09 09 AM:
<token signature here>

Successfully revoked all access tokens for identity with ID: 8:acs:4ccc92c8-9815-4422-bddc-ceea181dc774_00000006-19e0-2727-80f5-8b3a0d003502

Deleted the identity with ID: 8:acs:4ccc92c8-9815-4422-bddc-ceea181dc774_00000006-19e0-2727-80f5-8b3a0d003502
Set up and manage access tokens for Teams users
Now we will see a use case with multiple actors: users, developers, and administrators from fictional companies Fabrikam and Contoso. In this use case, Contoso is a company that is building (SaaS) Software as a service for Fabrikam.
The steps below will describe the steps for administrators, developers, and users. The diagrams demonstrate the multitenant use case.
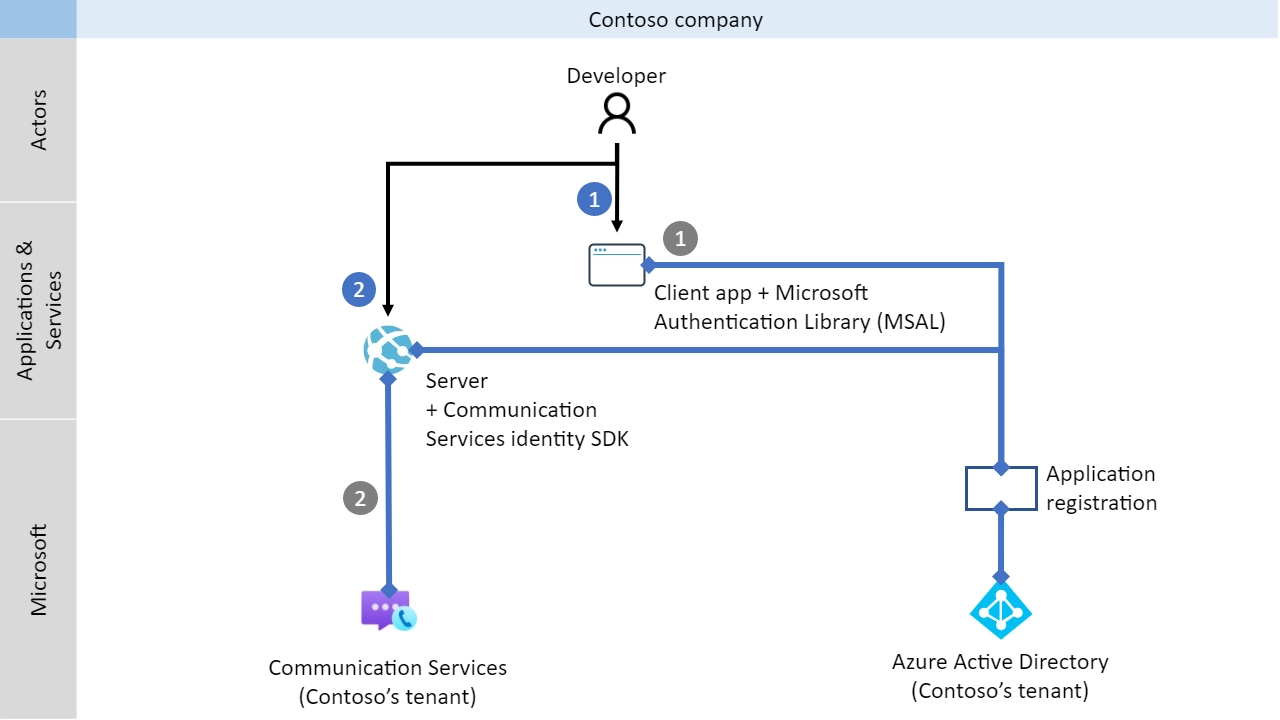
Administrator actions
The Administrator has extended permissions in Azure AD. Administrators can read information from the Azure portal and set up resource.
In the below diagram, you can see all actions that have to be executed by Administrators.
Step 1: Create an Azure AD application registration or select an Azure AD application.
Step 2: Allow public client flows
Step 3: Add the Communication Services permissions in the application
Step 4: Create or select a Communication Services resource
Step 5: Provide Administrator consent
Developer actions
The Contoso developer must set up the client application to affirm users. The developer then needs to develop an endpoint on the back-end server to process the Azure AD user token after redirection. When the Azure AD user token is obtained, it's swapped for the access token of Teams user and replaced to the client application.
The developer's required actions are shown in following diagram:
The Contoso developer firstly configures the Microsoft Authentication Library (MSAL) to affirm the user for the application created before by the Administrator for Communication Services Teams.ManageCalls permission.
The Contoso developer then initializes the Communication Services Identity SDK and exchanges the incoming Azure AD user token for the access token of the Teams user via the identity SDK. The access token of the Teams user is then returned to the client application.
Setup
Create a new Python application
Firstly create a new directory, and go to it.
mkdir communication-access-tokens-quickstart && cd communication-access-tokens-quickstart
Using a text editor create a file called exchange-communication-access-tokens.py in the project root directory and add basic structures.
import os
from azure.communication.identity import CommunicationIdentityClient, CommunicationUserIdentifier

try:
   print("Azure Communication Services - Access Tokens Quickstart")
   # Quickstart code goes here
except Exception as ex:
   print("Exception:")
   print(ex)
Install the package
Install the Azure Communication Services Identity SDK by using the pip install command, in the application directory.
Step 2: Initialize the CommunicationIdentityClient
# This code demonstrates how to fetch your connection string
# from an environment variable.
connection_string = os.environ["COMMUNICATION_SERVICES_CONNECTION_STRING"]

# Instantiate the identity client
client = CommunicationIdentityClient.from_connection_string(connection_string)
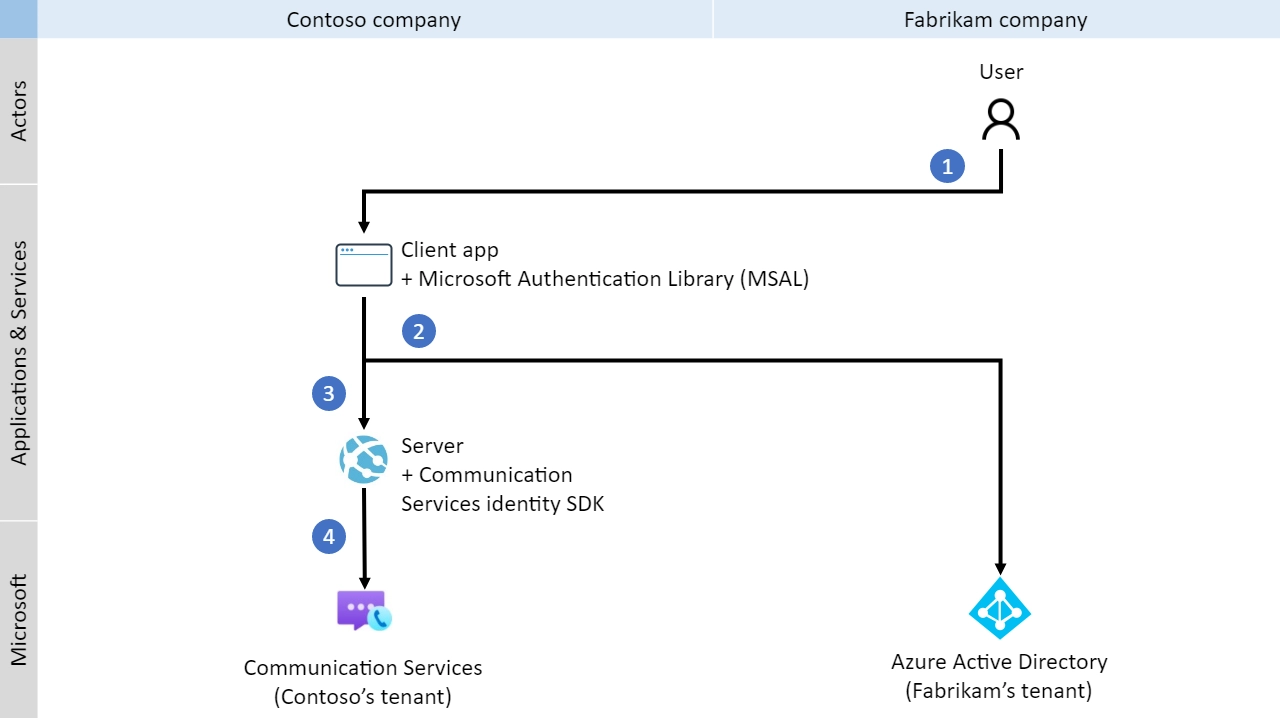
Step 3: Replace the Azure AD access token of the Teams User for a Communication Identity access token
The user represents the users of Fabrikam of the Contoso application. The user experience is shown in the below diagram:
The Fabrikam User utilizes the Contoso client application and is requested to authenticate.
The Contoso client application operates the MSAL to authenticate the User against the Fabrikam Azure AD tenant for the Contoso application using Communication Services Teams.ManageCalls permission.
Authentication is diverted to the server, as described in the property Redirect URI in the Contoso application and MSAL.
The Contoso server then exchanges the Azure AD user token for the access token of the Teams user with the help of the Communication Services.
Add Chat to your App
Now we shall learn about Azure Communication Services with the help of the Communication Services Chat SDK for adding real-time chat to our application.
Sample Code
The finalized code for this quickstart can be found on GitHub.
Prerequisites
Step 1: Create an Azure account with an active subscription.
Step 2: Install Python.
Step 3: Create an Azure Communication Services resource.
Step 4: Set the scope to chat, and note the token string as well as the userId string.
Setting up
Create a new Python application
Create a new directory in the terminal.
mkdir chat-quickstart && cd chat-quickstart
Add required SDK components
Create a file called start-chat.py in root directory of project and add necessary structures.
import os
try:
    print('Azure Communication Services - Chat Quickstart')
    # Quickstart code goes here
except Exception as ex:
    print('Exception:')
    print(ex)
Install SDK
Install using the following command:
pip install azure-communication-chat
Object model
Name
Description
ChatClient
This class is required for the chat functionality. After instantiating it with your subscription information, you can use it to delete, create, get threads.
ChatThreadClient
This class is required for the chat thread functionality. You obtain an instance via ChatClient, and use it to update, send, receive and delete messages.
Create a chat client
Use the Communication Services endpoint along with the access token you generated earlier to create a chat thread.
Use topic to provide the thread a topic. You can later update the topic after the chat thread is created by update_thread function.
Use thread_participants to get the list of the ChatParticipant to be added to the chat thread. The ChatParticipant inputs the CommunicationUserIdentifier type as user.
The thread_id is the unique ID of the existing chat thread. The get_chat_thread_client method returns a thread client for a thread that is already present. You can later use it to carry on operations on the created thread.
While you create a chat thread, you can remove and add users from it. By adding users, you provide them access to be able to send messages to the chat thread, and remove or add other participants.
from azure.communication.identity import CommunicationIdentityClient
from azure.communication.chat import ChatParticipant
from datetime import datetime

# create 2 users
identity_client = CommunicationIdentityClient.from_connection_string('<connection_string>')
new_users = [identity_client.create_user() for i in range(2)]

# # conversely, you can also add an existing user to a chat thread; provided the user_id is known
# from azure.communication.identity import CommunicationUserIdentifier
#
# user_id = 'some user id'
# user_display_name = "Wilma Flinstone"
# new_user = CommunicationUserIdentifier(user_id)
# participant = ChatParticipant(
#     identifier=new_user,
#     display_name=user_display_name,
#     share_history_time=datetime.utcnow())

participants = []
for _user in new_users:
  chat_thread_participant = ChatParticipant(
    identifier=_user,
    display_name='Fred Flinstone',
    share_history_time=datetime.utcnow()
  )
  participants.append(chat_thread_participant)
response = chat_thread_client.add_participants(participants)

def decide_to_retry(error, **kwargs):
    """
    Insert some custom logic to decide if retry is applicable based on error
    """
    return True
# verify if all users has been successfully added or not
# in case of partial failures, you can retry to add all the failed participants
retry = [p for p, e in response if decide_to_retry(e)]
if retry:
    chat_thread_client.add_participants(retry)
List thread participants in a chat thread
You can also list all the participants from a thread by Using list_participants to retrieve the participants of the thread.
chat_thread_participants = chat_thread_client.list_participants()
for chat_thread_participant_page in chat_thread_participants.by_page():
    for chat_thread_participant in chat_thread_participant_page:
        print("ChatParticipant: ", chat_thread_participant)
Run the code
To run the code:
python start-chat.py
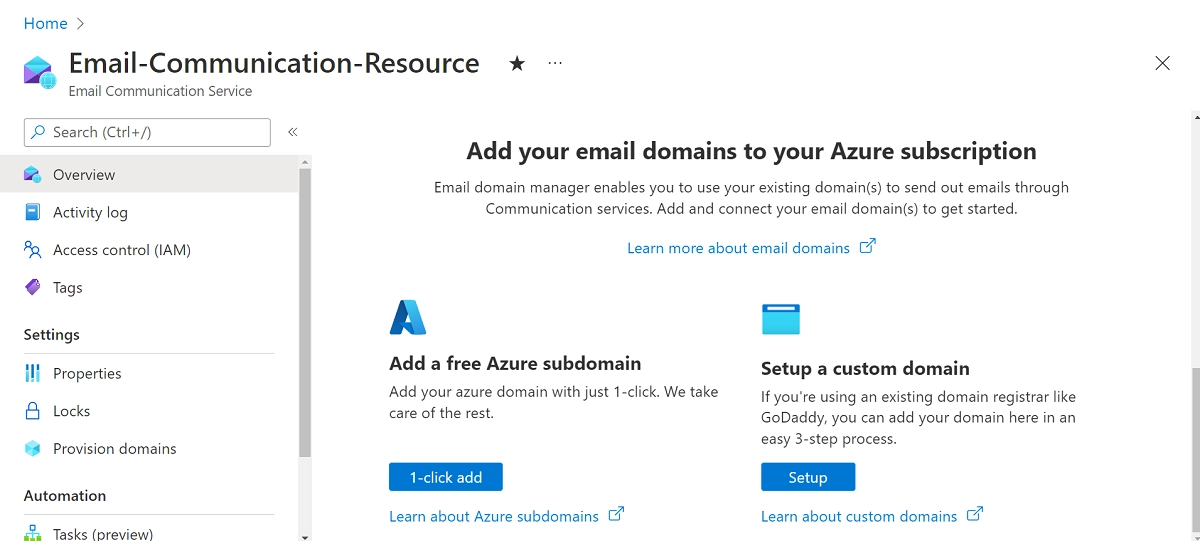
Creating and managing Email Communication Service resources in Azure Communication Service
Creating the Email Communications Service resource through the portal
Go to Azure portal to create a new resource.
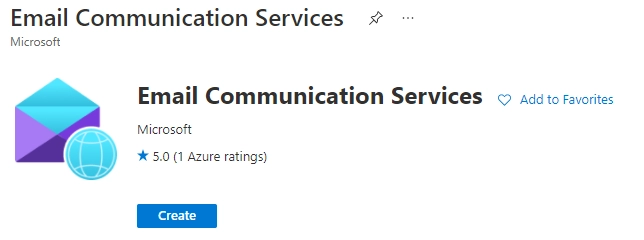
Locate the Email Communication Services and hit enter. Select Email Communication Services and press Create.
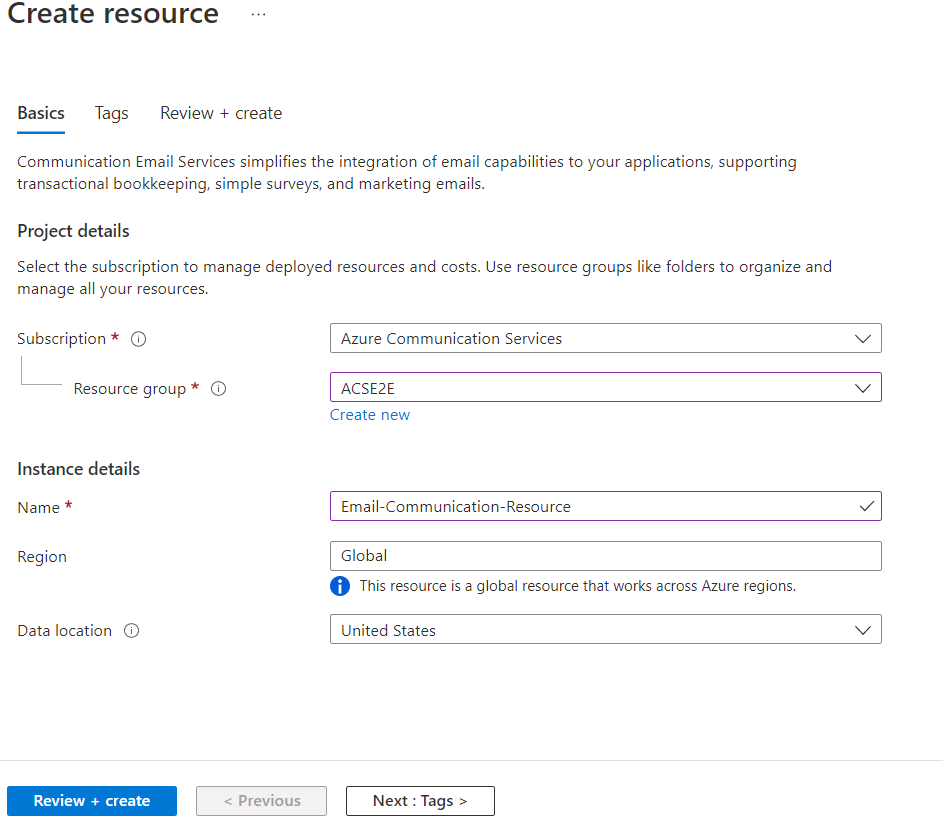
3. Complete the information on the basics tab:
Select an existing Azure subscription, existing resource group, or create a new one by clicking the Create new link.
Providing a valid name for the resource and select United States as the data location.
If you would like to add tags, click Next: Tags. Add any name/value pairs.
Click Next: Review + create.
4. Wait for the validation to pass. Click Create
5. Wait for the Deployment to complete. Click Go to Resource and you will land on Email Communication Service Overview Page.
Frequently Asked Questions
What are Azure communication services?
Azure Communication Services is a combination of video APIs, communication APIs, and SMS APIs for deploying your applications on any device, or any platform.
Write some use cases of Azure Cloud Shell.
Some use cases are:
Application development.
AI.
Data and analytics.
Hybrid cloud and infrastructure.
Internet of Things.
Security and governance.
What is Azure?
Microsoft Azure, also called Azure, is a cloud computing service operated by Microsoft for application management via Microsoft-managed data centers.
Where can we use Microsoft Azure?
Azure is commonly used as a platform for hosting databases in the cloud.
In addition, the platform is frequently used for backup and disaster recovery. Microsoft offers serverless relational databases such as Azure SQL and non-relational databases such as NoSQL.
Conclusion
I hope this article provided you with insights about some advanced Azure topics and steps such as access tokens and communication services.
We hope this blog has helped you increase your knowledge regarding AWS Step functions, and if you liked this blog, check other links. Do upvote our blog to help other ninjas grow. Happy Coding!"


 8+ registered

