Permissions required before using camera
It is important to acquire a set of permissions before actually using the camera application. These permissions can be added to the manifest file of our application.
Camera Permission
The permission for the camera can be acquired by adding the following line of code.
<uses-permission android:name="android.permission.CAMERA" />
Storage Permission
The images/videos captured by our camera need some space on the device's external storage for saving them. To acquire this permission, add the following line of code in the Android Manifest file of our application.
<uses-permission android:name="android.permission.WRITE_EXTERNAL_STORAGE" />
Audio Recording Permission
For capturing audio along with video, we need to acquire the relevant permission using the following line of code in our manifest file.
<uses-permission android:name="android.permission.RECORD_AUDIO" />
Location Permission
Use the following line of code to acquire location related permissions.
<uses-permission android:name="android.permission.ACCESS_FINE_LOCATION" />
Camera Features
To use the features of our camera, we need to add this line to our manifest file. This allows a list of features for our use at our convenience.
<uses-feature android:name="android.hardware.camera" />
Different Intent Tyes
There is a list of intents that the MediaStore provides to use an existing camera application in our own Android application. One can declare an intent using the following line of code. Some of the intents provided by Media Store are discussed after that.
Intent _intent = new Intent(android.provider.MediaStore.ACTION_VIDEO_CAPTURE)
The ACTION_IMAGE_CAPTURE Intent
This intent is used to capture an image from an existing camera application.
The EXTRA_SIZE_LIMIT Intent
It is used to upper cap the size of the captured image/video.
The ACTION_IMAGE_CAPTURE_SECURE Intent
It adds a layer of security to the ACTION_IMAGE_CAPTURE Intent. It returns the image when the device is secured properly.
The EXTRA_FULL_SCREEN Intent
This intent is helpful in controlling the UI of the ViewImage functionality.
The ACTION_VIDEO_CAPTURE Intent
It is used to capture video inside our Android application with the help of an existing video capture application.
The EXTRA_SCREEN_ORIENTATION Intent
It is used to change the orientation of the screen from portrait to landscape and vice versa.
Implementation of Android Camera Application
In this section, we will create a sample android application that will use the camera to capture an image and display it in our Android application. Follow the simple steps given below to complete this Android app.
Creating an Android Studio Project
You need to first create an Android Studio project before actually creating your Android apps. To create a new project, open up Android Studio and press the New Project button, select Empty Activity as the activity type and implementation language as Kotlin. Select a minimum SDK version as per your requirements.
Don't have Android Studio and environment already set up in your machine? No worries, we got you all covered. Refer to the blog Android Studio and Environment Setup on the Coding Ninjas Website to set up things for a smoother development process.
The Main Activity XML file
The activity_main.xml file is the most important layout of your application which is referenced when we are building the interface of our application. The code for this file is given as follows. If we see an overview of this file, we will find a ConstraintLayout widget containing one TextViews widget, one Button widget and an ImageView widget.
Code:
<?xml version="1.0" encoding="utf-8"?>
<androidx.constraintlayout.widget.ConstraintLayout xmlns:android="http://schemas.android.com/apk/res/android"
    xmlns:app="http://schemas.android.com/apk/res-auto"
    xmlns:tools="http://schemas.android.com/tools"
    android:layout_width="match_parent"
    android:layout_height="match_parent"
    tools:context=".MainActivity">

    <TextView
        android:id="@+id/textView"
        android:layout_width="337dp"
        android:layout_height="64dp"
        android:text="@string/heading"
        android:textAlignment="center"
        android:textSize="25dp"
        android:textColor="@color/orange"
        android:textStyle="bold"
        app:layout_constraintBottom_toBottomOf="parent"
        app:layout_constraintLeft_toLeftOf="parent"
        app:layout_constraintRight_toRightOf="parent"
        app:layout_constraintTop_toTopOf="parent"
        app:layout_constraintVertical_bias="0.039" />

    <Button
        android:id="@+id/button"
        android:layout_width="155dp"
        android:layout_height="75dp"
        android:text="Button"
        app:layout_constraintBottom_toBottomOf="parent"
        app:layout_constraintEnd_toEndOf="parent"
        app:layout_constraintStart_toStartOf="parent"
        app:layout_constraintTop_toTopOf="parent"
        app:layout_constraintVertical_bias="0.221" />

    <ImageView
        android:id="@+id/imageView"
        android:layout_width="309dp"
        android:layout_height="236dp"
        app:layout_constraintBottom_toBottomOf="parent"
        app:layout_constraintEnd_toEndOf="parent"
        app:layout_constraintStart_toStartOf="parent"
        app:layout_constraintTop_toTopOf="parent"
        app:layout_constraintVertical_bias="0.668"
        app:srcCompat="@drawable/ic_launcher_background" />

</androidx.constraintlayout.widget.ConstraintLayout>
The Main Activity Kotlin file
This is the main file that gets your application running. This file contains the onCreate method, one of the first methods that get called after running our application. The code for MainActivity.kt file is given below.
Code:
package com.example.androidcamera

import androidx.appcompat.app.AppCompatActivity
import android.os.Bundle
import com.example.androidcamera.R
import android.content.Intent
import com.example.androidcamera.MainActivity
import android.graphics.Bitmap
import android.provider.MediaStore
import android.view.View
import android.widget.Button
import android.widget.ImageView

class MainActivity : AppCompatActivity() {
    var imageView: ImageView? = null

    override fun onCreate(savedInstanceState: Bundle?) {
        super.onCreate(savedInstanceState)
        setContentView(R.layout.activity_main)
        imageView = findViewById<View>(R.id.imageView) as ImageView
        val photoButton = findViewById<View>(R.id.button) as Button
        photoButton.setOnClickListener {
            val cameraIntent = Intent(MediaStore.ACTION_IMAGE_CAPTURE)
            startActivityForResult(cameraIntent, CAMERA_REQUEST)
        }
    }

    override fun onActivityResult(requestCode: Int, resultCode: Int, data: Intent?) {
        super.onActivityResult(requestCode, resultCode, data)
        if (requestCode == CAMERA_REQUEST) {
            val photo = data!!.extras!!["data"] as Bitmap?
            imageView!!.setImageBitmap(photo)
        }
    } //    @Override

    companion object {
        private const val CAMERA_REQUEST = 3000
    }
}
As you might have noticed from the above code, we have used the ACTION_IMAGE_CAPTURE Intent from the MediaStore.
The Android Manifest file
This file is used for registering our activities. We don’t need to change anything in this file and just use the boilerplate code provided by Android Studio for this. The code for the AndroidManifest.xml file is given below.
Code:
<?xml version="1.0" encoding="utf-8"?>
<manifest xmlns:android="http://schemas.android.com/apk/res/android"
    package="com.example.androidcamera">

    <application
        android:allowBackup="true"
        android:icon="@mipmap/ic_launcher"
        android:label="@string/app_name"
        android:roundIcon="@mipmap/ic_launcher_round"
        android:supportsRtl="true"
        android:theme="@style/Theme.AndroidCamera">
        <activity
            android:name=".MainActivity"
            android:exported="true">
            <intent-filter>
                <action android:name="android.intent.action.MAIN" />

                <category android:name="android.intent.category.LAUNCHER" />
            </intent-filter>
        </activity>
    </application>

</manifest>
The Resources Directory
The resources folder named res in our Android Studio project is an important folder that contains all the resources for our application. It contains all non-coding assets of our application. For example, consider the strings.xml file present under the directory res/values. This file contains the name of the application, which is rendered when we run the application. The code of this file is written below. In this blog, we have named the application as Android Camera.
Code:
<resources>
    <string name="app_name">Android Camera</string>
    <string name="heading">Android Camera Tutorial\nBy Coding Ninjas</string>
</resources>
Another important resource file is the colors.xml file, the code for which is given as follows.
Code:
<?xml version="1.0" encoding="utf-8"?>
<resources>
    <color name="purple_200">#FFBB86FC</color>
    <color name="purple_500">#FF6200EE</color>
    <color name="purple_700">#FF3700B3</color>
    <color name="teal_200">#FF03DAC5</color>
    <color name="teal_700">#FF018786</color>
    <color name="black">#FF000000</color>
    <color name="white">#FFFFFFFF</color>
    <color name="orange">#FF8C00</color>
</resources>
Final Application
The following application will be created after following the steps in the blog.
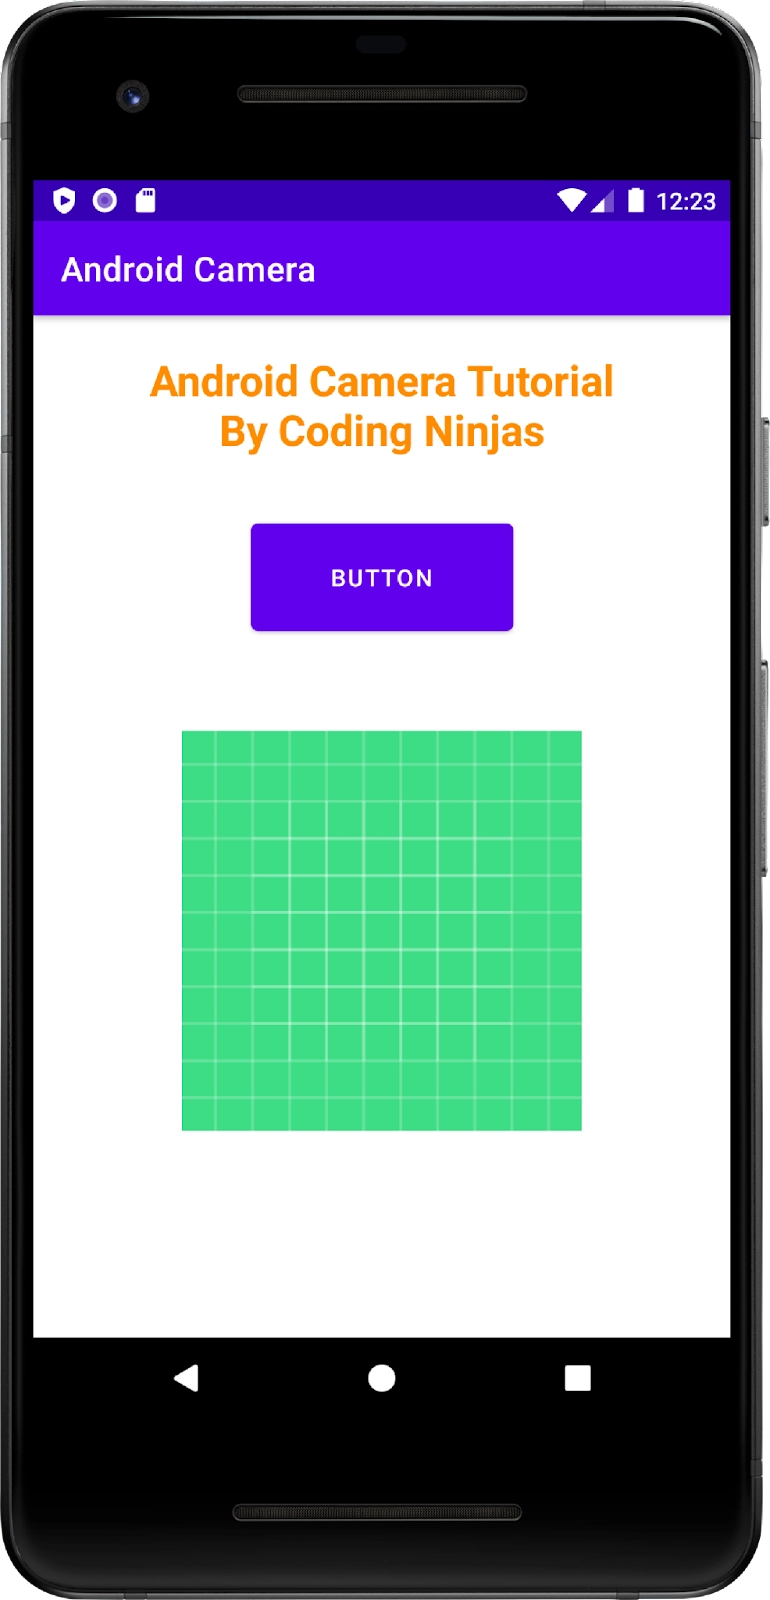
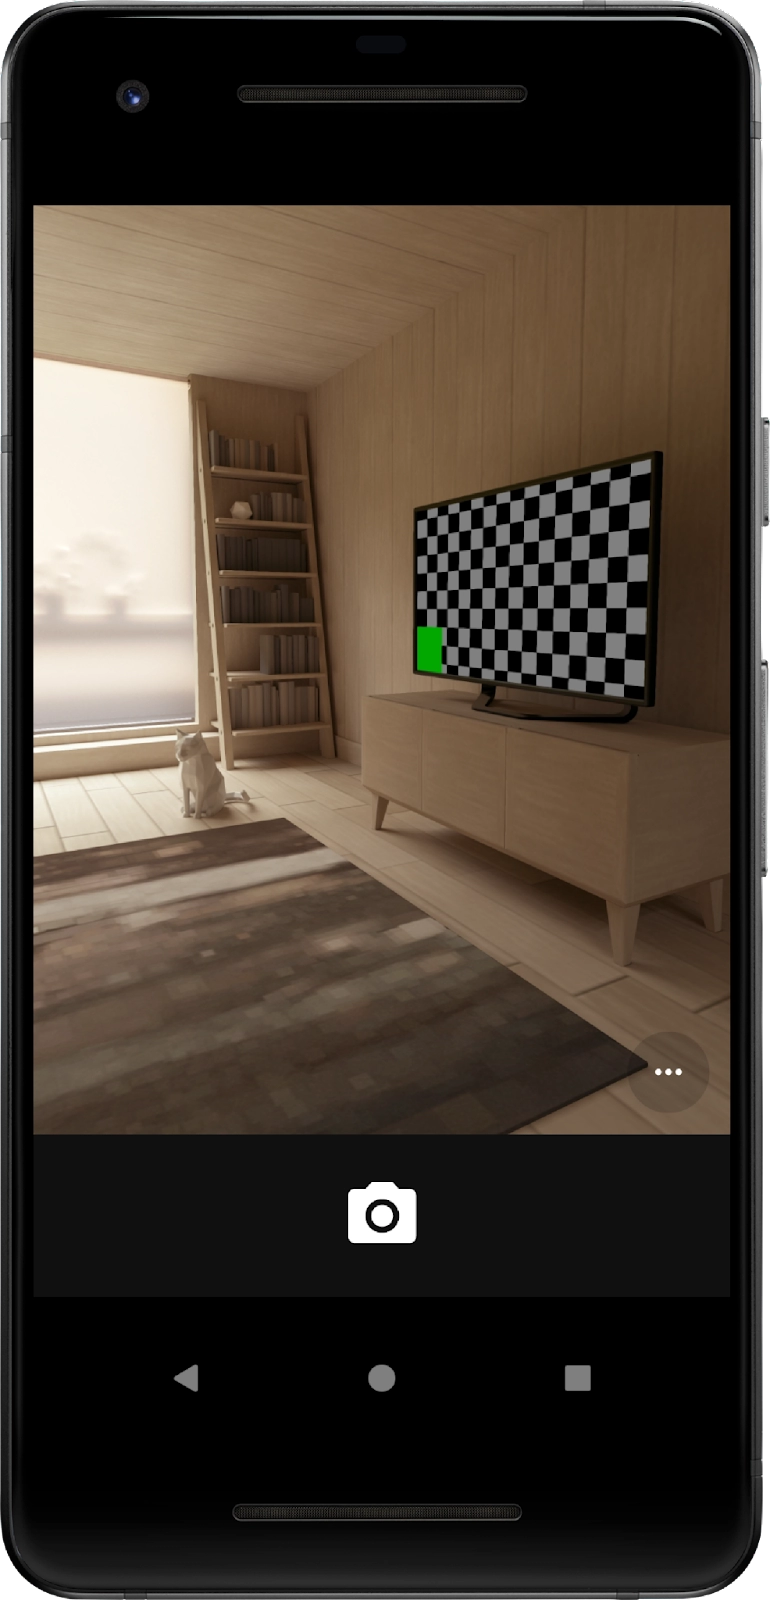
On clicking the button given in our app, the app will open up the Camera as displayed below (left image). When the user clicks the picture, they will get an option to either accept or reject the image depicted in the right image. If the user rejects the image, they would be allowed to retake it.

If the user accepts the clicked image, they would be redirected to the next screen of our app. This screen displays the image clicked by the user in our application.

Frequently Asked Questions
-
Which activity function is used to start an activity?
The startActivityForResult() function is used to start an activity. It can take a bunch of arguments along with it.
-
Why is it important to check for exceptions when using a camera in our Android applications?
It is important to check for exceptions because if the exceptions remain unchecked, it may cause our application to crash and might result in some other unhandled failures.
-
What is the use of the startActivityFromChild() function in Android?
The startActivityFromChild() function is used to start an activity when the current activity is a child of some other parent activity.
Conclusion
In this article, we have extensively discussed using a camera in our Android applications and saw an application that implements the same. You can also read the blog Alert Dialog Box in Android on the Coding Ninjas Website to create Alert Dialog Boxes in your Android application.
We hope that this blog has helped you enhance your knowledge regarding the Android application's camera features. If you want to learn more, check out our Android Development Course on the Coding Ninjas Website to learn everything you need to know about Android development. Do upvote our blog to help other ninjas grow. Happy Coding!


 8+ registered

