Installing the Emulator
Now, let us learn how to install the required emulator in our system.
We need to follow the following steps to install the emulator:
- Go to SDK Manager.
- Search for the SDK Tools tab of the SDK Manager.
- Go to the Android Emulator component from there and download it.
For more details, see Update your tools using the SDK Manager.
Android Virtual Devices
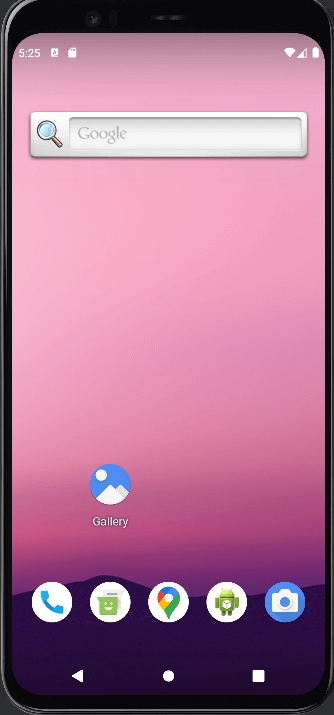
The android emulator creates an Android Virtual Device (AVD) based on the Android Version and hardware specifications of the device we are stimulating. We must make an AVD for all the devices we plan to run the application on for effective app testing. Each AVD can be considered an independent device.
Each AVD has its characteristic like any particular device would have. For instance, it has its private storage for data and SD cards. It stores all this data in the directory of that AVD. The emulator loads all this data from the directory on the launch of the AVD.
Running an App on the Android Emulator
We can run an app installed on the android emulator or from Android Studio. Follow these steps to run the App:
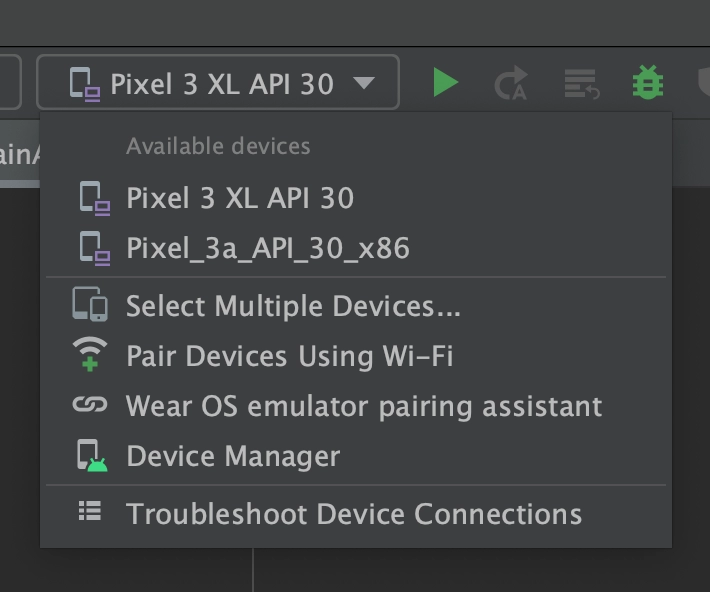
- Create an Android Virtual device in Android Studio that the emulator can use for running the application.
- Scroll through the target device drop-down menu select the AVD you want to run your application.
-
Click Run.
If you receive any error message, click on it to get more details and resolve the issue before proceeding further.
Source: Android Developers
Launching the Android Emulator without First Running the App
Let us now learn how to launch the android emulator and open an AVD before running the App.
To do so, You need to open the Device Manager. Then, double click on an AVD or Click Run. The Android Emulator loads after this operation. Further, you can choose the application you want to run on the emulator.
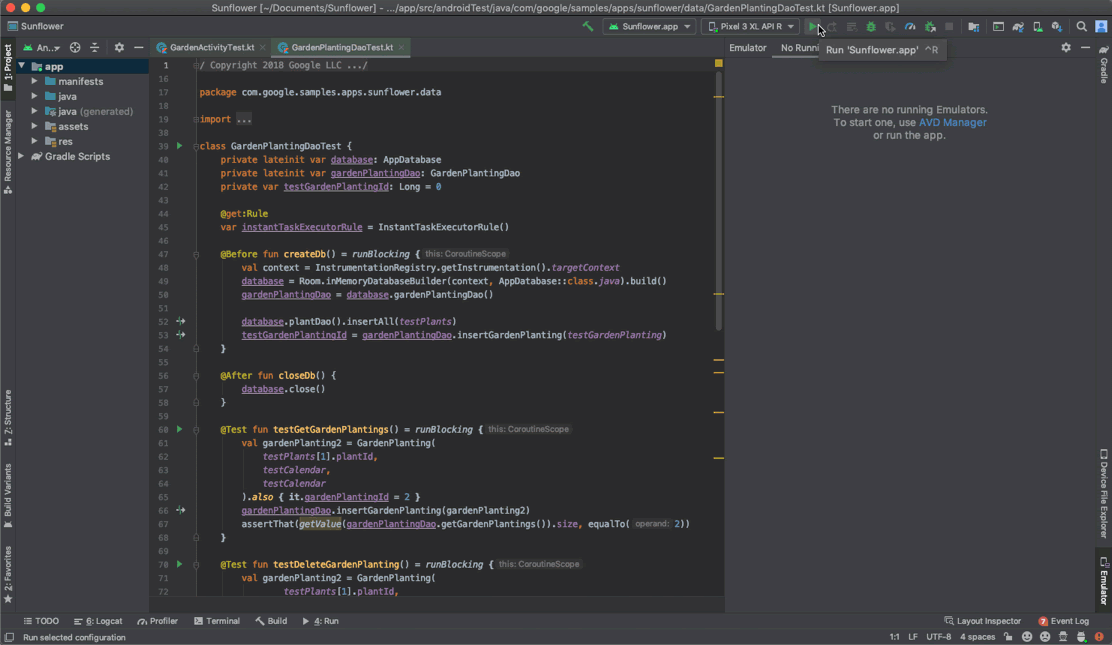
Running the Android Emulator Directly in Android Studio
The Android Studio runs the Andriod Emulator inside it by default. It has many advantages to it. It allows the user to conserve screen real estate, organize your IDE and emulator workflow in a single window and quickly move through the emulator and editor window.
We can perform emulator actions like rotating and extended control options like navigation playback on running the emulator.
If you want to run the emulator in a separate window, go to File > Settings > Tools > Emulator (Android Studio > Preferences > Tools > Emulator on macOS) and deselect Launch in a tool window.
Source: Android Developers
Running App on a Physical Device
Emulators work well for development purposes. However, we must run the application we intend to roll out on a physical device. We use an Android Debud Bridge for this purpose.
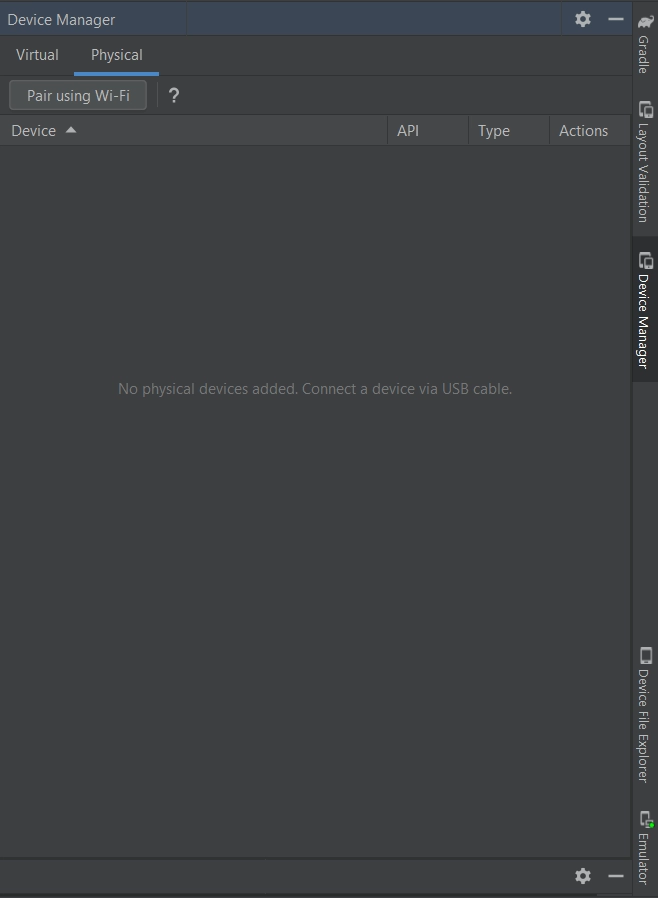
Setting up A Physical Device
Firstly, we need to decide whether we should use Wi-Fi or USB to connect our device. After that, we need to follow these steps:
- Go to the settings tab on the device and open it.
- Select developer options and go to USB Debugging.
- Set up your system and connect your device to it.
Source: Android Developers
Connecting Through USB
If you decide to connect to your device using USB, follow these steps:
- Set up your device and plug it over USB.
- Now click Run in Android Studio. Now you can build and run your App on the device.
Connecting Through Wi-fi
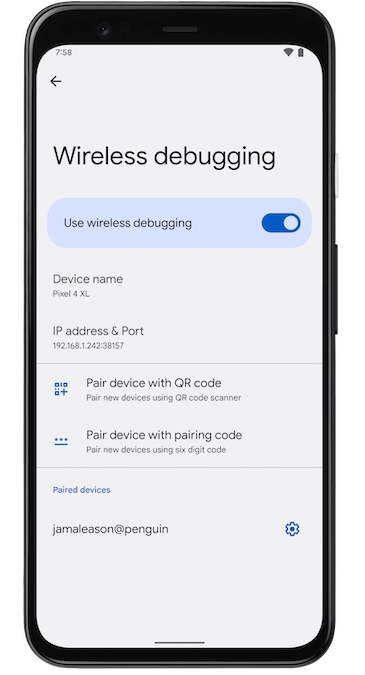
Using the Android debugging bridge, you can debug your App wirelessly on Android 11 and later versions. It aids us in deploying the App to multiple remote devices without having to connect the device physically.
To pair the device to your systems, follow the following steps:
- Connect the workstation and the device to the same wireless network.
- The device must be running on Andriod 11 or a higher version.
- Download Android Studio Bumblebee Canary if you don’t have it already.
- Update the SDK Platform Tools to the latest version.
- If all of the requirements are now up to date. Open Android Studio.
-
Go to the run configuration drop-down menu and select Pair Devices using Wi-fi.
- Enable Developer’s Option on your device.
- Enable Debugging over Wifi on your device.
- Select debugging and then pair your device. You can pair your device with a QR Code or by using Pairing Code.
- When successfully paired, you can start by deploying your application and then work on it.
Key Takeaways
Cheers if you reached here!!
In this blog, we discussed the various ways in which developers debug and test their Android Apps.
We understood what are android emulators and how do they help us in debugging and testing our apps. We also explored different ways of using the emulators. The concept of Android Virtual Devices in emulators was also discussed. We then learned how to test the app on a physical device.
To conclude, the blog helped in understanding android emulators and physical device setup for debugging and testing.
After reading this blog, I believe you will work with Emulators smoothly. If you wish to learn about Android Architecture, you can check out our other article on Android Architecture.
And to learn in-depth about android development, check out our Android Development course on the Coding Ninjas website.
Happy Coding!!


 6+ registered

