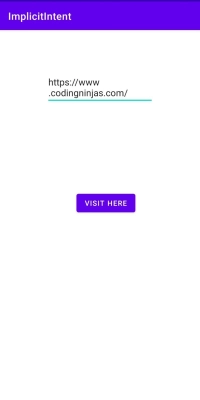
Android Implicit Intent Example
Let us have a look at a simple example of implicit intent that shows a web page.
activity_main.xml
File: activity_main.xml
<?xml version="1.0" encoding="utf-8"?>
<androidx.constraintlayout.widget.ConstraintLayout xmlns:android="http://schemas.android.com/apk/res/android"
    xmlns:app="http://schemas.android.com/apk/res-auto"
    xmlns:tools="http://schemas.android.com/tools"
    android:layout_width="match_parent"
    android:layout_height="match_parent"
 tools:context="com.codingninjas.implicitintent.MainActivity">

    <EditText
        android:id="@+id/editText"
        android:layout_width="wrap_content"
        android:layout_height="wrap_content"
        android:layout_marginEnd="4dp"
        android:layout_marginStart="4dp"
        android:layout_marginTop="80dp"
        android:ems="10"
        app:layout_constraintEnd_toEndOf="parent"
        app:layout_constraintHorizontal_bias="0.5"
        app:layout_constraintStart_toStartOf="parent"
        app:layout_constraintTop_toTopOf="parent" />

    <Button
        android:id="@+id/button"
        android:layout_width="wrap_content"
        android:layout_height="wrap_content"
        android:layout_marginRight="4dp"
        android:layout_marginLeft="150dp"
        android:layout_marginTop="170dp"
        android:text="Visit Here"
        app:layout_constraintEnd_toEndOf="parent"
        app:layout_constraintHorizontal_bias="0.0"
        app:layout_constraintStart_toStartOf="parent"
        app:layout_constraintTop_toBottomOf="@+id/editText" />
</android.support.constraint.ConstraintLayout>
Activity Class
File: MainActivity.kt
package com.codingninjas.implicitintent;

import android.content.Intent
import android.net.Uri
import android.os.Bundle
import android.view.View
import android.widget.Button
import android.widget.EditText
import androidx.appcompat.app.AppCompatActivity

class MainActivity : AppCompatActivity() {
    var mButton: Button? = null
    var et: EditText? = null
    override fun onCreate(savedInstanceState: Bundle?) {
        super.onCreate(savedInstanceState)
        setContentView(R.layout.activity_main)
        mButton = findViewById(R.id.button)
        et = findViewById(R.id.editText)
        mButton.setOnClickListener(View.OnClickListener {
            val url = et.getText().toString()
            val intent = Intent(Intent.ACTION_VIEW, Uri.parse(url))
            startActivity(intent)
        })
    }
}
Output:

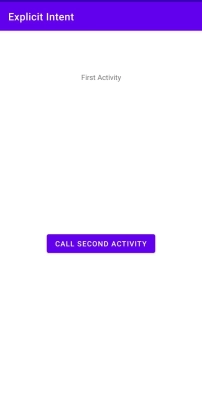
Android Explicit Intent Example
The component to be invoked from Activity is specified by Android Explicit intent. To put it another way, we can summon another activity in Android using explicit intent.
We may also use express purpose to transmit information from one activity to another.
Let us have a look at a basic Android explicit example that calls one activity from another and vice versa.
activity_main.xml
File: activity_first.xml
<?xml version="1.0" encoding="utf-8"?>
<androidx.constraintlayout.widget.ConstraintLayout xmlns:android="http://schemas.android.com/apk/res/android"
    xmlns:app="http://schemas.android.com/apk/res-auto"
    xmlns:tools="http://schemas.android.com/tools"
    android:layout_width="match_parent"
    android:layout_height="match_parent"
    tools:context="com.codingninjas.explicitintent.FirstActivity">

    <TextView
        android:layout_width="wrap_content"
        android:layout_height="wrap_content"
        android:layout_marginEnd="10dp"
        android:layout_marginStart="10dp"
        android:layout_marginTop="10dp"
        android:text="First Activity"
        app:layout_constraintBottom_toBottomOf="parent"
        app:layout_constraintEnd_toEndOf="parent"
        app:layout_constraintHorizontal_bias="0.5"
        app:layout_constraintLeft_toLeftOf="parent"
        app:layout_constraintRight_toRightOf="parent"
        app:layout_constraintStart_toStartOf="parent"
        app:layout_constraintTop_toTopOf="parent"
        app:layout_constraintVertical_bias="0.1" />

    <Button
        android:id="@+id/button"
        android:layout_width="wrap_content"
        android:layout_height="wrap_content"
        android:layout_marginEnd="10dp"
        android:layout_marginStart="10dp"
        android:layout_marginTop="390dp"
        android:onClick="callSecondActivity"
        android:text="Call Second Activity"
        app:layout_constraintEnd_toEndOf="parent"
        app:layout_constraintStart_toStartOf="parent"
        app:layout_constraintTop_toTopOf="parent" />
</androidx.constraintlayout.widget.ConstraintLayout>
ActivityOne Class
File: FirstActivity.kt
package com.codingninjas.explicitintent;

import android.content.Intent
import android.os.Bundle
import android.view.View
import androidx.appcompat.app.AppCompatActivity


class FirstActivity : AppCompatActivity() {
    override fun onCreate(savedInstanceState: Bundle?) {
        super.onCreate(savedInstanceState)
        setContentView(R.layout.activity_first)
    }


    fun callSecondActivity(view: View?) {
        val i = Intent(applicationContext, SecondActivity::class.java)
        i.putExtra("Value1", "Android Kotlin By Coding Ninjas")
        i.putExtra("Value2", "Simple Explicit Tutorial")
        // Set the request code to any code you like, you can identify the
        // callback via this code
        startActivity(i)
    }
}
activity_two_main.xml
File: activity_second.xml
<?xml version="1.0" encoding="utf-8"?>
<androidx.constraintlayout.widget.ConstraintLayout xmlns:android="http://schemas.android.com/apk/res/android"
    xmlns:app="http://schemas.android.com/apk/res-auto"
    xmlns:tools="http://schemas.android.com/tools"
    android:layout_width="match_parent"
    android:layout_height="match_parent"
    tools:context="com.codingninjas.explicitintent.SecondActivity">


    <TextView
        android:layout_width="wrap_content"
        android:layout_height="wrap_content"
        android:layout_marginEnd="10dp"
        android:layout_marginStart="10dp"
        android:layout_marginTop="10dp"
        android:text="Second Activity"
        app:layout_constraintBottom_toBottomOf="parent"
        app:layout_constraintEnd_toEndOf="parent"
        app:layout_constraintHorizontal_bias="0.5"
        app:layout_constraintLeft_toLeftOf="parent"
        app:layout_constraintRight_toRightOf="parent"
        app:layout_constraintStart_toStartOf="parent"
        app:layout_constraintTop_toTopOf="parent"
        app:layout_constraintVertical_bias="0.1" />


    <Button
        android:id="@+id/button"
        android:layout_width="wrap_content"
        android:layout_height="wrap_content"
        android:layout_marginEnd="10dp"
        android:layout_marginStart="10dp"
        android:layout_marginTop="390dp"
        android:onClick="callFirstActivity"
        android:text="Call First Activity"
        app:layout_constraintEnd_toEndOf="parent"
        app:layout_constraintStart_toStartOf="parent"
        app:layout_constraintTop_toTopOf="parent" />
</androidx.constraintlayout.widget.ConstraintLayout>
ActivityTwo Class
File: SecondActivty.kt
package com.codingninjas.explicitintent;
import android.content.Intent
import android.os.Bundle
import android.view.View
import android.widget.Toast
import androidx.appcompat.app.AppCompatActivity
class SecondActivity : AppCompatActivity() {
override fun onCreate(savedInstanceState: Bundle?) {
super.onCreate(savedInstanceState)
setContentView(R.layout.activity_second)
val extras = intent.extras
val value1 = extras!!.getString("Value1")
val value2 = extras.getString("Value2")
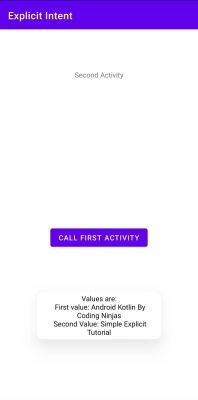
Toast.makeText(
applicationContext, """Values are:
First value: $value1
Second Value: $value2""", Toast.LENGTH_LONG
).show()
}
fun callFirstActivity(view: View?) {
val i = Intent(applicationContext, FirstActivity::class.java)
startActivity(i)
}
}
Output:
Common Intents
You can initiate Activity in another app by specifying a simple action you'd like to accomplish (such as seeing a map or taking a photo) in an Intent object. This is an implicit intent since it does not define the app component to start but instead specifies an action and offers some data with which to act.
When you call startActivity() or startActivityForResult() with an implicit intent, the system resolves the intent to an app capable of handling the intent and begins the applicable Activity. If the intent may be controlled by more than one app, the system prompts the user to choose which app to use.
Now, we will study some of the famous examples of common intents.
Capture photo or video from Camera
Use the ACTION_VIDEO_CAPTURE or ACTION_IMAGE_CAPTURE action to launch a camera app and receive the generated photo or video. In the EXTRA_OUTPUT additional, we can specify the URI where we want the Camera to save the snapshot or video.
When the camera app restores focus to the Activity (app receives the onActivityResult() callback), we can access the video or photo at the URI that we defined with the EXTRA_OUTPUT setting.
Code:
package com.codingninjas.contentprovider

import android.app.Activity
import android.content.Intent
import android.graphics.Bitmap
import android.net.Uri
import android.os.Bundle
import android.provider.MediaStore
import android.view.View
import android.widget.Button
import androidx.appcompat.app.AppCompatActivity

class MainActivity : AppCompatActivity() {

    private val locationForPhotos: Uri = Uri.fromFile(Environment.getExternalStorageDirectory())


    override fun onCreate(savedInstanceState: Bundle?) {
        super.onCreate(savedInstanceState)
        setContentView(R.layout.activity_main)
        val btnSend = findViewById<View>(R.id.sendMessage) as Button
        btnSend.setOnClickListener {
            capturePhoto("filename.extension")
        }
    }

    private fun capturePhoto(targetFileName: String) {
        val intent = Intent(MediaStore.ACTION_IMAGE_CAPTURE).apply {
            putExtra(MediaStore.EXTRA_OUTPUT, Uri.withAppendedPath(locationForPhotos, targetFileName))
        }
        if (intent.resolveActivity(packageManager) != null) {
            startActivityForResult(intent, REQUEST_IMAGE_CAPTURE)
        }
    }

    override fun onActivityResult(requestCode: Int, resultCode: Int, data: Intent?) {
        super.onActivityResult(requestCode, resultCode, data)
        if (requestCode == REQUEST_IMAGE_CAPTURE && resultCode == Activity.RESULT_OK) {
            val thumbnail: Bitmap? = data?.getParcelableExtra("data")
            // Do other work with full size photo saved in locationForPhotos

        }
    }

    companion object {
        private const val REQUEST_IMAGE_CAPTURE = 101
    }
}
In the above code snippet, you can provide your location to store the data and file name of that data.
Select a Contact
Use the ACTION_PICK action and set the MIME type to Contacts.CONTENT_TYPE allows the user to select a contact and provide your program access to all contact information.
The payload of the result Intent given to your onActivityResult() callback is: URI referring to the specified contact.
Code:
package com.codingninjas.contentprovider

import android.content.Intent
import android.net.Uri
import android.os.Bundle
import android.provider.ContactsContract
import android.view.View
import android.widget.Button
import androidx.appcompat.app.AppCompatActivity

class MainActivity : AppCompatActivity() {

    override fun onCreate(savedInstanceState: Bundle?) {
        super.onCreate(savedInstanceState)
        setContentView(R.layout.activity_main)
        val btnSend = findViewById<View>(R.id.sendMessage) as Button
        btnSend.setOnClickListener {
            selectContact()
        }
    }

    fun selectContact() {
        val intent = Intent(Intent.ACTION_PICK).apply {
            type = ContactsContract.Contacts.CONTENT_TYPE
        }
        if (intent.resolveActivity(packageManager) != null) {
            startActivityForResult(intent, REQUEST_SELECT_CONTACT)
        }
    }

    override fun onActivityResult(requestCode: Int, resultCode: Int, data: Intent?) {
        super.onActivityResult(requestCode, resultCode, data)
        if (requestCode == REQUEST_SELECT_CONTACT && resultCode == RESULT_OK) {
            val contactUri: Uri? = data?.data
            // Do something with your selected contact
        }
    }

    companion object {
        private const val REQUEST_SELECT_CONTACT = 1
    }
}
When you use the intent mentioned above to access the contact URI, you usually don't need the READ_CONTACTS permission to read basic contact details like the display name and if the contact is starred. However, if you want to read more precise information about a contact, such as their email address or phone number, you must have the READ_CONTACTS permission.
Make a phone call
Using the URI scheme, use the ACTION_DIAL action to specify a phone number shown below to open the phone app and dial provided phone number. When the phone app opens, the phone number is displayed, but the user must touch the Call button to begin the phone call.
Code:
package com.codingninjas.contentprovider

import android.content.Intent
import android.net.Uri
import android.os.Bundle
import android.view.View
import android.widget.Button
import androidx.appcompat.app.AppCompatActivity

class MainActivity : AppCompatActivity() {

    override fun onCreate(savedInstanceState: Bundle?) {
        super.onCreate(savedInstanceState)
        setContentView(R.layout.activity_main)
        val btnSend = findViewById<View>(R.id.sendMessage) as Button
        btnSend.setOnClickListener {
            dialPhoneNumber("123456789")
        }
    }

    private fun dialPhoneNumber(phoneNumber: String) {
        val intent = Intent(Intent.ACTION_DIAL).apply {
            data = Uri.parse("tel:$phoneNumber")
        }
        if (intent.resolveActivity(packageManager) != null) {
            startActivity(intent)
        }
    }
}
There is plenty of more example of Intents like setting the alarm clock, calendar, mails, maps, google search, load website, playing music, SMS, etc., that you may come across while developing apps.
Check this out : usb debugging
FAQs
-
What are Intent flags in Android?
Ans: In Android, intents are used to launch activities. Flags can be set to govern the task that will contain the Activity. Some flags can be used to use an existing activity, create a new activity, or move a current instance of an activity to the front of the queue.
-
What is the difference between URL and URI?
Ans: Uniform Resource Identifier is an abbreviation for Uniform Resource Identifier. URL is an abbreviation for Uniform Resource Locator. URN, which gives the name, and URL, which tells the location, are two subsets of URI. URL is a subset of URI that specifies the resource's unique location.
-
What is Sticky Intent in Android?
Ans: Sticky intent is an intent that is utilized with the sticky broadcast. The Android system will remember this intent for future broadcast receiver requests.
Key Takeaways
In this article, we have extensively discussed Types of Intent in Android and its example.
You can head over to our Android Development Course on the Coding Ninjas Website to dive deep into Android Development and build future applications.
We hope that this blog has helped you enhance your knowledge regarding intents, their type and if you would like to learn more, check out our articles on Gradle Build in Android. Do upvote our blog to help other ninjas grow. Happy Coding!


 9+ registered

