Table of contents
1.
Introduction
2.
Prerequisites
2.1.
Install Node.js
2.2.
Install Appium
3.
Setting up an Emulator
4.
Setting up a Physical Device
5.
Verify Android Device connection in Katalon
6.
Frequently Asked Questions
6.1.
Can I perform Mobile testing using Katalon Studio? 
6.2.
How can I set up an emulator for testing in Katalon Studio? 
6.3.
Can I use a physical mobile device for testing in Katalon Studio? 
7.
Conclusion
Last Updated: Mar 27, 2024

Android Setup and configuring the android Studio In Katalon studio

Author Neha Chauhan
0 upvote
Career growth poll
Do you think IIT Guwahati certified course can help you in your career?

Introduction

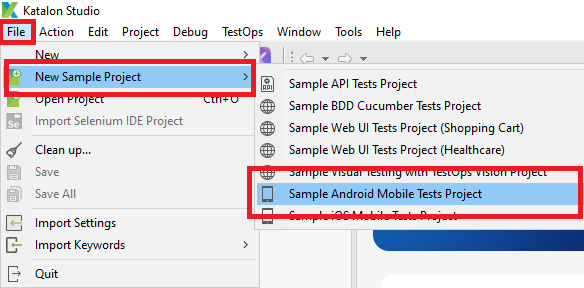
Katalon Studio is a test automation tool. It can be used for web, mobile and API testing. You can create test suites, test cases and test objects. You can record test cases and play them later i.e. you can manually set a test case, later on Katalon automation tool will imitate the user’s behaviour and run the actions in a repeatable manner. 

Android Studio is an application for building Android applications for Mobiles, Tablets, Android TV and Android Wears. You can build, test and debug your applications. In order to test the application you can connect the physical device to the android studio application or you can use the emulator to imitate the physical device. The emulator allows you to test your app on a variety of devices without needing each physical device. 

Katalan Android Setup

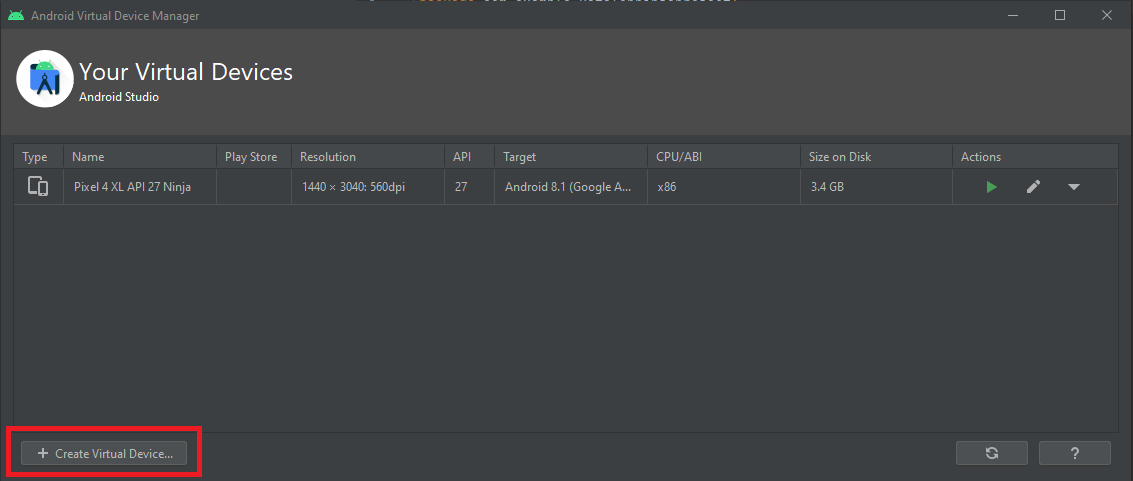
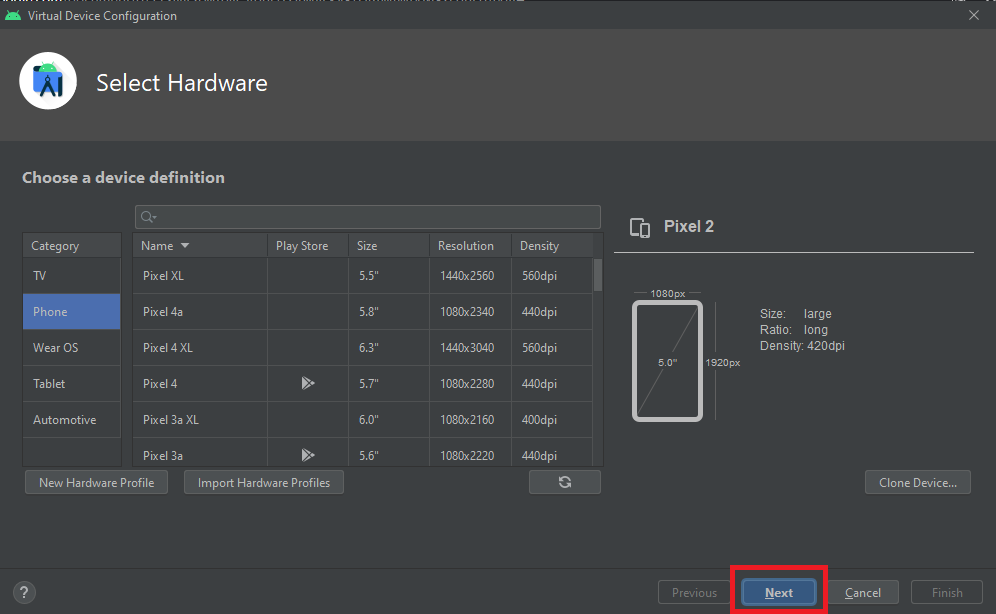
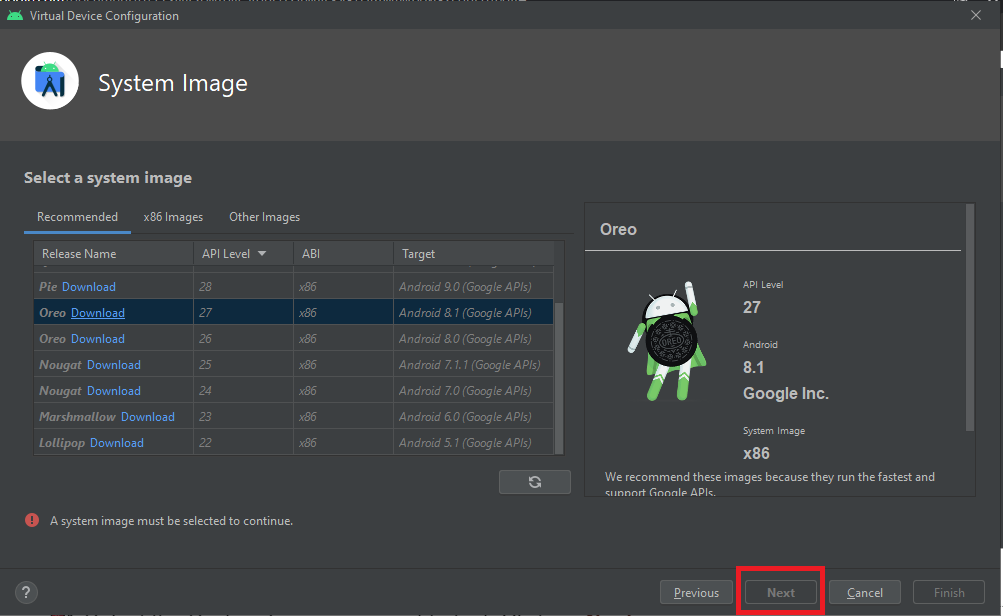
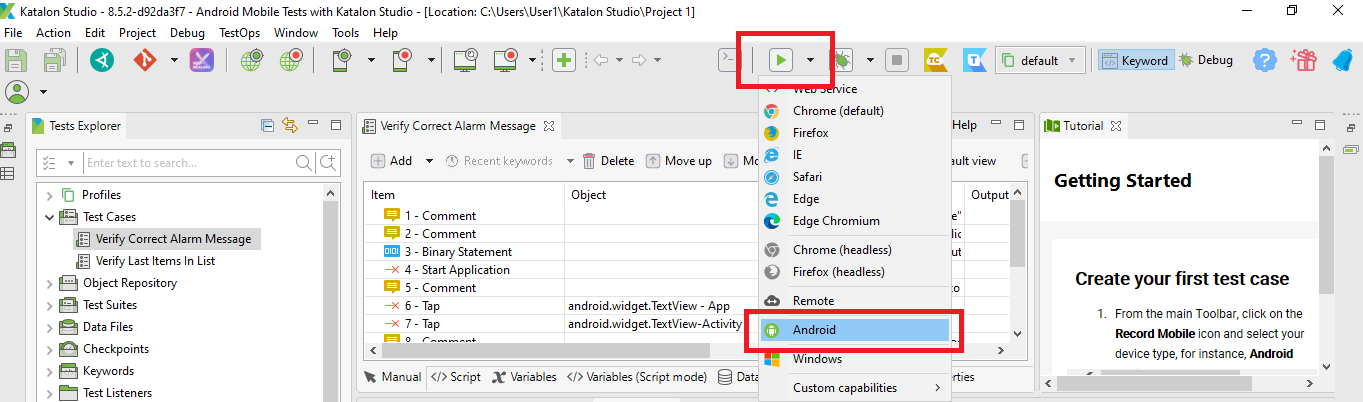
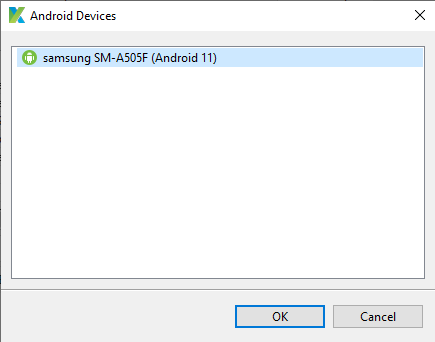
In this article, we will discuss how to configure Android devices for testing in Katalon Studio. We will discuss how to connect to a physical device and how to set up an emulator using Android Studio. 

Prerequisites

Before we set up the emulator, ensure that you have downloaded the latest version of Appium on your device. Appium is an open-source framework for web, mobile and API testing. It works as a virtual server. Npm (node package manager) is used to install Appium, so, make sure you have installed npm. 

Install Node.js

To install Node.js go to the official website and download the version of Node.js suitable for your device. 

You can check whether Node.js has been successfully installed, by running this command on the command prompt:

node -version or node -v 


If node.js is installed then it will show its version or it will show a message, “node is not recognized as an internal or external command, operable program or batch file.” 

Node Package Manager (npm) gets automatically installed with Node.js. 

To check its version, run the following command on Command Prompt:

npm -v or npm -version

Install Appium

After installing npm, run the following command in the command prompt to install Appium: 

npm install -g appium  


Note: Installing Node.js and Appium is a necessary prerequisite, whether you set up an Emulator or a Physical Device. 

Setting up an Emulator

We can set up an emulator from the command line and by using android studio. In this article, we will discuss how to set up an emulator using Android Studio. 

The first step would be to download and install Android Studio. Android Studio will guide you through the installation process and automatically set up components for creating an emulator. 

Head over to the Android Studio Application🚀

🪁 On the welcome page, click on Create New ProjectEmpty Project.

Android Studio Create New project
Android Studio activity

🪁 A new page will open. Enter the required information. Click on Finish

Android studio project details

🪁 On the Tool Bar, click on Device Manager > Create Device

Device Manager Android Studio
Android Studio virtual device

🪁 Choose the emulator’s size, resolution and pixel density. Click Next.

Android Studio select hardware

System Image page opens. In Android Studio, Android System Images are the versions of Android that we want to run, if you select and download the Oreo Android version, the emulator will imitate the Oreo Android Version.

🪁 Select the System Image you want to test. Click on Next

🪁 Change the default Emulator name, if you want to, then click on Finish

Android Studio system image

Yay🥳 You have successfully created an emulator using Android Studio. 

🪁A new page will open, click on Play button to start the emulator. 

or

🪁Under the Device Manager , you can see a new emulator has been added. Click on the Emulator you want to run and Click on Run

✅Your Emulator has been launched. 

Katalon automatically detects the emulator as an android device. 

Setting up a Physical Device

After installing Node.js and Appium, connect your android phone with the computer. 

Ensure that the Developer Mode is Switched ON. 

To switch on Developer Mode, on your Mobile Phone, go to Settings > About Phone > Software Information

Click on the Build numberSeven times. The Developer Mode will be switched on.

Go to Settings> Developer Option

Allow USB debugging and installation using a USB cable.

✅Your Physical Device has been launched. 

Katalon automatically detects the android device. 

Verify Android Device connection in Katalon

Head over to the Katalon desktop application. 

Go to File> New Sample Projects> Sample Android Mobile Tests Project

Android Studio new sample project

On the main toolbar click on the dropdown next to Run button, select the Android device in the dropdown list.

Android Studio run button

You should see the name of your emulator appear as an Android device.

Android Studio device

You can now execute mobile testing with the emulator or the physical device. 

Frequently Asked Questions

Can I perform Mobile testing using Katalon Studio? 

Yes. Katalon Studio can be used for testing Android and iOS mobile devices. It can also be used for web and API testing.

How can I set up an emulator for testing in Katalon Studio? 

You can set up an emulator from the command line and from Android Studio. 

Can I use a physical mobile device for testing in Katalon Studio? 

Yes. Switch on the developer mode on the mobile device and connect the mobile device to the system using a USB cable. Katalon studio will automatically detect the mobile device.

Conclusion

Pat yourself on the back for finishing this article. In this article, we discussed how to set up devices for mobile testing in Katalon. We discussed how to launch an emulator using  Android Studio, following which we discussed how to connect a physical device for testing. 

Do not stop learning! We recommend you read these articles on Katalon Studio-

🔥 Android Studio

🔥 Android Introduction

🔥 Android Services

🔥 Keyboard Shortcuts in Katalon Studio

ping command in linux
 

Also check out NPX vs NPM.

Head to the Guided Path on the Coding Ninjas Studio and upskill in Data Structures and AlgorithmsCompetitive ProgrammingSystem Design, and many more courses.

If you want to Practice top Coding Problems, attempt mock tests, or read interview experiences, head to the Coding Ninjas Studio, our practice platform.

We wish you Good Luck!🎈 Please upvote our blog 🏆 and help other ninjas grow.

Live masterclass