Creating an API
Certain commands need to be executed in order to create an API all those commands are discussed below but many of those commands require you to enter the API_ID and for API_ID there are certain requirements that need to be followed and they are as follows:
-
Can have a max length of 63 characters.
-
Only lowercase letters, numbers, or dashes are allowed.
-
Cannot start with a dash.
-
Cannot contain an underscore.
As long as the above requirements are satisfied you can execute any of the below commands to create an API on the API gateway.
1. Make sure you are using the correct project by executing the below command and confirming the project_id returned.
gcloud config list project
In case you want to change the project you can execute the below command.
gcloud config set project PROJECT_ID
2. Create an API using the following command.
gcloud api-gateway apis create API_ID --project=PROJECT_ID
3. After completion, use the following command to view the details of the API.
gcloud api-gateway apis describe API_ID --project=PROJECT_ID
Congratulations, you have successfully created an API.
Creating an API config
As discussed in the above section there are some requirements for API_ID. In this section too, some commands need you to specify the id of API config as CONFIG_ID and this ID has the same requirements as the requirement we discussed for API_ID in the above section.
Follow the below steps to create an API config.
1. Make sure you are in the same directory in which you have created the API.
2. Make sure you are using the correct project by executing the below command and confirming the project_id returned.
gcloud config list project
In case you want to change the project you can execute the below command.
gcloud config set project PROJECT_ID
3. Create an API config by running the following command.
gcloud api-gateway api-configs create CONFIG_ID --api=API_ID --openapi-spec=API_DEFINITION --project=PROJECT_ID --backend-auth-service-account=SERVICE_ACCOUNT_EMAIL
4. View the details of the API config by running the following command.
gcloud api-gateway api-configs describe CONFIG_ID --api=API_ID --project=PROJECT_ID
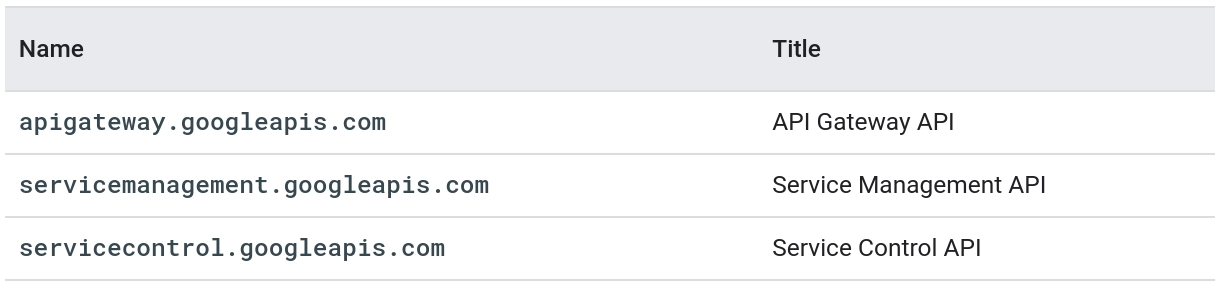
5. Enable the API.
gcloud services enable MANAGED_SERVICE_NAME.apigateway.PROJECT_ID.cloud.goog
You can find the value of the Managed Service column for your API on the APIs landing page.
You have successfully created an API config and also enabled the API.
Deploying an API to a gateway
You can deploy the API to a gateway using the steps mentioned in this section. Many of the commands mentioned in the steps require you to specify the id of the gateway which has some constraints associated with it that need to be followed and they are as follows:
-
Can have a max length of 49 characters.
-
Only lowercase letters, numbers, or dashes are allowed.
-
Cannot start with a dash.
- Cannot contain an underscore.
The endpoint of the deployed API config
A new unique URL is generated after the deployment of the API config to the API gateway. The API gateway can use this URL to access the deployed API config. The URL is in the form
https://GATEWAY_ID-HASH.REGION_CODE.gateway.dev
Where GATEWAY_ID, HASH, and REGION_CODE need to be specified by the user.
Steps for API deployment
1. Make sure you are using the correct project by executing the below command and confirming the project_id returned.
gcloud config list project
In case you want to change the project you can execute the below command.
gcloud config set project PROJECT_ID
2. The following command is used to deploy an API to the API gateway.
gcloud api-gateway gateways create GATEWAY_ID --api=API_ID --api-config=CONFIG_ID --location=GCP_REGION --project=PROJECT_ID
Where GATEWAY_ID is the ID of the gateway, API_ID is the ID of the API, CONFIG_ID is the ID of the API config deployed to the API gateway, GCP_REGION specifies the region for the deployed API gateway, and PROJECT_ID specifies the gCloud project ID.
3. After completion, use the following command to view the details of the gateway.
gcloud api-gateway gateways describe GATEWAY_ID --location=GCP_REGION --project=PROJECT_ID
You have successfully created and deployed your API on the API gateway.
Frequently asked questions
What is an API?
Application Programming Interface, or API, is a software bridge that enables the communication between two applications. You utilize an API every time you use an app like sending a text message or checking the weather on your phone.
What is an API gateway?
An API gateway is an API management system that can manage the API, authentication, rate limiting, analytics, and many more. API gateway lies between the client and the backend services. It receives all the API calls, processes them, and returns the appropriate result.
Why do you need an API gateway?
An API gateway is necessary because it offers a unified entry point for all internal APIs. You are able to manage user access. Additionally, it applies security standards like OAuth or JWT and enables security measures like rate limiting. In particular, an API gateway is crucial for protecting microservices.
Conclusion
In this article, we have shown you what an API gateway is, how can we create an API, API config, and also the deployment of the API to the API gateway.
We hope this blog has helped you enhance your knowledge. If you would like to learn more check out our blogs related to the above topic: Introduction to Google Cloud Platform, Google Prediction API, Using API in Cloud Monitoring, Utility API, and many more on our Website.
You can also check Interview Experiences and Interview Preparation Resources if you are interested in cracking the technical interviews at top Product-based companies like Amazon, Microsoft, Uber, etc. Upskill yourself in Data Structures and Algorithms, Competitive Programming, JavaScript, System Design, and more with our Coding Ninjas Studio Guided Path.

Do upvote our blogs if you find them helpful and engaging!
Happy Learning!


 9+ registered

