Do you think IIT Guwahati certified course can help you in your career?
Introduction
We will be studying the MNIST Dataset and then applying CNN on the same and observing the results.
Before we go ahead, we need to understand CNN and the MNIST dataset.
Convolutional Neural Networks (CNN)
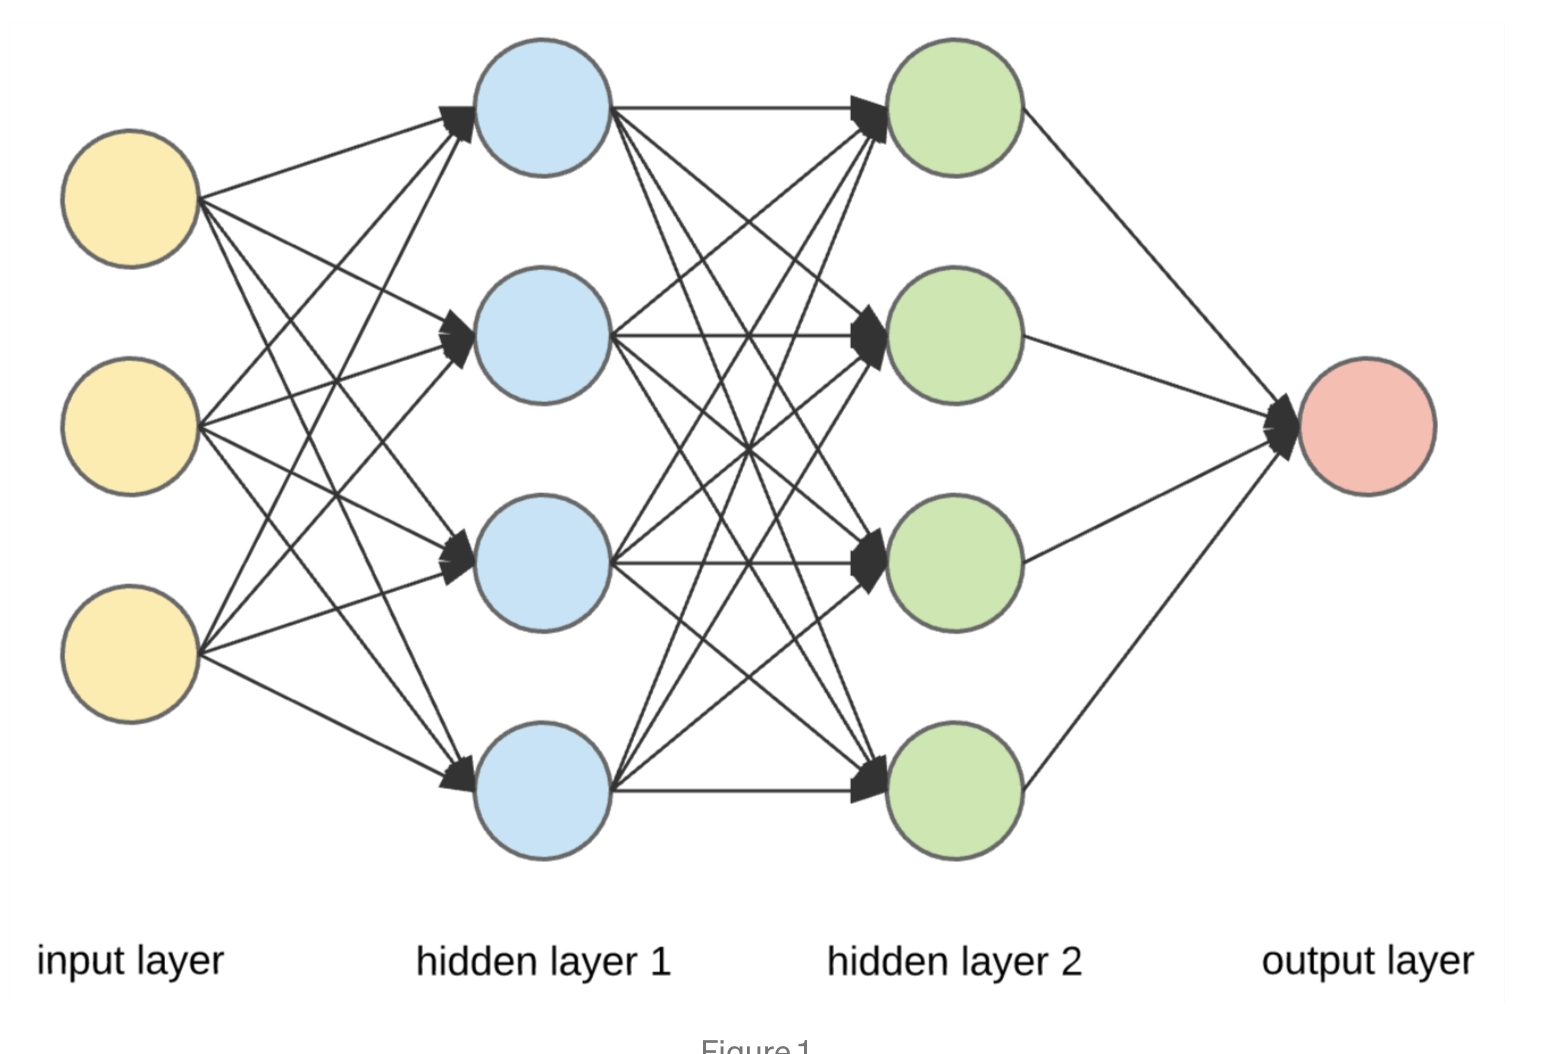
→ ANN or Artificial Neural Network is a multi-layer fully-connected neural net that consists of many layers, including an input layer, multiple hidden layers, and an output layer. This is a very popular deep learning algorithm used in various classification tasks like audio and words.
→ Similarly, we have Convolutional Neural Networks(CNNs) for image classification.
→ CNNs are neural nets that share their parameters. A covnet is a sequence of layers, and each layer transforms one volume to another through a differentiable function.
MNIST Dataset
→ It is a handwritten digit dataset that is instrumental in the field of pattern recognition and analysis.
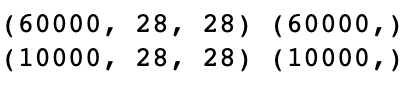
→ The MNIST dataset consists of 60,000 samples in the training set and 10,000 samples in the test set.
Implementation
Now that we've understood the basics of CNN and MNIST Dataset, we will be moving on to the implementation of CNN on the MNIST Dataset.
We will be building a digit classifier using the dataset. The dataset is widely used in Machine Learning and Deep Learning.
Importing Necessary Libraries
Firstly, we will load some basic libraries:-
(i) Numpy - for linear algebra.
(ii) Pandas - for data analysis.
(iii) Matplotlib - for data visualization.
(iv) Tensorflow - for neural networks.
import numpy as np
import pandas as pd
from numpy import unique, argmax
from tensorflow.keras.datasets.mnist import load_data
from tensorflow.keras import Sequential
from tensorflow.keras.layers import Conv2D
from tensorflow.keras.layers import Dense
from tensorflow.keras.layers import Flatten
from tensorflow.keras.layers import Dropout
from tensorflow.keras.utils import plot_model
import matplotlib.pyplot as plt
from tensorflow.keras.datasets import mnist
Loading Data
We will load the MNIST Dataset using the Keras library and split it into training and testing sets.
Now, we will perform normalization for scaling the image pixels. This will help improve the model's performance because the value will range from 0 to 1 instead of 0 to 255.
#normalizing the pixel values of images
train_x = train_x.astype('float32')/255.0
test_x = test_x.astype('float32')/255.0
Now, let us plot the first 20 images for better visualization.
What is a Deep Learning? Deep learning is closely related to machine learning, but it learns to perform classification tasks directly from images, text, or sound.
What is the difference between ANN and CNN? ANN or Artificial Neural Network is a multi-layer fully-connected neural net that consists of many layers, including an input layer, multiple hidden layers, and an output layer. CNNs are neural nets that share their parameters. A covnet is a sequence of layers, and each layer transforms one volume to another through a differentiable function.
Key Takeaways
Congratulations on making it this far. This blog discussed a fundamental overview of CNN and the MNIST Dataset !!
We learned about Data Loading and Data Visualisation, and finally, we applied CNN on the MNIST Dataset.
If you are preparing for the upcoming Campus Placements, don’t worry. Coding Ninjas has your back. Visit this link for a carefully crafted and designed course on-campus placements and interview preparation.


 6+ registered

