


Introduction
When you visit a website or any project that provides an interface with the database, you must have noticed that some take much time to present their code in front of users for feedback. At the same time, some perform this operation very quickly. So how can we make our project do these functions quicker?
The answer is by using Scaffolding. It is used for auto-generating a set of views, models, and controllers in a single operation for a new resource.
Creating Project of Scaffolding in ASP.NET
Before directly jumping on creating a project, let us have a basic idea about Scaffolding. It is one of the main features provided by ASP.NET, with the help of which we can generate functional code rapidly.
And because of this, it is also known as the generator framework. We can use it for creating basic CRUD applications as it generates clean code and reduces time.
Step 1: Create a new project
Click on the file on the Top left side and then on new and then on project File -> New-> Project.

The above step will pop a window from which you can select the project to work, from which we are choosing ASP.NET Core with API.

It contains MVC automatically in the latest version. After that, click on ‘ok’.

CRUD project Structure
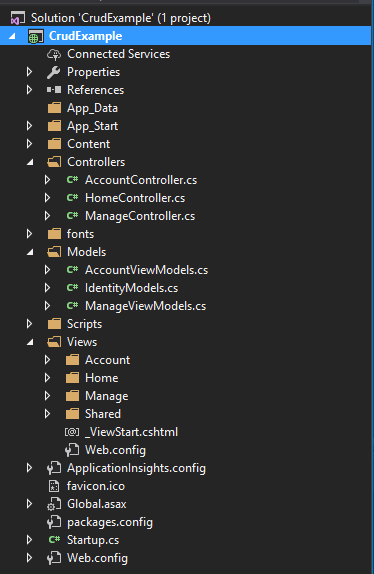
You can run it by pressing ctrl+F5. It will redirect you to the page, as shown below.

Now we need to create View, Model, Controller to complete CRUD.
Step 2: Create a new Model
Now we will create a Student Model in the Models folder. Right-click on the folder and select add-> class. It will pop a dialog box as shown below:

Click add after adding the class. Now add the following code to this class:
using System;
using System.Collections.Generic;
using System.ComponentModel.DataAnnotations;
using System.Linq;
using System.Web;
namespace CrudExample.Models
{
public class Student
    {
public int ID { get; set; }
        [Required]
public string Name { get; set; }
        [Required]
        [EmailAddress]
public string Contact { get; set; }
public string Email { get; set; }
        [Required]

    }
}
Step 3: Create a Context Class
Now we are creating another class inside the Models folder. IT is used to perform database operations and communicate with the Entity Framework. Enter the following code in the class:
using System;
using System.Web;
using System.Data.Entity.ModelConfiguration.Conventions;
using System.Data.Entity;
using System.Collections.Generic;
using System.Linq;

namespace CrudExample.Models
{
public class StudentRecord : DbContext
    {
public DbSet<Student> Students { get; set; }
protected override void OnModelCreating(DbModelBuilder modelBuilder)
        {
            modelBuilder.Conventions.Remove<PluralizingTableNameConvention>();
        }
    }
}
Check out Entity Framework Interview Questions to know more about it.
Step 4: Add Scaffold to the project.
Now we need to add the scaffold to our project, and to do so, right-click on the controller's folder and follow the steps as done in the below-attached screenshot.
In the Student controller, add the following code:

This will pop up a dialog box like this:

Select the MVC Controller with views, using Entity Framework. Then click on add button and fill the details in the following dialog box as shown below:

This will create a student folder and a Student Controller:
using System;
using System.Collections.Generic;
using System.Data;
using System.Data.Entity;
using System.Linq;
using System.Net;
using System.Web;
using System.Web.Mvc;
using CrudExample.Models;
namespace CrudExample.Controllers
{
public class StudentsController : Controller
{
private StudentRecord db = newStudentRecord();
public ActionResult Index()
{
return View(db.Students.ToList());
}
public ActionResult Details(int? id)
{
if (id == null)
{
return new HttpStatusCodeResult(HttpStatusCode.BadRequest);
}
Student student = db.Students.Find(id);
if (student == null)
{
return HttpNotFound();
}
return View(student);
}
public ActionResult Create()
{
return View();
}
[HttpPost]
[ValidateAntiForgeryToken]
public ActionResult Create([Bind(Include = "ID,Name,Contact,Email")] Student student)
{
if (ModelState.IsValid)
{
db.Students.Add(student);
db.SaveChanges();
return RedirectToAction("Index");
}
return View(student);
}
public ActionResult Edit(int? id)
{
if (id == null)
{
return new HttpStatusCodeResult(HttpStatusCode.BadRequest);
}
Student student = db.Students.Find(id);
if (student == null)
{
return HttpNotFound();
}
return View(student);
}
[HttpPost]
[ValidateAntiForgeryToken]
public ActionResult Edit([Bind(Include = "ID,Name,Contact,Email")] Student student)
{
if (ModelState.IsValid)
{
db.Entry(student).State = EntityState.Modified;
db.SaveChanges();
return RedirectToAction("Index");
}
return View(student);
}
public ActionResult Delete(int? id)
{
if (id == null)
{
return new HttpStatusCodeResult(HttpStatusCode.BadRequest);
}
Student student = db.Students.Find(id);
if (student == null)
{
return HttpNotFound();
}
return View(student);
}
[HttpPost, ActionName("Delete")]
[ValidateAntiForgeryToken]
public ActionResult DeleteConfirmed(int id)
{
Student student = db.Students.Find(id);
db.Students.Remove(student);
db.SaveChanges();
return RedirectToAction("Index");
}
protected override void Dispose(bool disposing)
{
if (disposing)
{
db.Dispose();
}
base.Dispose(disposing);
}
}
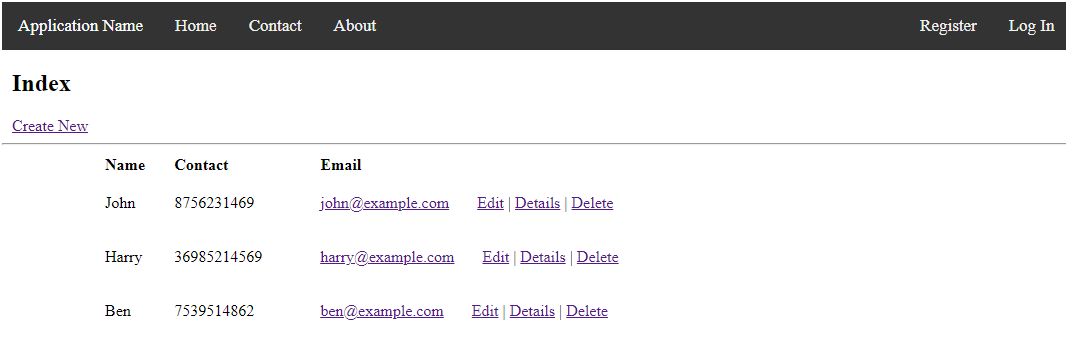
}The index.cshtml in the student folder contains the following code:
@model IEnumerable<scaffoldingTest.Models.Student>
    @{
        ViewBag.Title = "Index";
    }
    <h2>Index</h2>
    <p>
        @Html.ActionLink("Create New", "Create")
    </p>
    <table class="table">
    <tr>
    <th>
                @Html.DisplayNameFor(model => model.Name)
    </th>
    <th>
        @Html.DisplayNameFor(model => model.Contact)


    </th>
    <th>
        @Html.DisplayNameFor(model => model.Email)
    </th>
    <th></th>
    </tr>
    @foreach (var item in Model) {
    <tr>
    <td>
                @Html.DisplayFor(modelItem => item.Name)
    </td>
    <td>
        @Html.DisplayFor(modelItem => item.Contact)


    </td>
    <td>
        @Html.DisplayFor(modelItem => item.Email)

    </td>
    <td>
                @Html.ActionLink("Edit", "Edit", new { id=item.ID }) |
                @Html.ActionLink("Details", "Details", new { id=item.ID }) |
                @Html.ActionLink("Delete", "Delete", new { id=item.ID })
    </td>
    </tr>
    }
    </table>
Must Read IEnumerable vs IQueryable.


 9+ registered

