Understanding MVC Validation with an Example
In this example, we will use annotations. The order that we follow in this example is: First, we will create the controller, then the model, and after that, the view followed by output.
Controller
This is the syntax for creating a controller. Here we are creating a student controller:
using System;
using System.Collections.Generic;
using System.Linq;
using System.Web;
using System.Web.Mvc;
namespace MvcApplicationDemo.Controllers
{
    public class StudentsController : Controller
    {
        // GET: Students
        public ActionResult Index()
        {
            return View();
        }
    }
}
Model
Here we are creating a student model:
using System.ComponentModel.DataAnnotations;

namespace MvcApplicationDemo.Models
{
    public class Student
    {
        public int ID { get; set; }
        // -- Validating Student Name
        [Required(ErrorMessage ="Name is required")]
        [MaxLength(12)]
        public string Name { get; set; }
        // -- Validating Contact Number
        [Required(ErrorMessage = "Contact is required")]
        [DataType(DataType.PhoneNumber)]
        [RegularExpression(@"^\(?([0-9]{3})\)?[-. ]?([0-9]{3})[-. ]?([0-9]{4})$", ErrorMessage = "Not a valid Phone number")]
        public string Contact { get; set; }
        // -- Validating Email Address
        [Required(ErrorMessage ="Email is required")]
        [EmailAddress(ErrorMessage = "Invalid Email Address")]
        public string Email { get; set; }

    }
}
View
Now this will be the view that is visible to the user on the front end:
@model MvcApplicationDemo.Models.Student
@{
    ViewBag.Title = "Index";
}
<h2>Index</h2>
@using (Html.BeginForm())
{
    @Html.AntiForgeryToken()
    <div class="form-horizontal">
        <h4>Student</h4>
        <hr />
        @Html.ValidationSummary(true, "", new { @class = "text-danger" })
        <div class="form-group">
            @Html.LabelFor(model => model.Name, htmlAttributes: new { @class = "control-label col-md-2" })
            <div class="col-md-10">
                @Html.EditorFor(model => model.Name, new { htmlAttributes = new { @class = "form-control" } })
                @Html.ValidationMessageFor(model => model.Name, "", new { @class = "text-danger" })
            </div>
        </div>
   <div class="form-group">
            @Html.LabelFor(model => model.Contact, htmlAttributes: new { @class = "control-label col-md-2" })
            <div class="col-md-10">
                @Html.EditorFor(model => model.Contact, new { htmlAttributes = new { @class = "form-control" } })
                @Html.ValidationMessageFor(model => model.Contact, "", new { @class = "text-danger" })
            </div>
        </div>
        <div class="form-group">
            @Html.LabelFor(model => model.Email, htmlAttributes: new { @class = "control-label col-md-2" })
            <div class="col-md-10">
                @Html.EditorFor(model => model.Email, new { htmlAttributes = new { @class = "form-control" } })
                @Html.ValidationMessageFor(model => model.Email, "", new { @class = "text-danger" })
            </div>
        </div>

        <div class="form-group">
            <div class="col-md-offset-2 col-md-10">
                <input type="submit" value="Create" class="btn btn-default" />
            </div>
        </div>
    </div>
}
<div>
    @Html.ActionLink("Back to List", "Index")
</div>
@section Scripts {
    @Scripts.Render("~/bundles/jqueryval")
}
Output
We can see in the below attached screenshot that it validates the empty fields and displays the message that these fields are required.

In the below-attached screenshot, we are validating the entered data.

Functions of a Controller
A controller is mainly responsible for performing the following tasks:
- It locates the appropriate action method to call and validate the requests.
- It gets the values to use as the action method's arguments.
- It handles all the errors that might occur during the execution of the action.
- It uses the WebFormViewEngine class for rendering the ASP.Net page.
Working of a Controller

Source: Link
- The user requests through the ASP.Net website.
- All these requests then reach the controllers.
- The controller asks the models for data.
- These models further perform database operations and respond to the controller with the required data.
- The controller retrieves the data from the model.
- Then, the controller renders an HTML page with model data and creates a view page.
- Further, the controller responds to the user with the View Page.
Creating a Controller
This section will understand how the controller and view page work together.
- Go to the menubar, click on the file and create a new project.

- Choose ASP.NET Web Application (.NET Framework) as your project template.

- Configure your project, assign it with a name and create the project.
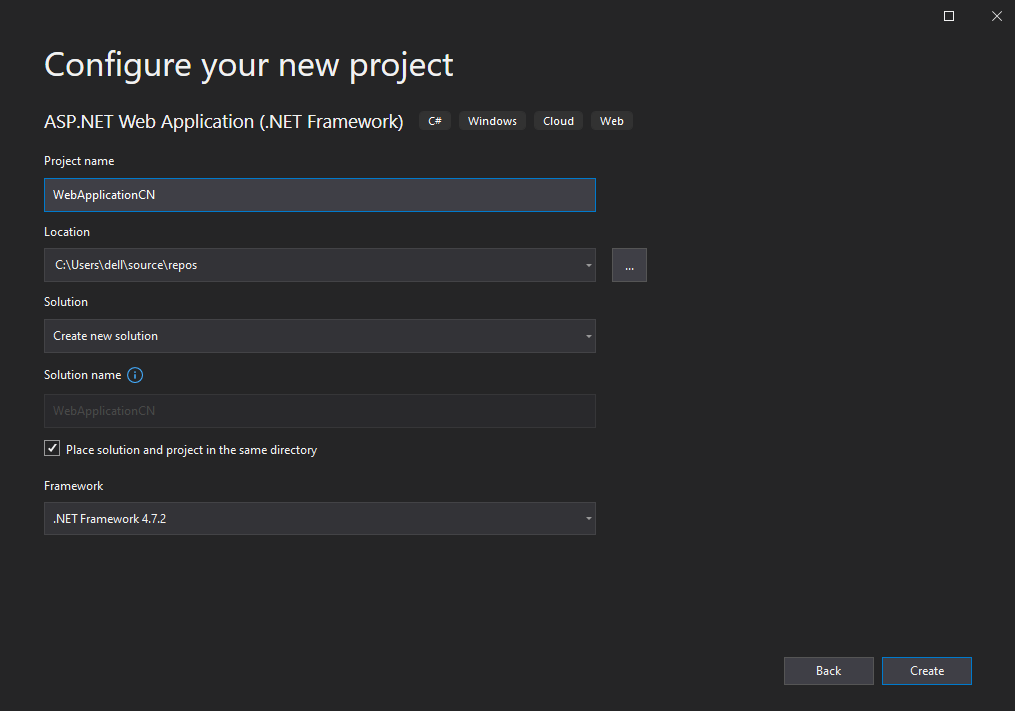
- Make sure that you press the right choices, i.e., An empty template, no authentication, and checkmark the MVC under the add folders & core references heading. Refer to the image given below.

- Go to visual studio, right-click on the controller folder -> Add -> controller.

This will open an “Add scaffold” dialog box.
(Scaffolding is an automatic code generation framework for ASP.Net web applications. Scaffolding reduces the time to develop a controller, view, etc., in the MVC framework.)
- Select MVC 5 Controller- empty and click on the add button.

- Then, give the controller name to the ItemController. “Controller” suffix must be added in the controller name. Every controller must be located in the controller folder. Here, we are assigning the name Ninja to our controller. Further, click on the add button to add the controller.

- This will create the NinjaController class with the Index() method in NinjaController.cs file under the controller folder.
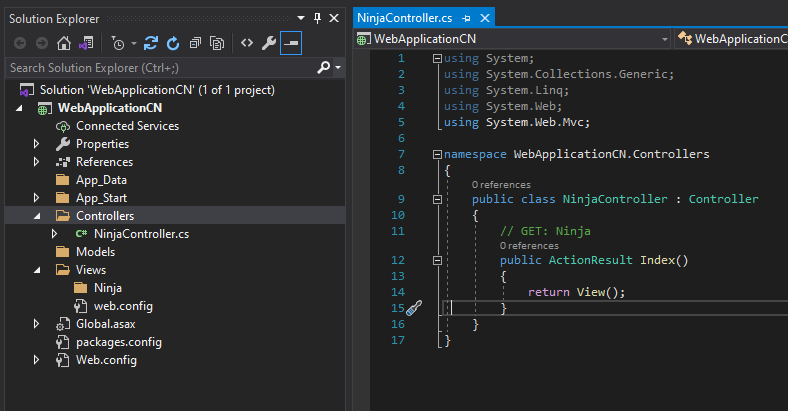
- The NinjaController class is derived from the Controller class. A controller in MVC must be derived from the abstract controller class. This base controller class also contains helper methods that can be used for multiple purposes.
- Now, we can return a dummy string from the index action method of the controller that we have defined. Change the return type of the index method from ActionResult to string and return any dummy string of your choice. Refer to the image given below.
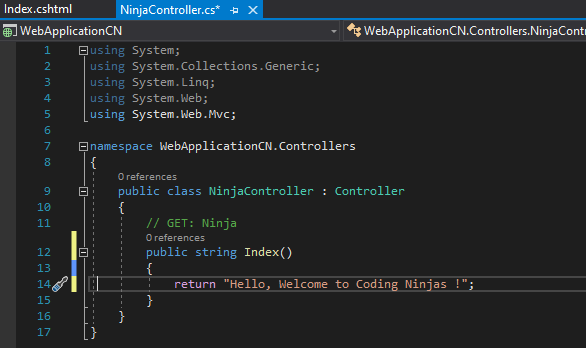
(If you face any issues while debugging, try changing the default controller name from “Home” to “your file name” in the RouteConfig.cs file under App_Start folder.)
Output:

Adding a View Page
A view in the ASP.Net MVC is responsible for the user interface. The view displays the data coming from the models. It is an HTML template that binds and displays HTML controls with data. The “.cshtml” file uses the Razor view engine, and .cshtml views are used in C# programming. It is a combination of C# and HTML (.cshtml). The return type can either be “ViewResult” or “ActionResult.”
A view can contain the following extension depending on the language:
- .aspx
- .asp
- .html
- .cshtml
- .vbhtml
Let’s create a view page to understand the concept better. Refer to the following steps:
- Right-click on the index action method and select add view option from the dialog box.

- A dialog box named add view will appear on the screen, as shown below. Click on the MVC5 view and press the add button to add the view page.


- An index view page will be added named “filename.cshtml”. In this case, it is Index.cshtml.

The view file initially will look something like this:

- Add the following code to the NinjaController.cs file.

- Add the following code in Index.cshtml file.
<h1>@ViewBag.NinjaList</h1>
- Now, run the project (or press Ctrl + F5). You will see a window popping up which will contain your desired output.
Output:

If you pay attention to the URL given below:

Note that the controller will execute on the above link. Here, Ninja represents the controller, and Index represents the action method. The incoming URL in an ASP.Net MVC application is mapped to the controller action method.
Frequently Asked Questions
1. Write some features of ASP.NET.
Answer: It can separate server-side code with the HTML layout and uses C# and VB.NET as languages to make the website.
2. What is a round trip?
Answer: It is the trip of a web page from client to server and then again from server to client.
3. Name some page events in ASP.NET.
Answer: Some page events in ASP.NET are preinit, init, PreLoad, Load, Render, PreRender, etc.
4. How many types of validations are there in ASP.NET?
Answer: There are mainly two validations in ASP.NET: client-side and server-side.
Key Takeaways
In this blog, we have learned about MVC validations by explaining the base class validator, the standard annotations used during validation, and examples with Model, View, Controller.
If you want to learn about Webform LinkButton in ASP.Net, look at this blog. Here, you will get the idea of what they are and the Features Of ASP Net with examples.
Recommended Readings:


 9+ registered

