Important Methods of AudioCapture
Your app must inform the user that it will access the device's audio input in order to record. So this permission tag must be included in the manifest file of the app:
<uses-permission android:name="android.permission.RECORD_AUDIO" />
Apart from this, The MediaRecorder class also includes a few additional useful features. Below is a list of these methods.
- setAudioSource(): This function defines the audio source for recording.
- setVideoSource(): This function defines the video source to record.
- setOutputFormat(): This method provides the audio format that will be used to store the audio.
- setAudioEncoder(): The audio encoder to be utilized is specified via this method.
- setOutputFile(): This method specifies the location of the file where the captured audio will be saved.
- stop(): This procedure brings the recording to a halt.
- release(): When the recorder instance is no longer required, this method should be called.
Let's see the use of these discussed methods and attributes with a working example given below.
Example Application
The example below demonstrates how to use the Intent object to launch an SMS client and send an SMS to the specified recipients.
Open Android Studio, start an empty activity, give a name to your app(Audio Capture CN in our case), and let Android do the Gradle syncing.
Now, start working on the studio by editing the activity_main.xml file.
Code:
<?xml version="1.0" encoding="utf-8"?>
<RelativeLayout xmlns:android="http://schemas.android.com/apk/res/android"
    android:layout_width="match_parent"
    android:layout_height="match_parent">

    <TextView
        android:layout_width="match_parent"
        android:layout_height="wrap_content"
        android:id="@+id/tv_heading"
        android:gravity="end"
        android:text=" ~Code Studio Presents "
        android:textSize="25sp"
        android:layout_marginTop="10dp"
        android:layout_marginEnd="10dp"
        android:textColor="@android:color/holo_orange_dark"/>

    <ImageView
        android:layout_width="wrap_content"
        android:layout_height="wrap_content"
        android:id="@+id/iv_CN"
        android:layout_marginTop="25sp"
        android:layout_below="@+id/tv_heading"
        android:layout_centerHorizontal="true"
        android:src="@drawable/my_img"/>

    <Button
        android:id="@+id/bttn_record"
        android:layout_width="wrap_content"
        android:layout_height="wrap_content"
        android:layout_below="@+id/iv_CN"
        android:layout_alignParentStart="true"
        android:layout_marginTop="37dp"
        android:text="Record Audio" />

    <Button
        android:id="@+id/bttn_stop"
        android:layout_width="wrap_content"
        android:layout_height="wrap_content"
        android:layout_alignTop="@+id/bttn_record"
        android:layout_marginTop="132dp"
        android:text="STOP Audio" />

    <Button
        android:id="@+id/bttn_play"
        android:layout_width="wrap_content"
        android:layout_height="wrap_content"
        android:layout_alignTop="@+id/bttn_stop"
        android:layout_alignParentStart="true"
        android:layout_marginStart="-1dp"
        android:layout_marginTop="-66dp"
        android:text="Play Audio" />

    <Button
        android:id="@+id/bttn_stopPlayingRecording"
        android:layout_width="wrap_content"
        android:layout_height="wrap_content"
        android:layout_below="@+id/bttn_stop"
        android:layout_marginTop="13dp"
        android:text="STOP PLAYING RECORDING " />
</RelativeLayout>
This XML code will result in four Buttons for the audio handling options with Textview and Imageview for styling.
AndroidManifest.xml
<?xml version="1.0" encoding="utf-8"?>
<manifest xmlns:android="http://schemas.android.com/apk/res/android"
    package="com.akshitpant.audiocapturecn">
 // add your permissions here
    <uses-permission android:name="android.permission.WRITE_EXTERNAL_STORAGE"/>
    <uses-permission android:name="android.permission.RECORD_AUDIO" />
    <uses-permission android:name="android.permission.STORAGE" />

    <application
        android:allowBackup="true"
        android:icon="@mipmap/ic_launcher"
        android:label="@string/app_name"
        android:roundIcon="@mipmap/ic_launcher_round"
        android:supportsRtl="true"
        android:theme="@style/Theme.AudioCaptureCN">
        <activity
            android:name=".MainActivity"
            android:exported="true">
            <intent-filter>
                <action android:name="android.intent.action.MAIN" />

                <category android:name="android.intent.category.LAUNCHER" />
            </intent-filter>
        </activity>
    </application>

</manifest>
MainActivity.kt
package com.codingninjas.audiocapturecn

import androidx.appcompat.app.AppCompatActivity
import android.media.MediaRecorder
import android.media.MediaPlayer
import android.os.Bundle
import com.akshitpant.audiocapturecn.R
import android.os.Environment
import android.widget.Toast
import kotlin.Throws
import androidx.core.app.ActivityCompat
import android.Manifest.permission
import com.akshitpant.audiocapturecn.MainActivity
import android.content.pm.PackageManager
import android.view.View
import android.widget.Button
import androidx.core.content.ContextCompat
import java.io.IOException
import java.lang.IllegalStateException
import java.lang.StringBuilder
import java.util.*

class MainActivity : AppCompatActivity() {
    var bttn_recordWorking: Button? = null
    var bttn_stopWorking: Button? = null
    var bttn_playLastRecordedAudioWorking: Button? = null
    var bttn_stopPlayingRecordingWorking: Button? = null
    var AudioSavePathInDevice: String? = null
    var my_mediaRecorder: MediaRecorder? = null
    var random: Random? = null
    var RandomAudioFileName = "vadhavdahbvsakhcbs"
    var mp: MediaPlayer? = null
    override fun onCreate(savedInstanceState: Bundle?) {
        super.onCreate(savedInstanceState)
        setContentView(R.layout.activity_main)
        bttn_recordWorking = findViewById<View>(R.id.bttn_record) as Button
        bttn_stopWorking = findViewById<View>(R.id.bttn_stop) as Button
        bttn_playLastRecordedAudioWorking = findViewById<View>(R.id.bttn_play) as Button
        bttn_stopPlayingRecordingWorking =
            findViewById<View>(R.id.bttn_stopPlayingRecording) as Button
        bttn_stopWorking!!.isEnabled = false
        bttn_playLastRecordedAudioWorking!!.isEnabled = false
        bttn_stopPlayingRecordingWorking!!.isEnabled = false
        random = Random()
        bttn_recordWorking!!.setOnClickListener {
            if (checkPermission()) {
                AudioSavePathInDevice =
                    Environment.getExternalStorageDirectory().absolutePath + "/" +
                            CreateRandomAudioFileName(5) + "AudioRecording.3gp"
                MediaRecorderReady()
                try {
                    my_mediaRecorder!!.prepare()
                    my_mediaRecorder!!.start()
                } catch (e: IllegalStateException) {
                    // TODO Auto-generated catch block
                    e.printStackTrace()
                } catch (e: IOException) {
                    e.printStackTrace()
                }
                bttn_recordWorking!!.isEnabled = false
                bttn_stopWorking!!.isEnabled = true
                Toast.makeText(
                    this@MainActivity, "Recording started",
                    Toast.LENGTH_LONG
                ).show()
            } else {
                requestPermission()
            }
        }
        bttn_stopWorking!!.setOnClickListener {
            my_mediaRecorder!!.stop()
            bttn_stopWorking!!.isEnabled = false
            bttn_playLastRecordedAudioWorking!!.isEnabled = true
            bttn_recordWorking!!.isEnabled = true
            bttn_stopPlayingRecordingWorking!!.isEnabled = false
            Toast.makeText(
                this@MainActivity, "Recording Completed",
                Toast.LENGTH_LONG
            ).show()
        }
        bttn_playLastRecordedAudioWorking!!.setOnClickListener {
            bttn_stopWorking!!.isEnabled = false
            bttn_recordWorking!!.isEnabled = false
            bttn_stopPlayingRecordingWorking!!.isEnabled = true
            mp = MediaPlayer()
            try {
                mp!!.setDataSource(AudioSavePathInDevice)
                mp!!.prepare()
            } catch (e: IOException) {
                e.printStackTrace()
            }
            mp!!.start()
            Toast.makeText(
                this@MainActivity, "Recording Playing",
                Toast.LENGTH_LONG
            ).show()
        }
        bttn_stopPlayingRecordingWorking!!.setOnClickListener {
            bttn_stopWorking!!.isEnabled = false
            bttn_recordWorking!!.isEnabled = true
            bttn_stopPlayingRecordingWorking!!.isEnabled = false
            bttn_playLastRecordedAudioWorking!!.isEnabled = true
            if (mp != null) {
                mp!!.stop()
                mp!!.release()
                MediaRecorderReady()
            }
        }
    }

    fun MediaRecorderReady() {
        my_mediaRecorder = MediaRecorder()
        my_mediaRecorder!!.setAudioSource(MediaRecorder.AudioSource.MIC)
        my_mediaRecorder!!.setOutputFormat(MediaRecorder.OutputFormat.THREE_GPP)
        my_mediaRecorder!!.setAudioEncoder(MediaRecorder.AudioEncoder.AAC)
        my_mediaRecorder!!.setOutputFile(AudioSavePathInDevice)
    }

    fun CreateRandomAudioFileName(string: Int): String {
        val stringBuilder = StringBuilder(string)
        var i = 0
        while (i < string) {
            stringBuilder.append(RandomAudioFileName[random!!.nextInt(RandomAudioFileName.length)])
            i++
        }
        return stringBuilder.toString()
    }

    private fun requestPermission() {
        ActivityCompat.requestPermissions(
            this@MainActivity,
            arrayOf(permission.WRITE_EXTERNAL_STORAGE, permission.RECORD_AUDIO),
            RequestPermissionCode
        )
    }

    override fun onRequestPermissionsResult(
        requestCode: Int,
        permissions: Array<String>,
        grantResults: IntArray
    ) {
        super.onRequestPermissionsResult(requestCode, permissions, grantResults)
        when (requestCode) {
            RequestPermissionCode -> if (grantResults.size > 0) {
                val StoragePermission = grantResults[0] ==
                        PackageManager.PERMISSION_GRANTED
                val RecordPermission = grantResults[1] ==
                        PackageManager.PERMISSION_GRANTED
                if (StoragePermission && RecordPermission) {
                    Toast.makeText(
                        this@MainActivity, "Permission Granted",
                        Toast.LENGTH_LONG
                    ).show()
                } else {
                    Toast.makeText(this@MainActivity, "Permission Denied", Toast.LENGTH_LONG).show()
                }
            }
        }
    }

    fun checkPermission(): Boolean {
        val result =
            ContextCompat.checkSelfPermission(applicationContext, permission.WRITE_EXTERNAL_STORAGE)
        val result1 = ContextCompat.checkSelfPermission(
            applicationContext,
            permission.RECORD_AUDIO
        )
        return result == PackageManager.PERMISSION_GRANTED &&
                result1 == PackageManager.PERMISSION_GRANTED
    }

    companion object {
        const val RequestPermissionCode = 1
    }
}
Now, run this code on your Android device.
Note: The Android Emulator does not have the ability to record sounds. So test your code on a connected simulated android device.
Output:

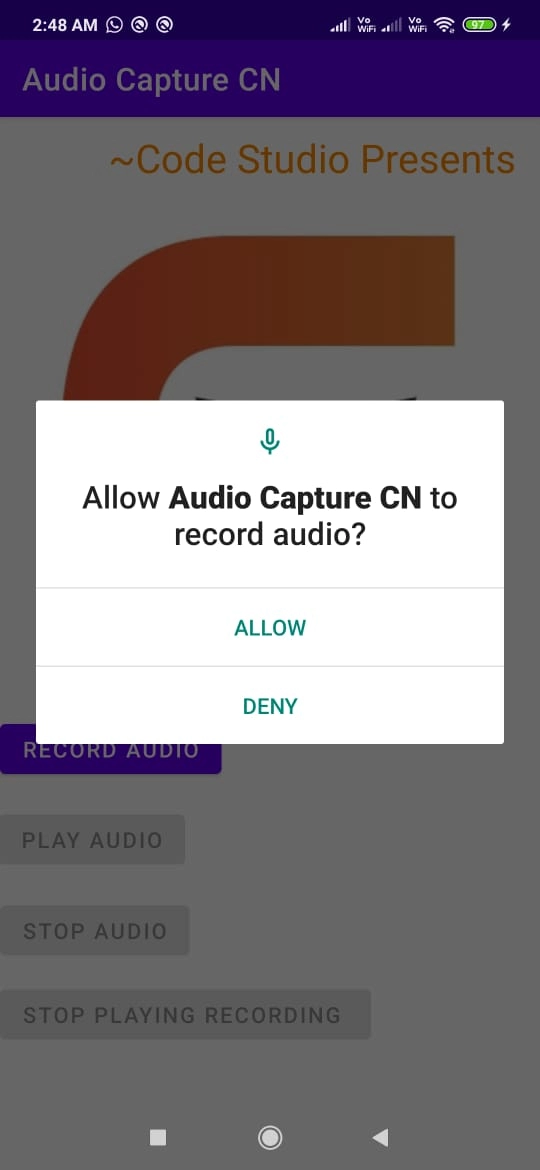
After the launch of our app, The following screen(image 1 & image 2) will be displayed on the mobile device, asking for permissions.
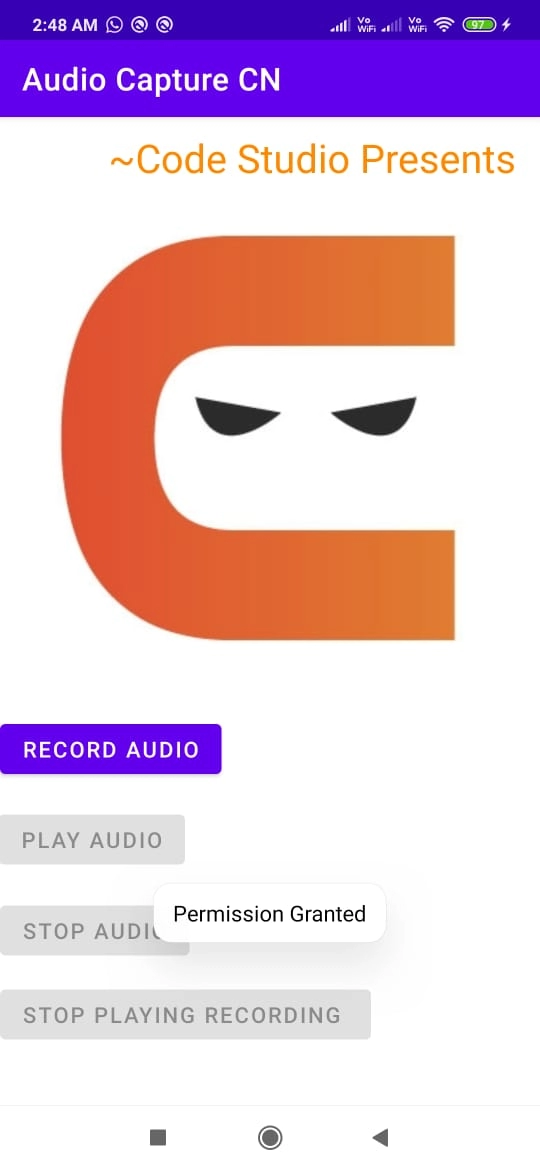

As you grant the permissions, a toast appears on the screen(image3), and clicking on the RECORD AUDIO button will start the audio recording(image4) on our application.
On pressing the STOP AUDIO button, the audio will be saved to an external SD card, and the following screen(image5) will appear.

Now, Simply press the PLAY AUDIO button, and the device will begin playing the recorded sounds.
Frequently Asked Questions
Why is access to the microphone for apps in the background not possible?
Apps running in the background on Android 9 (API level 28) or higher cannot access the microphone. As a result, your app should only record audio when it's in the foreground or when you use a MediaRecorder instance in a foreground service.
What is the difference between stop() and release() in a media recorder?
The stop() method brings the recording to a halt, whereas the release() method is used when we are done with the MediaRecorder instance and want to free its resources(clear up memory).
What is the difference between setOutputFile() and setOutputFormat() method?
setOutputFile(): This method is used to indicate the location of stored, recorded audio files.
setOutputFormat(): This method is used to specify our audio's output format.
Conclusion
In this article, we learned about Audio Capture and its implementation in Android.
You can head over to our Android Development Course on the Coding Ninjas Website to dive deep into Android Development and build future applications.
We hope this article has helped you enhance your knowledge of the Android Capture. If you want to learn more, check out our article on Android UI and Competitive Programming articles. Do upvote this article to help other ninjas grow.


 9+ registered

