Customization options
Change screen layouts (many tabs), font sizes, and light/dark interface styles to personalize your AWS CloudShell experience. Installing your software and altering start-up shell scripts are other ways to customize your shell environment.
Pricing
AWS CloudShell is a free service provided by Amazon Web Services. Any additional AWS resources that you use using AWS CloudShell are your responsibility. Data transmission speeds are also standard.
Getting started with AWS CloudShell
This section demonstrates how to use the shell command-line interface to run AWS CloudShell and conduct essential operations.
Prerequisites
Here are some prerequisites that we must have before moving to a real task
IAM Permissions
Attaching the following AWS managed policy to your IAM identity (user, role, or group) is the easiest method to get rights for AWS CloudShell:
- AWSCloudShellFullAccess: Gives customers complete control over AWS CloudShell and related features.
We'll also use AWS services in this lesson (in this case, creating an Amazon S3 bucket and adding an object to it.) As a result, our IAM identity requires a policy that authorizes the s3:CreateBucket and s3:PutObject capabilities at a minimum.
Exercise File
This exercise also requires us to upload and change a file, which is then launched as a program via the command-line interface. Add the following code snippet to a text editor on your local machine:
import sys
a=int(sys.argv[1])
b=int(sys.argv[2])
s=a+b
print("The resultant sum is",s)
Add the name add_prog.py to the file.
Steps to use AWS CloudShell
Step 1: To use the AWS Management Console, we must first input your IAM user details. Skip to step 2 if you're already in the console.
You may access the AWS Management Console using an IAM user sign-in URL or the primary sign-in page.
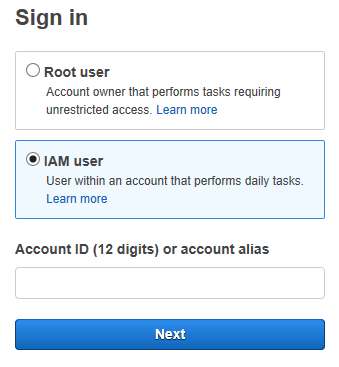
Source: https://miro.medium.com/max/678/0*LCqeNplaDHvn2oSu.png
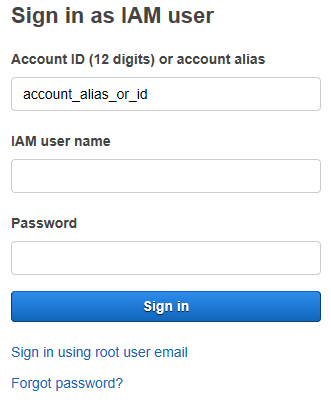
Source: https://miro.medium.com/max/662/0*VZaDsSOSvz4sJjXG.png
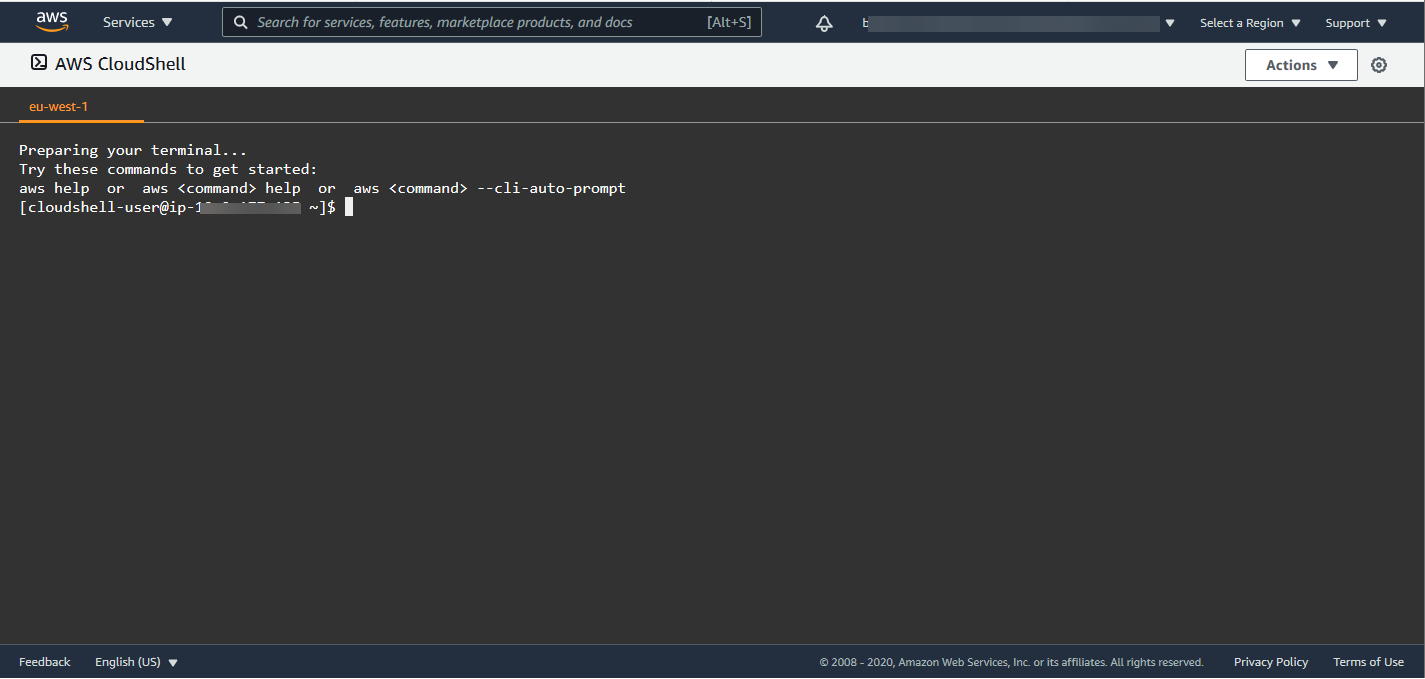
Step 2: This step involves launching AWS CloudShell from the console, selecting an AWS Region, and switching to your favorite shell (Bash, PowerShell, or Z shell).
You may start AWS CloudShell from the AWS Management Console by selecting one of the options on the navigation bar, i.e., Choose the AWS CloudShell icon or Start putting "cloudshell" into the search box, then choose CloudShell.
 Source: https://docs.aws.amazon.com/cloudshell/latest/userguide/images/launch_options.png
To work in an AWS Region, go to the Select a Region menu and choose a supported AWS Region to work in. (Regions that are available are marked.)
At the command line prompt, type the name of the pre-installed shell you want to use.
Step 3: This step demonstrates how to upload a file and then move it to a new directory in your home directory.
To determine your current working directory, type the following command at the prompt:
pwd
The shell returns your current working directory when you hit Enter. For instance, /home/cloudshell-user.
- Go to Actions and pick Upload file from the menu to add a file to this directory.
- Choose Browse.
- Select the text file you produced for this lesson (add prog.py) in your system's File upload dialogue box and click Open.
- Select Upload from the Upload file dialogue box.
The upload is tracked via a progress metre. If the upload is successful, a notice will appear confirming that add_prog.py has been has been placed at the beginning of your home directory
Enter the make directories command: mkdir mysub_dir to create a directory for the file.
Use the mv command to relocate the uploaded file from the root of your home directory to the new directory:
mv add_prog.py mysub_dir.
Enter cd mysub_dir to move your working directory to the new directory.
The command prompt changes to reflect that you have changed your working directory.
Enter the ls command to see the contents of the current directory, mysub_dir.
The working directory contents are presented, including the file you just uploaded.
Step 4: This section shows how to work with a file using the pre-installed Vim editor. The file is then executed as a programme from the command line.
Enter the following command to modify the file you submitted in the previous step:
vim add_prog.py
The shell interface updates to show the Vim editor.
Press the I key to open the file in Vim. Now change the code so that the program adds three digits instead of two:
import sys
x=int(sys.argv[1])
y=int(sys.argv[2])
z=int(sys.argv[3])
sum=x+y+z
print("The sum is",sum)
After editing the program, hit Esc to enter Vim command mode. Then, to save the file and close the editor, use the following command:
:wq
Return to the main command-line interface and enter three digits as input:
python3 add_prog.py 4 5 6
The program output is displayed on the command line: The total is 15.
Step 5: In this step, you establish an Amazon S3 bucket and then use the PutObject function to add your code file to that bucket as an object.
Enter the following command to create a bucket in a certain AWS Region:
aws s3api create-bucket --bucket insert-unique-bucket-name-here --region us-east-1
If the request is completed, the command line shows a response from the service that looks like this:
{
    "Location": "/insert-unique-bucket-name-here"
}
To upload a file and add it as an object to the newly constructed bucket, use the PutObject method:
aws s3api put-object --bucket insert-unique-bucket-name-here --key add_prog --body add_prog.py
If the item is successfully uploaded to the Amazon S3 bucket, the command line outputs something like this:
{
           "ETag": "\"ab123c1:w:wad4a567d8bfd9a1234ebeea56\""
}
The ETag is a hash of the item that was saved. It may be used to validate the item uploaded to Amazon S3.
Frequently Asked Questions
What is AWS CloudShell?
AWS CloudShell is a browser-based shell that makes it simple to manage, investigate, and interact with your AWS resources safely. CloudShell has already been authenticated using your console credentials. Common Development and operations tools are pre-installed, so there is no need for local installation or configuration.
Is the AWS CLI the same as CloudShell?
Every CloudShell shell environment has the AWS Command Line Interface (CLI) (v2) installed and configured, allowing you to perform aws commands right away. The Python and Node runtimes are also included, with many more to follow in the future.
What distinguishes CloudShell from Amazon EC2 Instance Connect?
Amazon EC2 Instance Connect allows you to connect to existing EC2 instances in your account using a web terminal. CloudShell requires no resources in your account. EC2 Instance Connect is best for connecting to existing EC2 instances through SSH, whereas CloudShell is best for AWS CLI commands and general-purpose scripting.
How can we stop AWS CloudShell?
We can end a shell session and log out from the command line using the exit command. We may then rejoin and continue using AWS CloudShell by pressing any key.
Conclusion
In this article, we have extensively discussed AWS Coudshell. We start with a brief introduction of the AWS Cloudshell, then discuss the steps to use it.
After reading about the AWS Coudshell, are you not feeling excited to read/explore more articles on the topic of AWS? Don't worry; Coding Ninjas has you covered. To learn, see AWS Cloud Map, AWS Cloud Directory, AWS Application Discovery Service, and Data Exchange in AWS, Nmap commands
Refer to our Guided Path on Coding Ninjas Studio to upskill yourself in Data Structures and Algorithms, Competitive Programming, JavaScript, System Design, and many more! If you want to test your competency in coding, you may check out the mock test series and participate in the contests hosted on Coding Ninjas Studio! But if you have just started your learning process and are looking for questions asked by tech giants like Amazon, Microsoft, Uber, etc., you must look at the problems, interview experiences, and interview bundle for placement preparations.
Nevertheless, you may consider our paid courses to give your career an edge over others!
Do upvote our blogs if you find them helpful and engaging!
Happy Learning!


 9+ registered

