Do you think IIT Guwahati certified course can help you in your career?
Introduction
Azure Blob Storage aids in the creation of data lakes for analytics and provides storage for the development of solid cloud-native and mobile apps. Reduce expenses by storing long-term data in tiered storage and flexibly scaling up for high-performance computing and machine learning workloads. In this article, we will learn in detail about the Blob Storage Tiers of Azure. This blog will also walk you through how to transition between different Azure storage tiers based on your data's lifespan so you can get the most out of your cloud storage investment.
Let's dive into the article to get more information about Azure blob storage tiers.
Blob access tiers
Blob access tiers are something to be aware of.
Data on the cloud has the potential to grow at an exponential rate. It's helpful to arrange your data based on criteria like frequency of access and scheduled retention time to control expenditures for your rising storage needs. Data on the cloud can vary depending on how it's generated, processed, and accessed throughout its lifecycle. Throughout its existence, some data has been actively accessed and updated. Some data is accessed frequently early in its life, but as the data ages, access decreases dramatically. Some data sits dormant in the cloud, rarely, if ever, retrieved after it's been saved. Azure provides many access levels to satisfy these various access requirements, which you can use to balance your storage expenses with your access requirements.
Different access tiers for your blob storage are available in Azure Storage, allowing you to store object data in the most cost-effective way possible. Tiers of access are offered, including:
Hot access tier: It is designed to store regularly accessed data (for example, images for your website).
Cool access tier: It is designed for data viewed infrequently and kept for at least 30 days (for example, invoices for your customers).
Archive access tier: For data that is infrequently accessed and archived for at least 180 days with flexible latency requirements, this tier is appropriate (for example, long-term backups).
Considerations of different Tiers
For the various access tiers, the following considerations apply:
Only the hot and cool access tiers can be changed at the account level. At the account level, the Archive access tier isn't available.
You can set the hot, cool, and archive levels at the blob level during or after upload.
Cool access data can tolerate slightly lesser availability, but it still requires excellent durability, retrieval latency, and throughput, much like hot data. Compared to hot data, somewhat reduced availability service-level agreements (SLAs) and higher access prices are acceptable trade-offs for cheaper storage costs for cool data.
Archive storage saves data offline and has the lowest storage costs but the most expensive rehydration and access costs.
Demonstration
The following diagram shows how to choose between the hot and cool access tiers on a general-purpose storage account.
The enterprise storage landscape accommodates various types of data, with some being actively used by applications daily and others sitting unused or undisturbed for extended periods. The former includes data utilized by line-of-business (LOB) applications and databases, while the latter provides archive data, backups, and other data types.
To ensure you're getting the most out of your storage, match your data with the storage that best meets its performance requirements while staying within budget. Azure Blob storage in the Azure cloud has three tiers that cater to different sorts of data and can assist you with this.
Azure Storage Tiers
Azure has three storage tiers to store data in blob storage: Hot Access, Cool Access, and Archive. These tiers target data at various phases of its lifetime and provide cost-effective storage solutions for different use cases.
Hot Access Tier: This tier should be used for data often accessed by programs and read or updated frequently. This tier has higher data storage costs than the other tiers but lower access costs, which fits the target use case.
Cool Access Tier: This storage tier is appropriate for data not accessed regularly by programs and is anticipated to be stored for at least 30 days, such as backups, telemetry data, media files, etc. The cool access tier is less expensive than the hot tier; however, access costs and availability are different. In addition, this tier has a lesser SLA (99%) than the hot tier (99.99%), and there is a per-GB payment for accessing the data.
Archive Tier: The Archive Tier, as the name implies, is for storing infrequently accessed or archival material. It has the cheapest storage rate on Azure but the highest data retrieval prices. This tier is meant for Azure archive storage for data that will be kept for at least 180 days and can withstand a longer retrieval window. Large amounts of idle data, such as data necessary for compliance, long-term backup, archived datasets, and so on, can be stored on the Archive tier.
These three data layers are supported in General Purpose storage V2 and Blob storage accounts. Customers can now use the Azure interface to switch their existing GPv1 storage account to GPv2 to take advantage of storage tiering.
Steps to Switch Between Storage Tiers
Let's look at how to switch between these three storage tiers so you may place your data in the one that best fits its usage pattern.
The Archive tier can only be configured at the blob level, while the Hot and Cool tiers can be enabled at the storage account or blob level. The default tier for a blob is inherited from the account level setting, and all three storage access tiers can exist in the same storage account. You could, however, set the tier at the object level using blob-level tiering.
Let's start with how the storage tier can be configured when the storage account is first created. When you create a storage account, you choose the account level tier. Select Create a resource->Storage->Storage account from the Azure portal. For the Access tier (default) level, choose between Hot and Cool. Note that any blob created in the storage account will inherit this tier.
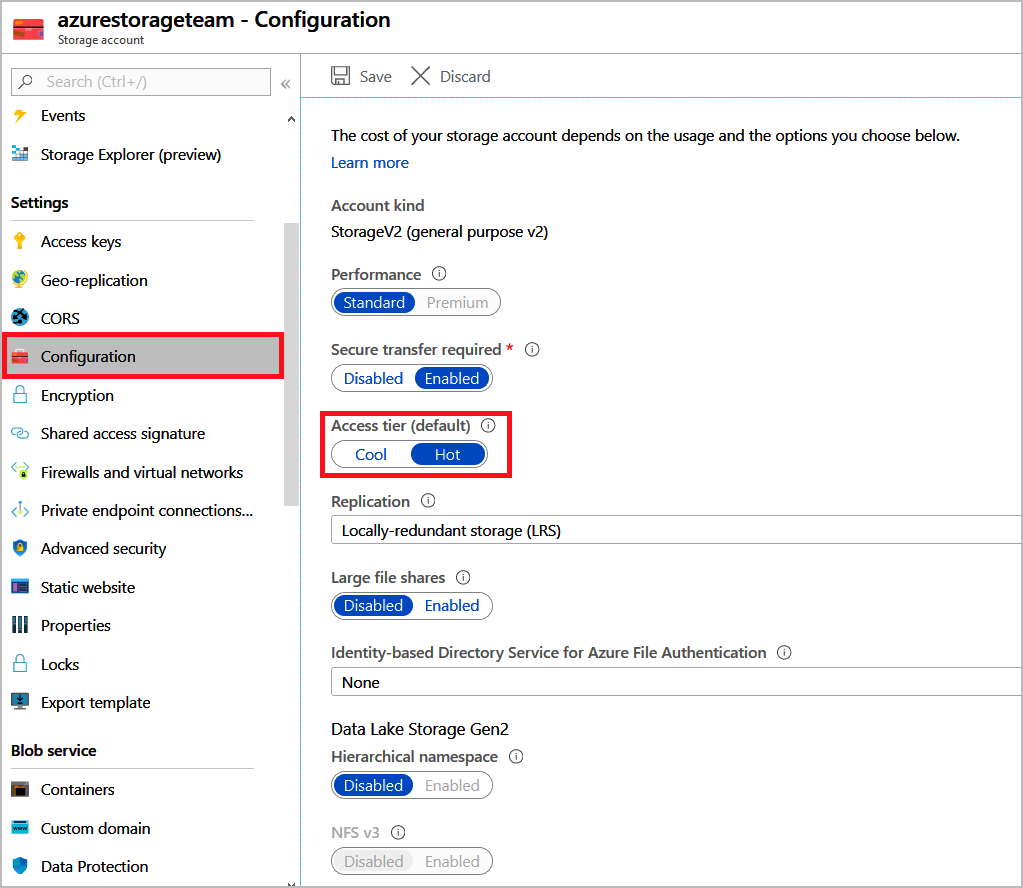
Navigate to the storage account-> configuration->Change Access tier(default) to Cool and click "Save" to change the storage access tier at a later time.
After saving your changes, go to the configuration of the same storage account to double-check. You can see that the tier is currently set to Cool in this section. Similarly, if the storage account was formed in the Cool tier, you might move to the Hot Access tier.
To change the tier of a given blob within the storage account, go to Storage account->Blob service->Blobs->container name>-> select the blob-> and click the context menu on the left. Choose "Blob properties" from the drop-down menu.
You will receive a warning message while switching to the Archive tier, stating that the blob will be inaccessible until it is rehydrated back to the Hot or Cool tier, which could take several hours. To change the tier, click "Ok."
By looking at the blob's attributes, you can see if the tier has been modified. You'll see that the access tier is now displayed as Archive in Storage account->Blob service->Blobs->container name>.
That's all there is to it. You've now seen how to successfully modify your Azure account's default storage tier and change it for individual blobs on demand.
Automated Lifecycle Management
Data can be automatically migrated to lower-access tiers utilizing Azure storage's lifecycle management feature based on pre-configured rule-based policies. This function also permits the deletion of data at the end of its lifecycle.
Data can be migrated from Hot to Cool Tier, Cool to Archive Tier, or Hot to Archive Tier using policies. Rules can be set up to run once a day against the storage account. Prefix filters can be used to target specific blobs and containers.
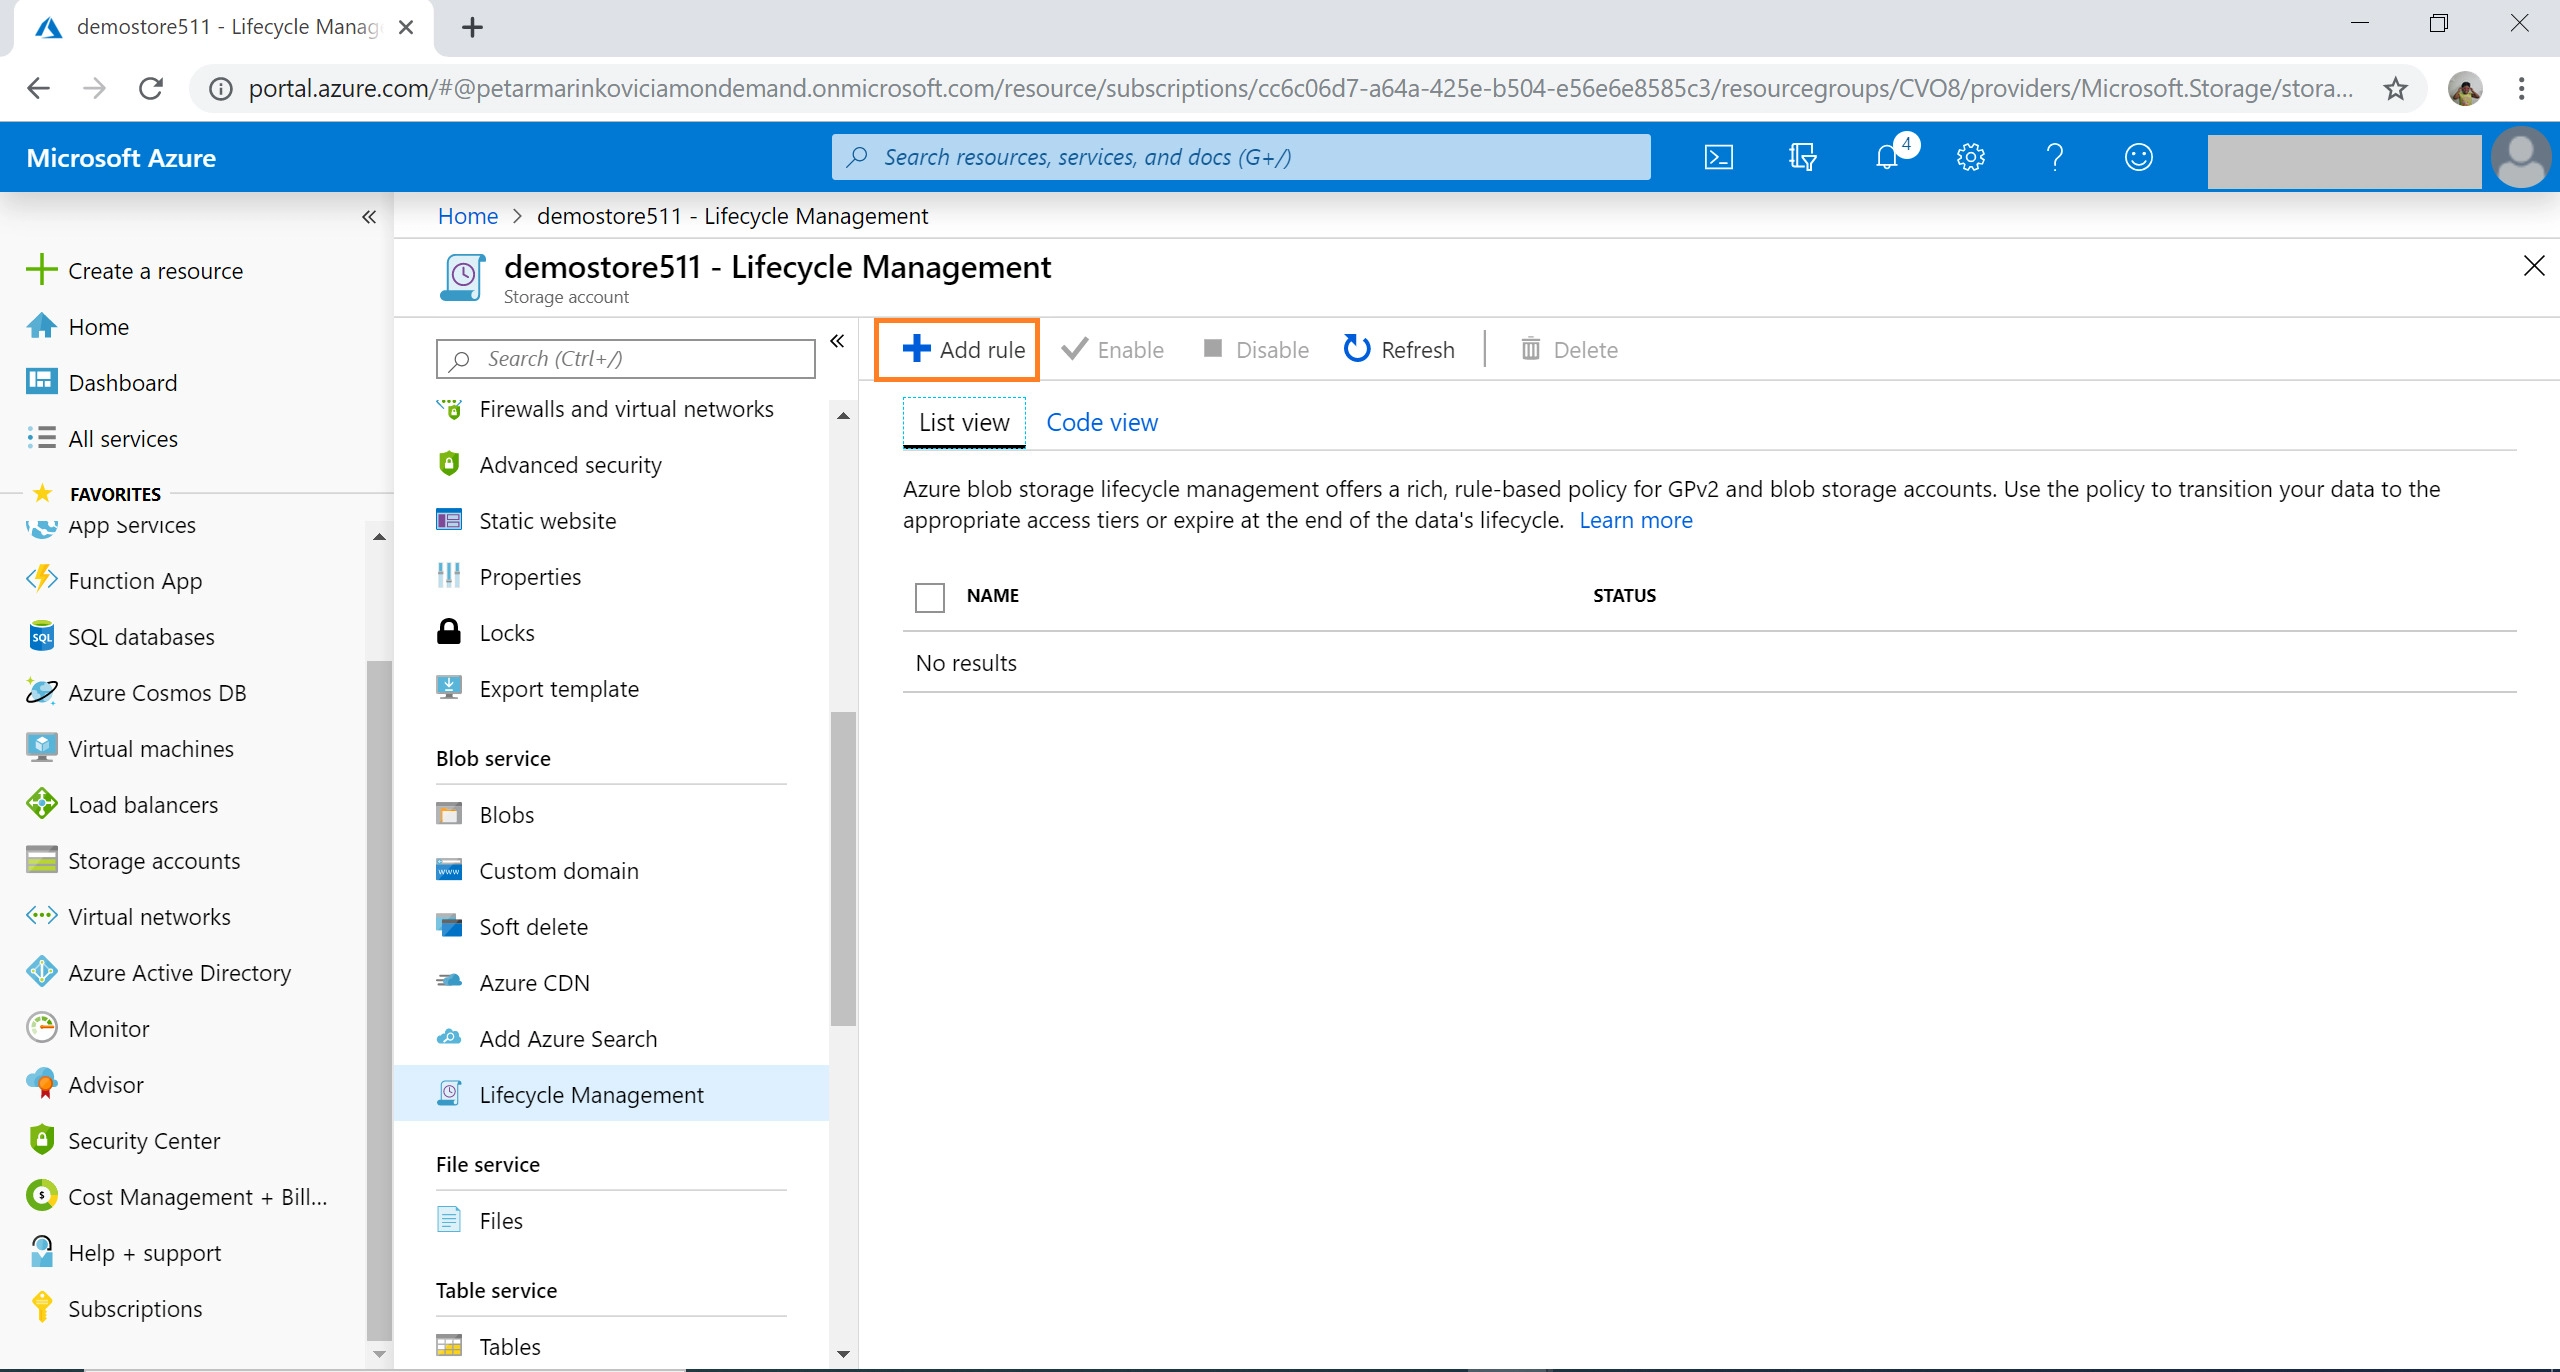
1. We'll begin by configuring a storage account's Lifecycle management rules. From the Azure portal, open the storage account, go to Blob service->Lifecycle Management, and click "Add Rule."
For example, if data is not edited for 20 days, it is moved to Cool storage, and if it is not modified for 90 days, it is moved to Archive storage. To configure the filter set, click "Next: Filter set." You may also specify a path for the rule to be applied to a specific container or group of virtual folders. It will be used as a prefix match when the rules are applied.
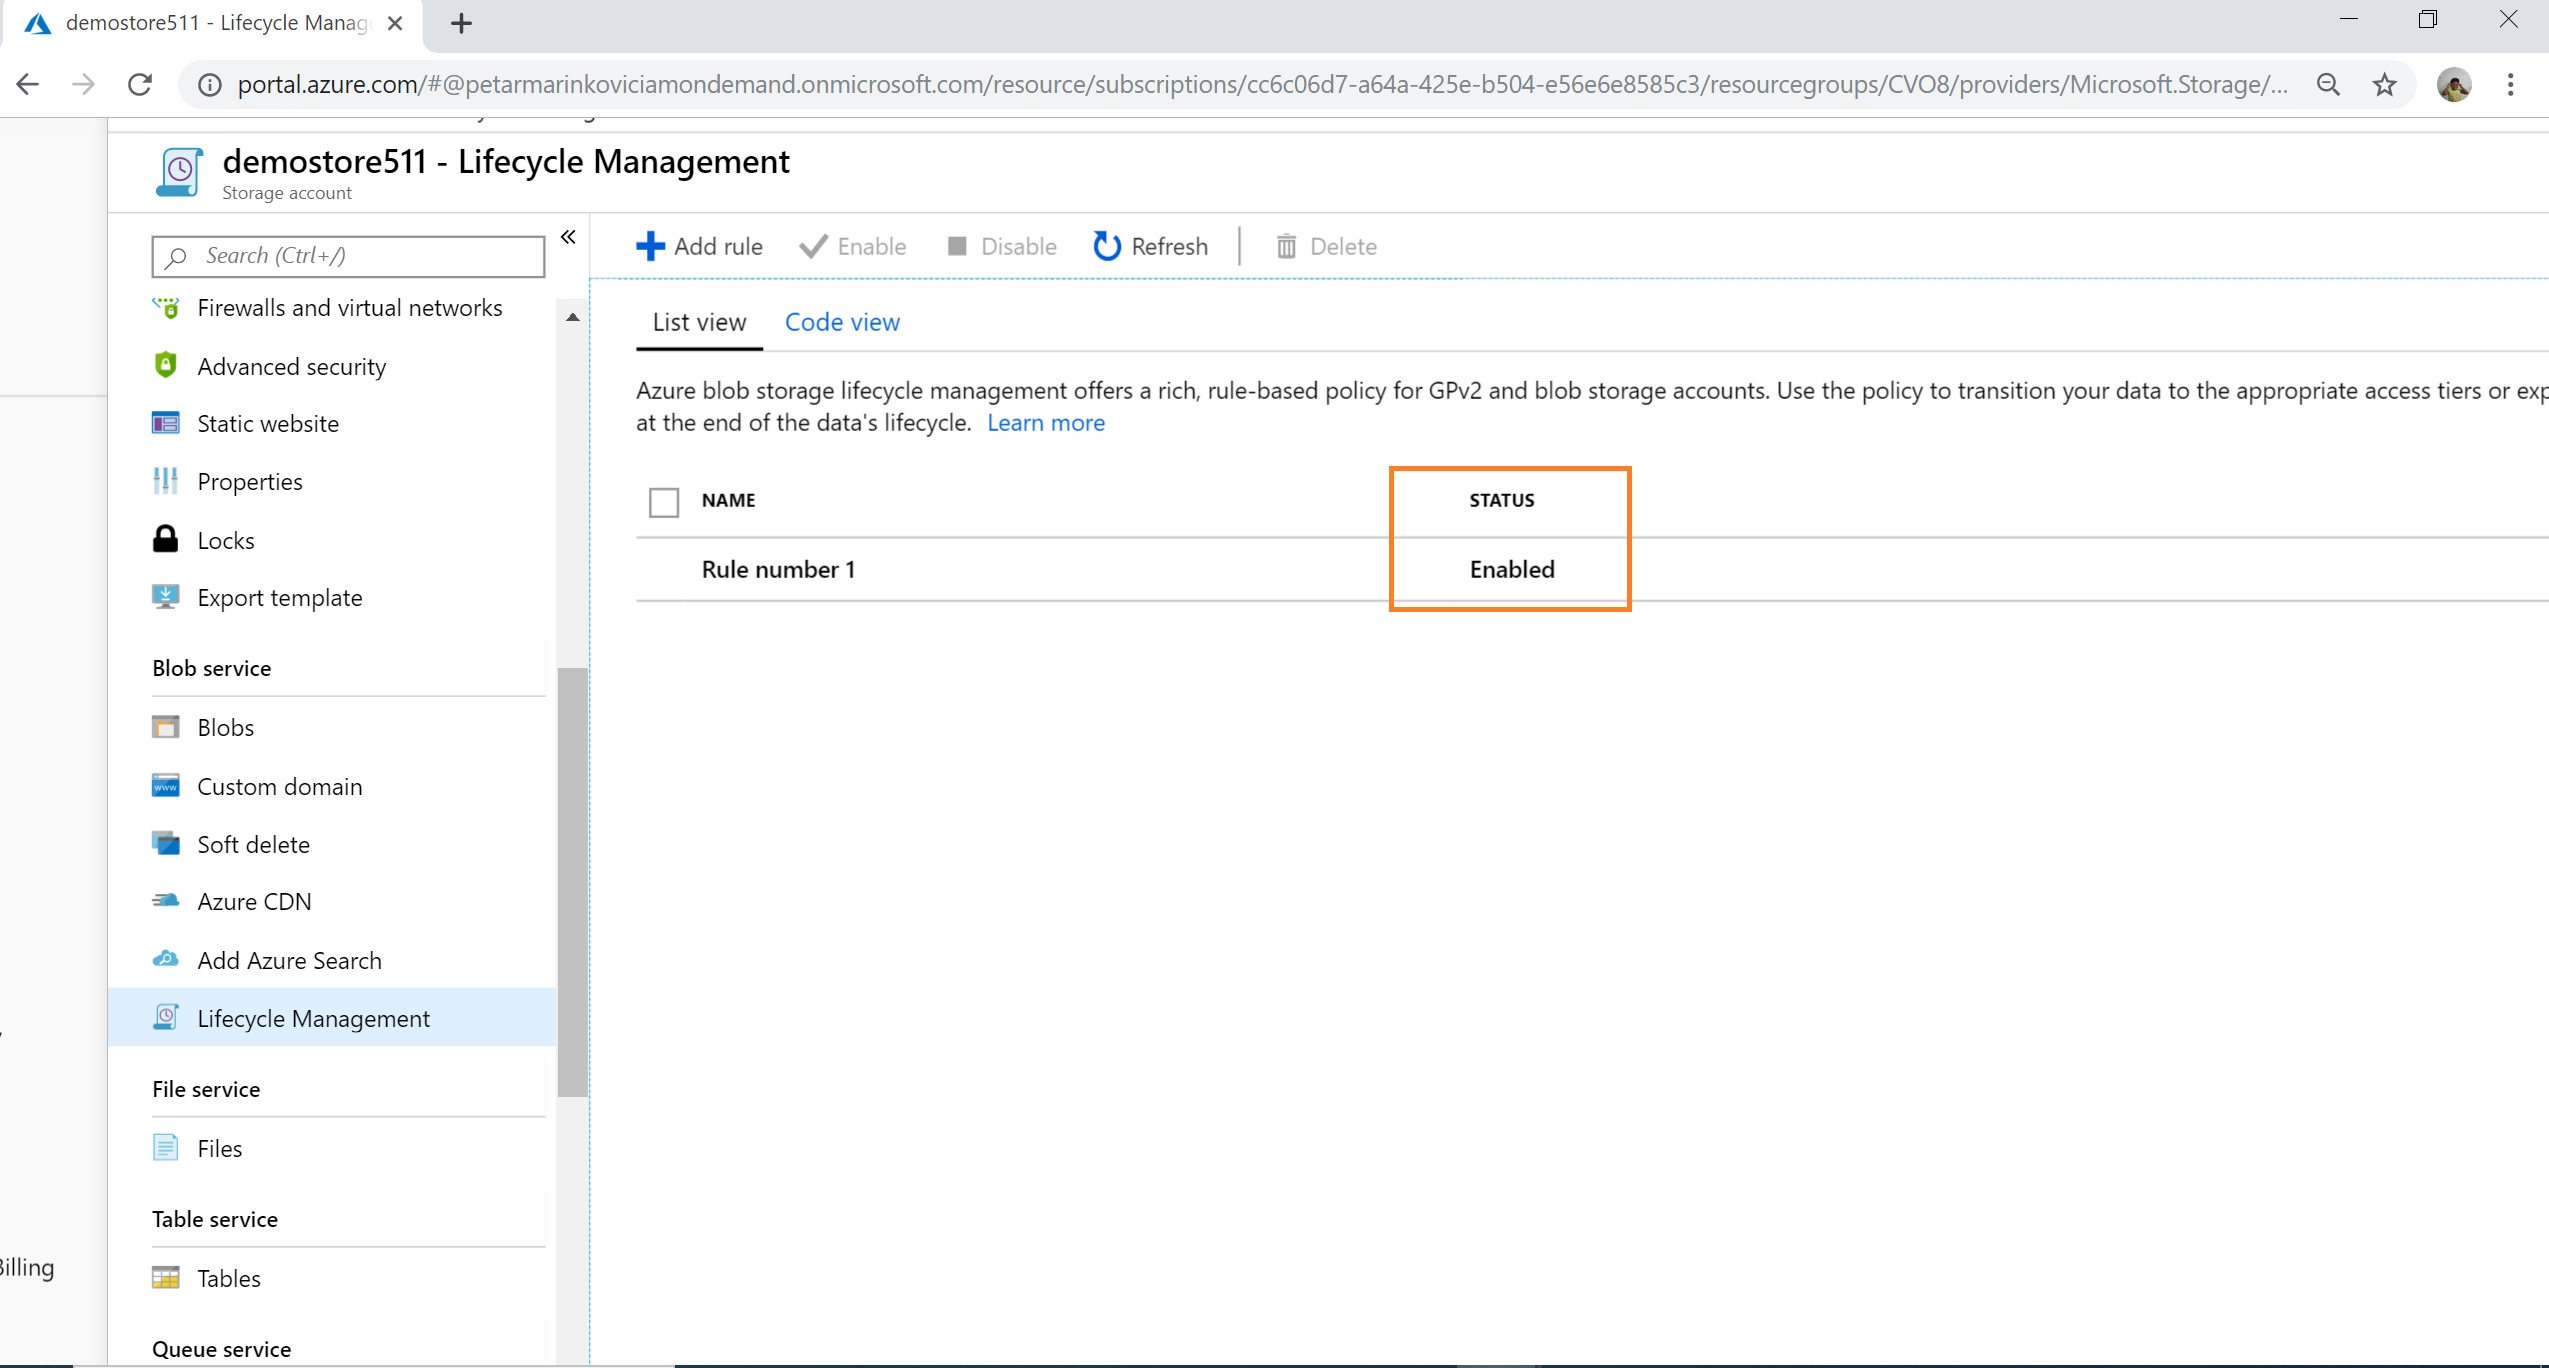
3. To confirm the configuration, click "Next: Review+Add." After that, click "Add" to finish the policy creation process.
5. The actions outlined above are the policy list view configuration option. As seen below, the settings can be altered through the "code view" window found under Storage->Lifecycle Management->Code view.
You've created a data lifecycle policy rule that automatically tiers data based on your consumption patterns.
Improve Data Tiering and Storage Efficiency
Using Cloud Volumes ONTAP for Azure, you may improve storage efficiency and data tiering. NetApp Cloud Volumes ONTAP extends NetApp's trusted ONTAP platform's data management capabilities to Azure, reducing Azure storage expenses through storage efficiency. Automated tiering between hot and cold storage tiers in Azure is one function that improves Azure storage consumption efficiency.
Cloud Volumes ONTAP enables automatic tiering between Azure tiers, including managed Azure SSD disc storage for performance and Azure Blob storage for capacity. Using Azure native storage services, this functionality is not available.
Based on the tiering policy defined, infrequently accessed data is tiered from managed Azure SSD disc storage to less-expensive blob storage, initially to the Hot Access tier. Customers can also utilize the method provided in this blog to switch the Azure storage tier to the cool tier for data that hasn't been accessed in 30 days to minimize storage charges further. The same functionality is provided for AWS storage tiers on Amazon EBS and Amazon S3 with Cloud Volumes ONTAP.
For use cases such as LOB apps, backup, Disaster Recovery, and more, organizations may tremendously benefit from the versatility of Cloud Volumes ONTAP paired with the cost savings of Azure storage tiers.
Frequently Asked Questions
What's the distinction between Azure blob storage and Azure file storage?
Azure Blob Storage is an object store for storing large volumes of unstructured data, whereas Azure File Storage is a fully managed file system based on the SMB protocol that, once mounted, appears to be a standard hard drive.
What is the purpose of Blob storage?
Blob storage is designed to hold large volumes of unstructured data like text or binary. Blob storage is helpful for the following applications: Directly serving pictures or documents to a browser and keeping files in a shared location so that multiple people can access them.
What is the meaning of the term "blob storage"?
Microsoft's data storage infrastructure allows customers to store massive amounts of unstructured data. In this context, blob stands for Binary Large Object, which encompasses items like photos and multimedia files.
Is an Azure blob the same as an S3 bucket?
Blob storage works in the same way that AWS S3 and EBS do. Structured datasets are stored in table storage. Table storage is a key-attribute data store that provides for rapid development and access to massive amounts of data in a NoSQL environment.
Conclusion
In this article, we have extensively discussed the Azure blob storage tiers, their types, and how to switch between them.
We hope this blog has helped you enhance your knowledge regarding Azure blob storage tiers. If you would like to learn more, check out our articles on Microsoft Azure, Azure Certification, How to prepare for Azure Certification, and AWS Vs. Azure Vs. Google Cloud.


 9+ registered

