File structure
The file structure of the android application will look like the following:
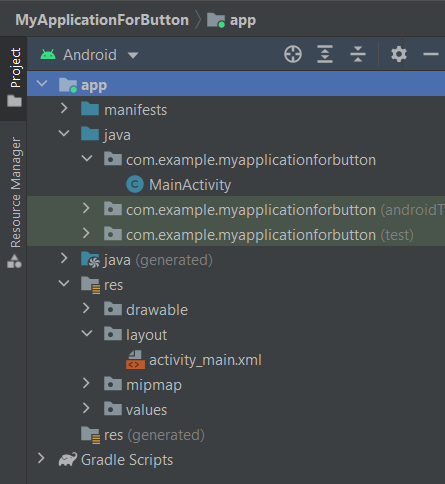
From the above files, we will be mainly working on the following files:
- MainActivity.java inside the com.example.myapplicationforbutton folder inside the java folder.
- activity_main.xml inside layout folder inside the res folder.
The frontend design
Using the GUI of the Android studio, we can just drag and drop the components from the palette and set their attributes.
The Design
In the design option of activity_main.xml you can drag and drop the components you want to use from the palette shown below:

Drag and drop the TextView and Button component to the app and set their positions:

You can change the attributes and properties of the components using the attributes section:


As you can see the id of Button and TextView components is set to “button” and “textView” respectively.
The Code
The layout can be designed using code too.
activity_main.xml
<?xml version="1.0" encoding="utf-8"?>
<android.support.constraint.ConstraintLayout xmlns:android="http://schemas.android.com/apk/res/android"
   xmlns:app="http://schemas.android.com/apk/res-auto"
   xmlns:tools="http://schemas.android.com/tools"
   android:layout_width="match_parent"
   android:layout_height="match_parent"
   tools:context=".MainActivity">


   <TextView
       android:id="@+id/textView"
       android:layout_width="wrap_content"
       android:layout_height="wrap_content"
       android:text="Coding Ninjas"
       android:textAppearance="@style/TextAppearance.AppCompat.Display2"
       app:layout_constraintBottom_toBottomOf="parent"
       app:layout_constraintHorizontal_bias="0.428"
       app:layout_constraintLeft_toLeftOf="parent"
       app:layout_constraintRight_toRightOf="parent"
       app:layout_constraintTop_toTopOf="parent"
       app:layout_constraintVertical_bias="0.113" />


   <Button
       android:id="@+id/button"
       style="@android:style/Widget.Button"
       android:layout_width="128dp"
       android:layout_height="68dp"
       android:layout_marginStart="141dp"
       android:layout_marginTop="130dp"
       android:layout_marginEnd="142dp"
       android:layout_marginBottom="252dp"
       android:text="Click on me!"
       app:layout_constraintBottom_toBottomOf="parent"
       app:layout_constraintEnd_toEndOf="parent"
       app:layout_constraintHorizontal_bias="0.0"
       app:layout_constraintStart_toStartOf="parent"
       app:layout_constraintTop_toBottomOf="@+id/textView"
       app:layout_constraintVertical_bias="1.0" />


</android.support.constraint.ConstraintLayout>
Adding Functionality to Button
In the MainActivity.java, we can write a function that is executed when the button is clicked.
OnClickListener
Rather than using an XML layout, you can declare the click event handler programmatically. This may be necessary if you need to declare the click behaviour in a Fragment subclass or if you instantiate the Button at runtime.
Create a View.OnClickListener object and assign it to the button using the setOnClickListener method to declare the event handler programmatically (View.OnClickListener).
MainActivity.java
package com.example.myapplicationforbutton;


import android.support.v7.app.AppCompatActivity;
import android.os.Bundle;
import android.util.Log;
import android.view.View;
import android.widget.Button;
import android.widget.Toast;


import org.w3c.dom.Text;


public class MainActivity extends AppCompatActivity {


   @Override
   protected void onCreate(Bundle savedInstanceState) {
       super.onCreate(savedInstanceState);
       setContentView(R.layout.activity_main);


       Button btn= (Button) findViewById(R.id.button);
       btn.setOnClickListener(new View.OnClickListener(){
           @Override
          public void onClick(View v) {
               Toast.makeText(MainActivity.this, "This article is about Buttons in Android!", Toast.LENGTH_SHORT).show();
          }
       });
   }
}
In the above code, we see the onClick function for the Button with id “button”. When the Button is clicked a toast with the text “This article is about Buttons in Android!” will appear on the application screen.
The Output
Select an emulator and run the application. The following will be displayed:

FAQs
-
How to make a Button through code?
You can create the button With text, using the Button class:
<Button
android:layout_width="wrap_content"
android:layout_height="wrap_content"
android:text="@string/button_text"
... />
-
How to make an ImageButton through code?
You can create the button With text, using the ImageButton class:
<ImageButton
android:layout_width="wrap_content"
android:layout_height="wrap_content"
android:src="@drawable/button_icon"
android:contentDescription="@string/button_icon_desc"
... />
-
How to make a button with text and an icon?
You can create button with text and an icon, using the Button class with the android:drawableLeft attribute.
-
What can we use other than using onClickListener?
Add the android:onClick attribute to the <Button> element in your XML layout to define the click event handler for a button. The name of the method you want to call in response to a click event must be the value for this attribute. The method must then be implemented by the Activity that hosts the layout. Like so:
<Button…
android:onClick="sendMessage"
…/>
-
For the above, how do you write the function for the onClick event?
The click event is handled by the following method within the Activity that hosts this layout:
/** Called when the user touches the button */
public void sendMessage(View view) {
// Do something in response to button click
}
Key Takeaways
In this article, we have extensively discussed the theoretical and practical implementation of buttons in android.
We hope that this blog has helped you enhance your knowledge regarding the theoretical and practical implementation of buttons in android and if you would like to learn more, check out our articles on Coding Ninjas Studio. Do upvote our blog to help other ninjas grow. Happy Coding!


 8+ registered

