


Introduction
One must be thinking that I am python developer but I also want to develop apps for Android and I don’t want to learn any other framework or library such as flutter, Android Native or swift fro developing IOS applications. No worries, pal; we'll be studying the Kivy framework supplied by Python, which will take you on a tour of constructing applications in Python quickly and effortlessly.
In this article we will be covering Button Size and Positioning is a Python using GUI tool that works on any platform provided by Kivy module python. We will also see how to use the .kv file in Kivy for developing the layout of the application. This article assumes that you have been somewhat familiar with Basics of Python otherwise it will be bit difficult to understand it in first glance however you can still go through this article.
Also see, Merge Sort Python
Button Size and It’s Position
Kivy is a Python GUI tool that works on any platform. It can operate on Android, iOS, Linux, and Windows, among other platforms. It is mostly used to create Android applications, but it may also be used to create desktop applications.
This article covers, how we can change the button size and button position using kivy in python. Here is the discussion of a few properties in it.
size : This is for static sizing of widgets and takes two arguments i.e. (width, height). Default size of the button = (100, 100).
pos : This is for static placement of widgets and is used to give position to buttons and by default it is (0, 0) which is the bottom-left corner of the screen.
size_hint : This is for dynamic sizing of the button and provides a hint of size. It contains two arguments i.e. width and height it can be floating values.By default, all widgets have their size_hint=(1, 1).
pos_hint : This is for dynamic placement of the button and provide hint of position. We can define upto 8 keys i.e. it takes arguments in the form of a dictionary.
Implementation
1. import kivy
2. import kivyApp
3. import all needed(like button and layouts to use them)
4. Set minimum version(optional)
5. create Layout class
6. create App class
7. Set up .kv file : Create the buttons and set up the position and size
8. return Layout/widget/Class(according to requirement)
9. Run an instance of the class
Below is the implementation in code.
button.py
from kivy.app import App
from kivy.uix.widget import Widget
from kivy.lang import Builder
from kivy.uix.floatlayout import FloatLayout

# loading our kivy file
Builder.load_file('button.kv')

# creating a widget class
class Widgets(Widget):
   def btn(self):
       showBtn()

# extending property of FloatLayout
class FloatLayout(FloatLayout):
   pass

# creating our Button App class
class BtnApp(App):
   def build(self):
       return FloatLayout()


def showBtn():
   show = BtnApp()

   btnWindow = BtnApp(title="Btn App Window", content=show, size_hint=(None, None), size=(200, 200))
   btnWindow.open()


if __name__ == '__main__':
   BtnApp().run()
button.kv
<FloatLayout>:
   Button:
       text: "postion hint"
       background_color: 0.1, 0.5, 0.6, 1
       size_hint: 0.3, 0.3
       pos_hint: {"x":0, "top":1}

   Button:
       text:"pos"
       background_color: 0.4, 0.5, 0.6, 1
       size_hint: 0.3, 0.3
       pos: 100, 100

   Button:
       text:"size hint"
       background_color: 0, 0, 1, 1
       size_hint: 0.5, 0.4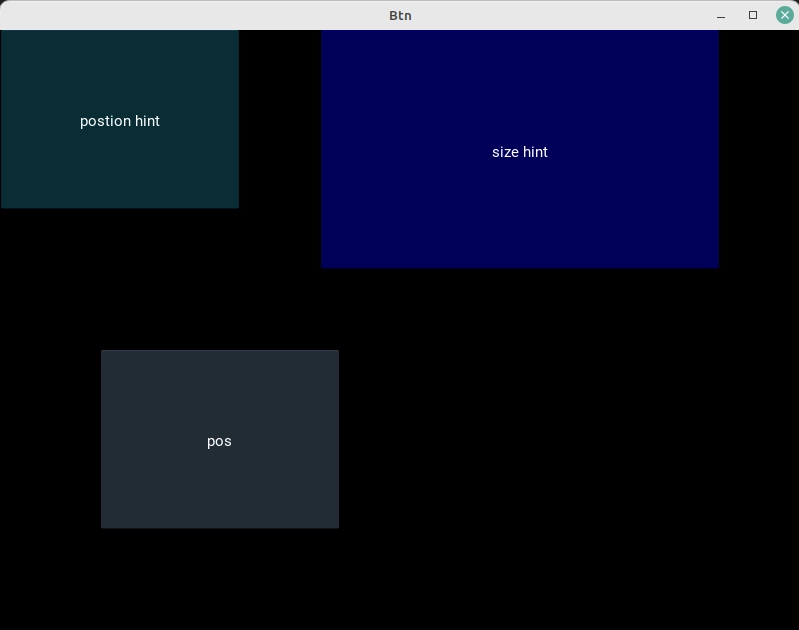
pos_hint: {"x":.4, "top":1}App Output


 9+ registered

