Properties of DateTimePicker control
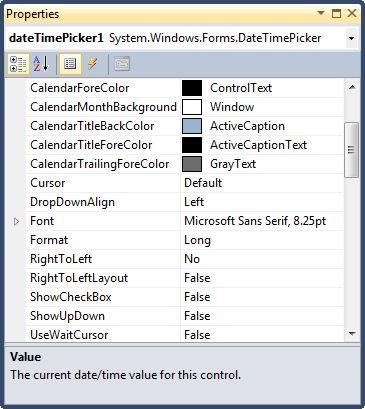
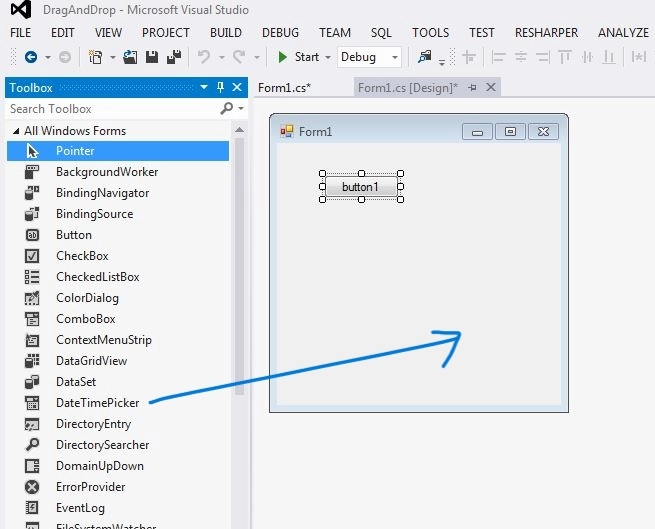
We have discussed above that we can set the properties of the DateTimePicker according to our needs. The easiest way is to use the Properties window, which can be accessed by right-clicking on the control and selecting properties from it. This will display a property window like the given below.
Source
Each of these properties can be set dynamically during run-time using a code snippet. We have discussed the code snippets for various properties, and their functions are given below.
Name
This property refers to a unique name for the DateTimePicker. It is used to access the control in the code. It can be set using the below-given code snippet.
DateTimePicker dynamicDTP = new DateTimePicker();
dynamicDTP.Name = "DyanmicDateTimePicker";
Location
Location property specifies the starting position of the DateTimePicker control on a form. It can be customized using the below-given code.
DateTimePicker dynamicDTP = new DateTimePicker();
dynamicDTP.Location = new System.Drawing.Point(12, 12);
Size
It specifies the size of the DateTimePicker control. The code for customizing it on run-time is given below. In this code, we have set the control's height as 25 and the control's width as 200.
DateTimePicker dynamicDTP = new DateTimePicker();
dynamicDTP.Size = new System.Drawing.Size(200, 25);
Height and Width
The height and width property can be used in place of the size property to alter the control size. The code for the same is given below.
DateTimePicker dynamicDTP = new DateTimePicker();
dynamicDTP.Width = 200;
dynamicDTP.Height = 25;
Font
It represents the font of the text to be displayed in the DateTimePicker control. The below-given code changes the font property at run-time. In this code, the font family is set to ''Georgia,'' and the font size is set to ''12''.
DateTimePicker dynamicDTP = new DateTimePicker();
dynamicDTP.Font = newFont("Georgia", 12);
Text and Value
Text property refers to the control text, and the Value property refers to the currently set date and time value in the DateTimePicker control. Code for using these properties is given below.
DateTimePicker dynamicDTP = new DateTimePicker();
MessageBox.Show(dynamicDTP.Text);
MessageBox.Show(dynamicDTP.Value.ToString());
MinDate and MaxDate
MinDate and MaxDate properties are used to set the minimum and maximum value of the date and time selected in control. The code to change these properties at run-time is given below. In this code, we set the minimum date 01-01-2000 and the maximum date today.
DateTimePicker dynamicDTP = new DateTimePicker();
dynamicDTP.MinDate = newDateTime(2000, 1, 1);
dynamicDTP.MaxDate = DateTime.Today;
Calendar Foreground and Background
We have an option to change the properties of the calendar part of the DateTimePicker control. We can change properties like CalendarFont, CalendarForeColor, CalendarMonthBackground, CalendarTitleBackColor, and CalendarTitleBackColor. All these properties are self-explanatory, i.e., it is obvious from their name what they do. We can change these calendar properties using the below-given code snippet.
DateTimePicker dynamicDTP = new DateTimePicker();
dynamicDTP.CalendarFont = newFont("Tahoma", 10F, FontStyle.Italic,
GraphicsUnit.Point, ((Byte)(0)));
dynamicDTP.CalendarForeColor = Color.Black;
dynamicDTP.CalendarMonthBackground = Color.Orange;
dynamicDTP.CalendarTitleBackColor = Color.Yellow;
dynamicDTP.CalendarTitleForeColor = Color.Black;
ShowCheckBox and ShowUpDown
The value of the DateTimePicker control can be changed without using the calendar. This can be done by setting the ShowCheckBox property to true. It makes the date part of the control editable. ShowUpDown property enables us to change the date and time using a spin button control. We can use these two properties using the below-given code.
DateTimePicker dynamicDTP = new DateTimePicker();
dynamicDTP.ShowCheckBox = true;
dynamicDTP.ShowUpDown = true;
Custom DateTimePicker
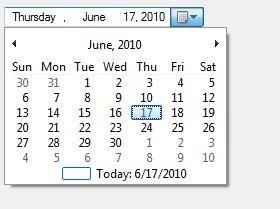
Suppose the date is June 01, 2001, and we want to display the date as "June 01, 2001 - Friday". For this, we can use the CustomFormat property. If we're going to show the date and time as "June 15 at 12:00 PM," then to display the date and time separators or format the strings, we must use escape characters in the substring. To show "June 15 at 12:00 PM," we have to set the CustomFormat property to "MMMM dd ''at'' t: mm tt." We have given a code snippet below to make you understand its implementation.
dynamicDTP.Format = DateTimePickerFormat.Custom;
dynamicDTP.CustomFormat = "MMMM dd, yyyy - dddd";
For more information on custom DateTimePicker, you can refer to the documentation by Microsoft.
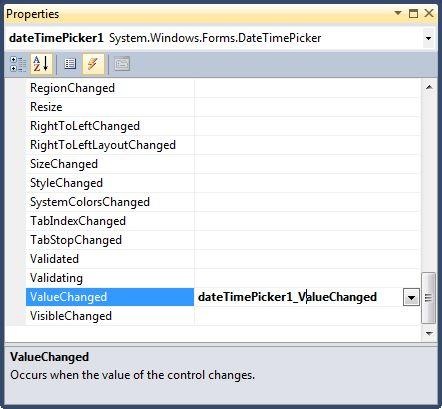
DateTimePicker ValueChanged Event Handler
This event handler is fired when the value of the control is changed. This is important in cases where we need to change some values based on the control value. To add this property, we can go to events windows and double click on the ValueChanged event as given below.
Source
Another way to implement this event is using this code snippet.
DateTimePicker dynamicDTP = new DateTimePicker();
dynamicDTP.ValueChanged += new System.EventHandler(dateTimePicker1_ValueChanged);
privatevoid dateTimePicker1_ValueChanged(object sender, EventArgs e)
{
    MessageBox.Show("New Datetime :" + dynamicDTP.Value.ToString());
// code of task you want to perform on change of control value
}
Frequently Asked Questions
What is DateTimePicker class?
DateTimePicker class is used to select, display, and collect the date and time in different formats in our windows forms.
How can we change the properties of DateTimePicker control?
Its properties can be changed in two ways. We can change it during the design time from the properties window or change it during run-time programmatically.
How to display the current date and time in the windows form?
We can use the below-given code snippet to get the current date and time.
DateTime now = DateTime.Now;
Here ''now'' stores the current date and time.
How to display time with the DateTimePicker control?
To display time with the DateTimePicker control, set the ''format'' property to ''Time'' and set the ''ShowUpDown'' property for the DateTimePicker to ''true''. You can refer to the below-given code snippet to do so.
timePicker.Format = DateTimePickerFormat.Time;
timePicker.ShowUpDown = true;
How to display a date in a custom format with the Windows forms DateTimePicker control?
To display a custom format, set the Format property to DateTimePickerFormat.Custom and set the CustomFormat property to a format string like "ddd dd MMM yyyy."
Conclusion
In this article, we have extensively discussed C# DateTimePicker Class. We hope that this blog has helped you enhance your knowledge regarding C# DateTimePicker Class and if you would like to learn more, check out our articles on
Refer to our carefully curated articles and videos and code studio library if you want to learn more. Refer to our guided paths on Coding Ninjas Studio to learn more about DSA, Competitive Programming, JavaScript, System Design, etc. Enroll in our courses and refer to the mock test and problems available. Take a look at the interview experiences and interview bundle for placement preparations.
Do upvote our blog to help other ninjas grow.
Happy Learning!!!


 9+ registered

