


Introduction
Kivy is a Python GUI development library that runs on iOS, Android, Windows, OS X, and GNU/Linux platforms. It helps developers create apps with cutting-edge multi-touch user interfaces. Kivy's basic concept allows developers to create an app once and deploy it across all devices, allowing for reusable and deployable code as well as rapid and easy interaction design and prototyping.
In this article, with the help of a few examples, we'll look at Canvas in Kivy using .kv file. This post assumes you've done some Python programming before. If that is not the case, you can return here after reading our Basics of Python article.
Canvas
The Canvas is the root object used for drawing by a Widget. A kivy canvas is not the place where you paint. By default, every Widget in Kivy comes with a Canvas. When you make a widget, you can include all of the drawing instructions if self is the widget you're currently using. When the window is drawn, the instructions Color and Rectangle are immediately appended to the canvas object.
Import the following module to use canvas:
from kivy.graphics import Rectangle, Color
Basic Approach -
-> import kivy
-> import kivy App
-> import widget
-> import Canvas i.e.:
      from kivy.graphics import Rectangle, Color
-> set minimum version(optional)
-> Extend the Widget class
-> Create the App Class
-> create the .kv file:
    -> create the canvas
    -> Add action/callback if needed
-> return a Widget
-> Run an instance of the class
Implementation of the approach
Now we'll look at a sample python application code that uses Kivy to show how the approach described above for canvas works. .kv file stores source code in the Kivy syntax, which include rule definitions, a root widget, dynamic class definitions, and templates. Each Widget in Kivy already has a Canvas by default. When you create a widget, you can create all the instructions needed for drawing.
main.py file
# to import kivy module
import kivy

# this restricts the version i.e
# below this kivy version, we cannot
# use the app
kivy.require("1.9.1")

# app:always used to refer the instance of your application
from kivy.app import App

# we are importing from graphics module
# Rectangle and Color as they are
# used for the basic building of canvas.
from kivy.graphics import Rectangle, Color

# Button behavior is provided by ButtonBehavior mixin class
from kivy.uix.button import ButtonBehavior

# The Label widget is used for rendering text.
from kivy.uix.label import Label

# class in which we create the canvas
class CanvasWidget(ButtonBehavior, Label):
    pass

# to create the App Class
class CanvasApp(App):
    def build(self):
        return CanvasWidget()

# run the App
CanvasApp().run()
.kv file
# .kv file of canvas

<CanvasWidget@Widget>

# to create canvas
canvas:
Color:
rgba: 250, 250, 0, 1 # Yellow

# size and position of Canvas
Rectangle:
pos: self.pos
size: self.size
Output

Change Color of screen
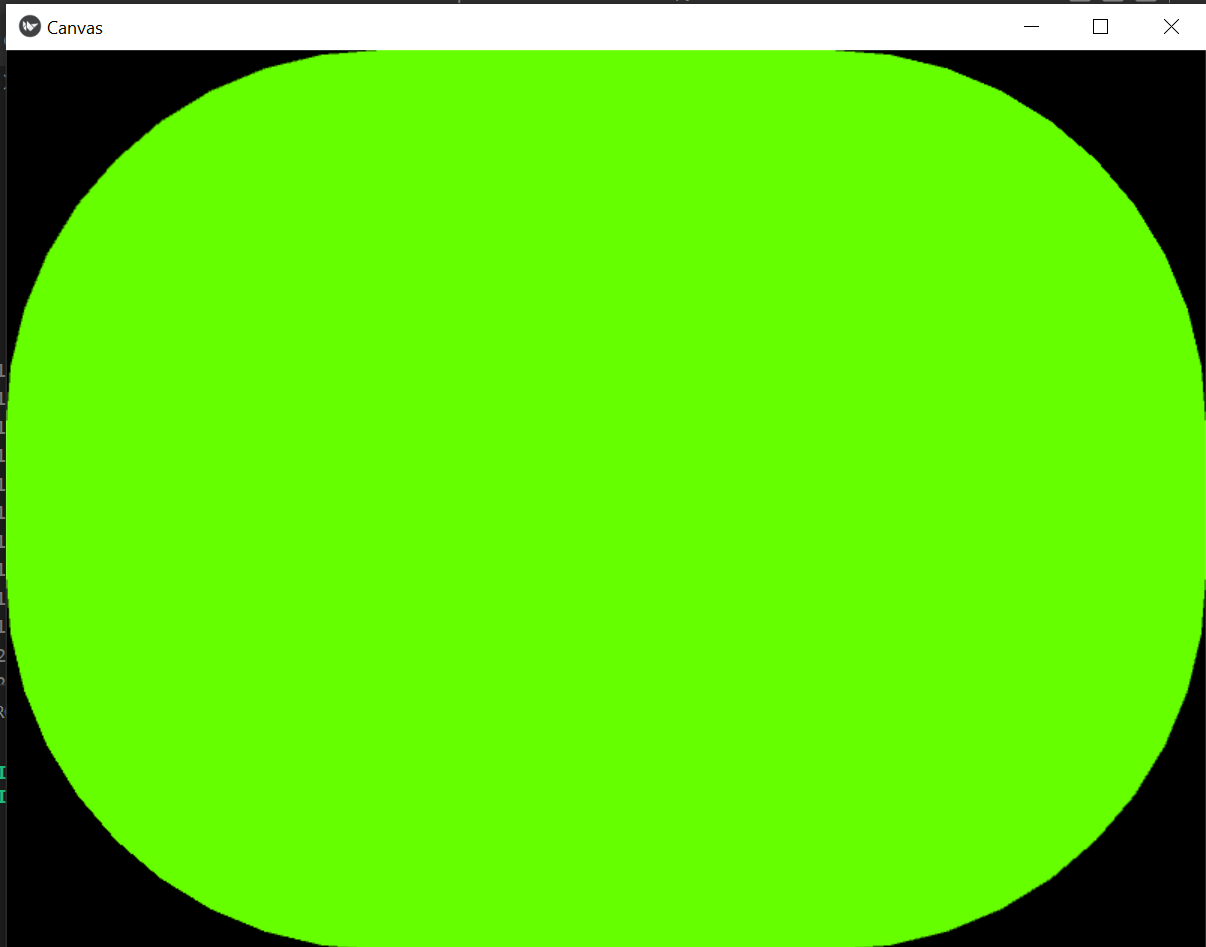
Now we'll look at a sample python application code that uses Kivy to show how the color of the screen changes. We have changed the color using python statements as a value expression for property and on_property attributes. Self keyword refers to the current widget context.
main.py file
# to import kivy module
import kivy

# this restricts the version i.e
# below this kivy version, we cannot
# use the app
kivy.require("1.9.1")

# app:always used to refers the instance of your application
from kivy.app import App

#  we are importing from graphics module
# Rectangle and Color as they are
# used for basic building of canvas.
from kivy.graphics import Rectangle, Color

# Button behavior is provided by ButtonBehavior mixin class
from kivy.uix.button import ButtonBehavior

# The Label widget is used for rendering text.
from kivy.uix.label import Label

# class in which we create the canvas
class CanvasWidget(ButtonBehavior, Label):
    pass

# to create the App Class
class CanvasApp(App):
    def build(self):
        return CanvasWidget()

# run the App
CanvasApp().run()
.kv file
# .kv file of canvas
<CanvasWidget>

# Creating Canvas
canvas:

# Color is skyblue if button is pressed,
# otherwise color is green
Color:
rgb: (0.4, 1, 0, 1) if self.state == 'normal' else (0.5, 0.9, 1, 1)

# to create rounded rectangle canvas
RoundedRectangle:
size: self.size
pos: self.pos

# use this if you want smooth corners for your button
radius: 250, 250, 250, 250
# Print the text when touched or button pressed

on_release:

print("I have been clicked")
Output


 9+ registered

