Creation of Button With Color
The basic approach followed while creating buttons is
- Importing kivy
- Importing the kivy App
- Importing the widget
- Importing the Button
- set the minimum version(it is optional)
- Create Widget Class
- Create App Class
-
Create .kv File ( Same name as the App class)
- Create Widget
- Create Button
- Set the background colour of the button as per your choice
- Specify Requirements
- Return the layout/class/widget (as per requirement)
- Run an instance of the class
Button Creation with color Using .kv File
As we have seen above the steps are to be followed while creating a button with color using the .kv file. Now we will be discussing with the help of a program.
The python code will set up our class, but we will define our buttons and their subsequent customisations using a separate .kv file.
Python Code
## Sample Python code demonstrating
## How to change the button color using the .kv file in Kivy


###################################################
# import kivy module
import kivy


# base Class of the App inherits from App class.
# app: it always refers to the instance of your application
from kivy.app import App


# This layout allows to set the relative coordinates for children.
from kivy.uix.relativelayout import RelativeLayout


# To change the kivy default settings
# we used this module config
from kivy.config import Config


# creating root widget used in the .kv file
class RelativeLayout(RelativeLayout):
    pass


# App class creation in which name.kv file
# is to be named Btn.kv
class SampleBtnApp(App):
    # defining build()
    def build(self):
        # returning the instance of root class
        return RelativeLayout()


# run the app
if __name__ == "__main__":
    SampleBtnApp().run()

You can also try this code with Online Python Compiler
Implementation of Btn.kv file of the main.py file
Program
#.kv file implementation of color btn


<RelativeLayout>:


    Button:

        text:"Ninja"
        # Change the default color to your choice
        background_color: 255,165,0,0.8
        pos_hint: {"x":0.2, "y":.4}
        size_hint: 0.3, 0.2


    Button:
        text:"Coder"


        # The default color of a button
        background_color: 1, 1, 1, 1
        pos_hint: {"x":.6, "y":.4}
        size_hint: 0.3, 0.2
Output
In this output, the button will not cover the whole window as we have given a specific size of the button, so by default, it will not show button size equal to window size.
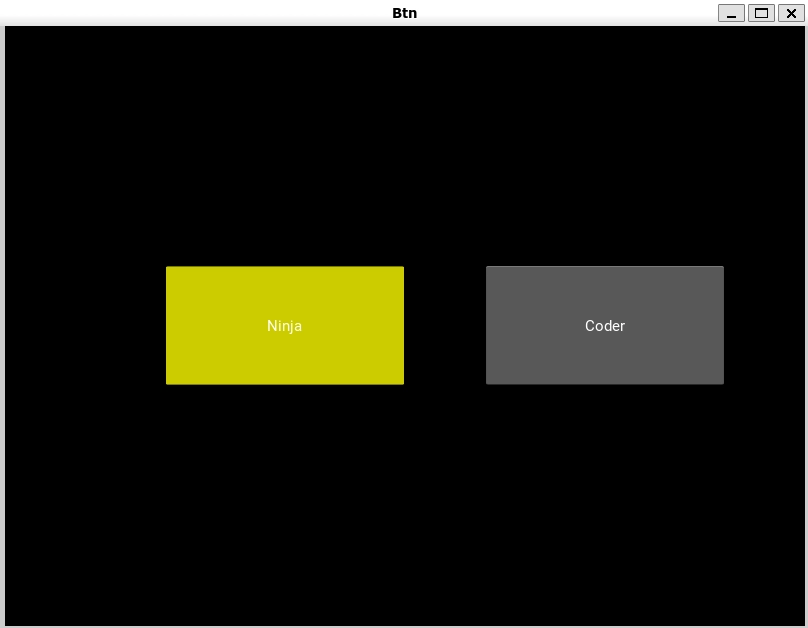
By default the colour of the “Default Button” is greyish and if you want to change it then you have to use this property, and it only takes the value in the range 0 to 1. If any other value is given, it will lead to misbehaving in the program.
Frequently Asked Questions
How to set the background colour of the button in kivy?
The background-color kivy is the property which sets the background color of an element.
Syntax:
background_color: 1, 0, 0, 1
What is the box layout in kivy?
The BoxLayout arranges the children in a vertical or horizontal box. For example: layout = BoxLayout(orientation='vertical').
What is a widget in kivy?
A Widget is a base building block of the GUI interfaces in Kivy. It provides a Canvas that can be used to draw on the screen.
What is float layout in kivy?
The FloatLayout honors pos_hint and size_hint properties of its children. For example: layout = FloatLayout(size=(300, 300)).
Conclusion
In this blog, we started with the kivy framework and button introduction. Then we discussed the creation of a button by adding colour to it using .kv file in kivy. After that, we discussed how to change the button colour and its background colour with the help of a simple program.
We hope that this blog helped you enhance your knowledge to improve your understanding of changing the button colours in kivy using the .kv file.
You may also want to learn more so please visit interesting articles about buttons, kivy, and python libraries.
Learning never stops, and to learn more and become more skilled, head over to our practice platform Coding Ninjas Studio, practice top problems, attempt Mock Tests, read informative blogs, and interview experiences. Do upvote our blog to help other ninjas grow.
Happy Learning!


 9+ registered

