


Introduction
In React, you can write a piece of code once and reuse that code whenever you want in your project. The reusable code is labeled as a component in React. React allows you to isolate these components, integrate them with others, and build a complete project. There are two types of components in React.
- Function Components
- Class Components

In this blog, we will cover React's class components. We will discuss the anatomy of the class components in React. We will learn about each aspect of the class components in React so that you can understand the working of React more clearly.
Also See, Dropdown in React JS, Hooks in React JS
You can also consider our React Js Course to give your career an edge over others.
What are Class Components?
Before React 16.8, class components were frequently used in React projects. The reason is that in function components, you cannot track the state and lifecycle methods of the component. The function components were known as “state-less” components.
To track the state of the components and use lifecycle methods, we have to use the class components in React. Now let's discuss how we can implement the class components in React.
To implement a class component, use the keyword ‘class’ before the name of your class component and extend it with the component class.
Example
class Coding Ninjas Studio extends Component{ }
To use properties available in React in your class component, you must inherit the Component class in React.
Inside your class component, you need a render ( ) function. We will define the functionality of our class component inside the render( ) because React will render the code inside the render( ) every time we call that class component.
Example
import React, { Component } from 'react'

class Coding Ninjas Studio extends Component {
    render() {
      return (
        <h1>Coding Ninjas Studio</h1>
      )
    }
  }

export default Coding Ninjas Studio
Output

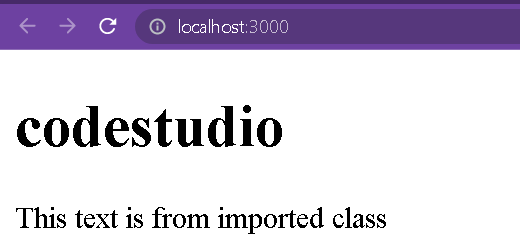
In the above example, we are rendering the Coding Ninjas Studio as a heading on the browser.
Integrating Other Components
You can integrate or import one class component to other. This integration of the components supports the code reusability and defines the term component in React. To import a class component, you need to set it as an exportable component by adding the export default classname at the end of the component, and then you can import it into other class components.
Example
We will import the Example class component from the ‘example.js’ file in ‘App.js’. To import a component, you must type import <componentName> from ‘./filename’.
example.js
import React, { Component } from 'react'

class Example extends Component {
  render() {
    return (
      <p>This text is from imported class</p>
    )
  }
}
export default Example;

App.js
import React, { Component } from 'react'
import Example from './example';
class Coding Ninjas Studio extends Component {
    render() {
      return (
        <>
        <h1>Coding Ninjas Studio</h1>
         <Example/>
        </>
      )
    }
  }
export default Coding Ninjas Studio;
Output
State in Class Components
As mentioned, we used class components in React to manage state and lifecycle methods. Let's learn how to manage states in class components in React. A condition in React is javascript objects containing data we can use in our components. These state objects are dynamic
Every component has some initial state. We need to initialize the initial state of every class component in React. In class components, we initialize the state with the help of constructors. A constructor initializes the objects or variables whenever we call that class component.
Example
import React, { Component } from 'react'
class Coding Ninjas Studio extends Component {
    constructor(){
      super()
      this.state = {username:"Dhananjay"}
    }
    render() {
      return (
        <>
        <h3>Hello {this.state.username}, Welcome to Coding Ninjas Studio</h3>
        </>
      )
    }
  }
export default Coding Ninjas Studio;
Output

In the constructor method, we have initialized this.state where we have defined the username object. To access the username object in the code, we must type {this.state.username}.
We use super() to call the constructor function of the parent class. Here the parent class is React.component. If we need access some properties or variables from the parent class we need ths super() function.
You can use the destructing method if you have multiple state objects.
Example
import React, { Component } from 'react'
class Coding Ninjas Studio extends Component {
    constructor(){
      super()
      this.state = {username:"Dhananjay", city:"Delhi"}
    }
    render() {
      const {username,city} = this.state
      return (
        <>
        <h3>Hello {username} from {city}, Welcome to Coding Ninjas Studio</h3>
        </>
      )
    }
  }
export default Coding Ninjas Studio;
Output

You can destructure the state objects like const {username,city} = this.state and then use these objects in the code.
Update the State
State is the dynamic javascript object. We can update the initial state if required in many ways. To update, we need to use this.setState() method. We need to call this method in a function to update the state.
Example
import React, { Component } from 'react'
class Coding Ninjas Studio extends Component {
    constructor(){
      super()
      this.state = {username:"Dhananjay", city:"Delhi"}
    }

    newstate = ()=>{
      this.setState({username:"Harsh"})
    }

    render() {
      const {username,city} = this.state
      return (
        <>
        <h3>Hello {username} from {city}, Welcome to Coding Ninjas Studio</h3>
        <button onClick={this.newstate}>click to change name</button>
        </>
      )
    }
  }
export default Coding Ninjas Studio;
Output
Initial State

After clicking on the button.

In the above code, when we click on the button, it will call the newstate function, where we update the state using the setState() method.
Props in Class Components
With the help of props, you can send the data from one component to another class component. Also, you can initiate a data flow between the components.
Example
App.js
import React, { Component } from 'react'
import Example from './example'
class Coding Ninjas Studio extends Component {
    constructor(){
      super()
      this.state = {username:"Dhananjay"}
    }

    render() {
      const {username} = this.state
      return (
        <>
        <h3>Hello {username}, Welcome to Coding Ninjas Studio</h3>
        <Example text="Random Text"/>
        </>
      )
    }
  }
export default Coding Ninjas Studio;
Example.js
import React, { Component } from 'react'

class Example extends Component {
  constructor(props){
    super(props)
  }
  render() {
    return (
      <p>{this.props.text}</p>
    )
  }
}

export default Example;
Output

In the above example, we have sent the text variable from the ‘App.js’ file to ‘example.js’. We can access this text variable using the props object in the ‘example.js’ file. Make sure you are passing the props in the constructor as parameters and also in the super function in example.js.
We need the constructor to access the props in example.js because it is the only way to pass the props or data as parameters in the class component in example.js. And to access that prop, you need to pass it as a parameter in the super() function as super(props).
Lifecycle Methods
Lifecycle methods are part of the lifecycle process. In this lifecycle process, there are multiple events. These multiple events work simultaneously, making one cycle known as the lifecycle events.
There are three lifecycle events.
- Mounting
- Updating
-
Unmounting
Mounting
We render the code in our DOM(Document Object Model) in the mounting lifecycle event. There are multiple methods in the mounting process.
- constructor()
- render()
- getDerivedStateFromProps()
-
componentDidMount()
Updating
Updating a component means a change in its state or props. The five built-in methods for updating in React.
- render()
- getDerivedStateFromProps()
- shouldComponentUpdate()
- getSnapshotBeforeUpdate()
-
componentDidUpdate()
Unmounting
Mounting means adding a component to the DOM, so naturally, unmounting means removing it. We use the componentWillUnmount ( ) method in Unmounting. We call this method to remove a component from the DOM.
To learn more about these methods and implementation, you can check out the blog on state and lifecycle.

 9+ registered

