Introduction
Hello Ninjas! In this blog, we are going to discuss coding conventions in HTML which are a proper set of guidelines and conventions one must follow, and the importance of these conventions in our HTML document.
It's crucial to uphold a set of guidelines while creating a website and follow them. Making the code aesthetically pleasing and understandable for consumers and other developers is our responsibility as developers. In order to achieve this uniformity in website construction, there are some fundamental standards that we must adhere to.
This article will discuss the coding conventions in HTML and their types, with an example of each. So, without wasting much time, let's start by first learning the coding conventions in HTML.
Important Coding Conventions
Coding conventions make the software more readable and make it easier for engineers to comprehend new code. If you distribute your source code as a product, you must ensure that it is just as neatly packaged and maintained as any other item you produce.
Declaration of Document Type
We must declare the type of the document in the first line itself because the type of page that the browser should show must be specified. By knowing what kind of page to produce, the browser can better allocate its resources.
Syntax:
<!DOCTYPE html>
Note: It is considered a bad practice not to mention the type of the document.
Use of Meta tag and Viewport
Meta tag: The metadata about the HTML document is displayed using the HTML <meta> tag. The page description, keywords, copyright, language, document creator, etc. comes under the metadata. Although the metadata is not visible on the webpage, search engines, browsers, and other online services that scan the site or webpage utilize it to learn about the webpage.
Viewport: The viewport in a browser refers to the area of a web page that a user may see. The screen sizes of the devices used to view the website have an impact on the viewport's size. A laptop's viewport is greater than that of a phone or tablet.
Example:
<!DOCTYPE html>
<html>
  <head>
    <title>
        Learning Coding Conventions
    </title>

    <meta charset="utf-8" name="viewport"
    content= "width=device-width, initial-scale=2.0">
  </head>
  <body>
    <p>
      	Welcome to Coding Ninjas
    </p>
  </body>
</html>
Use Lowercase Letters
HTML is not a case-sensitive language; hence we could use both lower and uppercase letters in element names and attribute names.
But, it is always recommended to use lowercase letters as-
-
Both writing and visual appeal are improved.
-
Uppercase letters break the consistency of our entire code in HTML documents.
-
It is not appealing to our eyes, making it difficult for the developers to read the written code.
Example:
<!DOCTYPE HTML>
<HTML>
  <BODY>

    <H4>Image Tag</H4>
    <IMG SRC = "images/codingninjas.jpg">

  </BODY>
</HTML>
This looks unsatisfactory, and dirty and is not appealing to our eyes.
Example:
<!DOCTYPE html>
<html>
  <body>

    <h4>Image Tag</h4>
    <img src = "images/codingninjas.jpg">

  </body>
</html>
This looks good and is much better than using uppercase letters.
Close All HTML Element Tags
It is not always necessary to close all the tags (like <p> or paragraph tag); however, it is a great practice to close all the tags that have closing tags. Some tags which don’t require a closing tag are <img>, <br>, <hr>, <col>, etc.
Example:
<!DOCTYPE html>
<html>
  <body>

   <p> Let’s learn about Coding Conventions in HTML
   <p> at Coding Ninjas!

  </body>
</html>
This does not look appealing.
Note- The closing tag of <p> tag, i.e., (</p> tag) is missing here.
Example:
<!DOCTYPE html>
<html>
  <body>

    <p> Let’s learn about Coding Conventions in HTML at Coding Ninjas! </p>

  </body>
</html>
This looks good.
Quote Attribute Values
We can add attribute values without quotes in our HTML document. However, it is always recommended to quote the user attribute values.
This is because quoted values are easier to read and are a must if our value contains spaces.
Example:
<!DOCTYPE html>
<html>
  <body>

    <h4>Image Tag</h4>
    <img src = codingninjas.com/blog/wp-content/uploads/2020/04/LOGO-05.png width="500" height="300">

  </body>
</html>
Output:
This gives an error and doesn’t work correctly.
Note: In the above example, we are trying to link an image to a specific link which is the choice of the user, but the link must always be specified in the quotes and the quotes around the value of the src attribute in the image tag above are missing which produces an error.
Example:
<!DOCTYPE html>
<html>
  <body>

    <h4>Image Tag</h4>
    <img src = "https://www.codingninjas.com/blog/wp-content/uploads/2020/04/LOGO-05.png" width="500" height="300">

  </body>
</html>
Output:
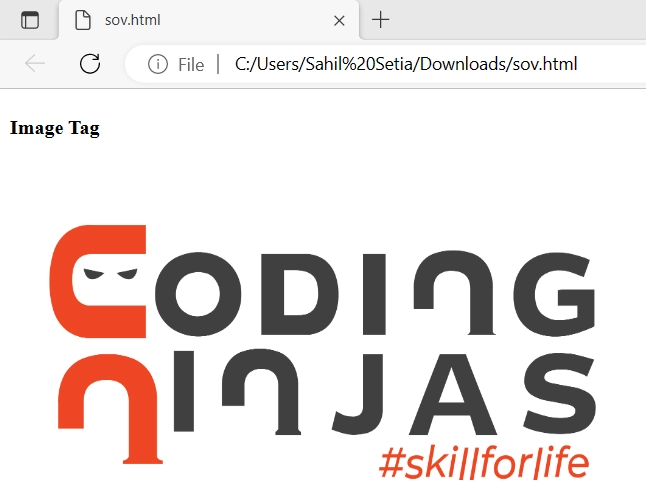
This looks good and works correctly.
Explanation: To link the image with a link, we need to put the quotes in order to get the correct output.
Specify Attributes for Image Tag
It is highly advised to include a value for the image tag's alt attribute. The value of the alt attribute shows what was intended to be displayed if the picture could not be displayed for whatever reason.
Additionally, specifying the width and height attributes of pictures lowers flickering and aids browsers in allocating space for it prior to loading.
Example:
<!DOCTYPE html>
<html>
  <body>

    <h4>Image Tag</h4>
    <img src = "images/codingninjas.jpg">

  </body>
</html>
Output:
But this doesn’t look appealing, and also, when the image fails to load, no alternative is provided to the user.
Example:
<!DOCTYPE html>
<html>
  <body>

    <h4>Image Tag</h4>
    <img src = "images/codingninjas.jpg" alt="Coding Conventions"
    style = "width:128px;height:40px">

  </body>
</html>
Output:
This looks good and also works correctly in case the image is not displayed.
Spaces Around Equal Signs
Although spaces around equal signs are allowed. However, a spaceless layout is simpler to read and better groups objects together.
Example:
<img src = "images/codingninjas.jpg" alt = "Coding Conventions" style = "width:128px;height:40px">
But this doesn’t look appealing.
Example:
<img src="images/codingninjas.jpg" alt="Coding Conventions" style="width:128px;height:40px">
This looks Good.
Avoid Long Lines of Code
Avoid writing long lines of code, as it is not convenient to scroll right and left while using an HTML editor.
At the same time, add blank lines and indentation (of four spaces and not a tab) to enhance readability and try to separate large blocks of code from each other, but do not add too many blank lines.
Example:
<!DOCTYPE html>
<html>
  <body>

    <p>
        Let’s learn about
        </p>
        <p>
        Coding Conventions in HTML
        </p>
        <p>
        at Coding Ninjas!
        </p>
      <h4>
        Image Tag
      </h4>

    <img src = "images/codingninjas.jpg" alt="Coding Conventions"  style="width:128px;height:40px">

  </body>
</html>
But this must look more readable, meaningful, and appealing with proper indentation.
Example:
<!DOCTYPE html>
<html>
  <body>

    <p>
        Let’s learn about Coding Conventions in HTML at Coding Ninjas!
    </p>
    <h4>
        Image Tag
    </h4>

    <img src = "images/codingninjas.jpg" alt="Coding Conventions”
    style="width:128px;height:40px">

  </body>
</html>
This looks good with proper indentation.
Different Heading Levels in HTML
The <h1> to <h6> tags in HTML are used to define headings.
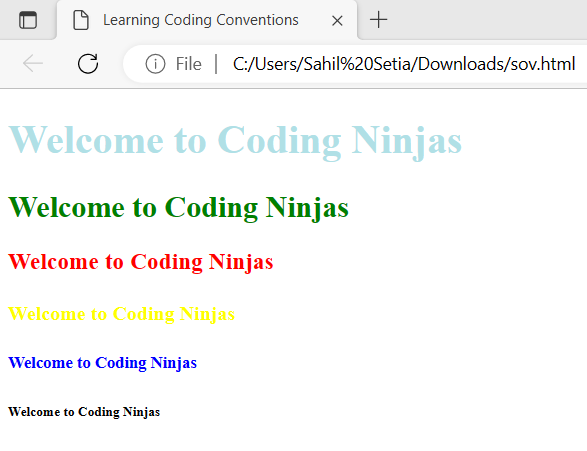
The most significant heading is defined by <h1>. The least significant heading is designated as <h6>. One may choose according to the requirements of the problem which tag to choose.
Example:
<!DOCTYPE html>
<html>
  <head>
    <title>
        Learning Coding Conventions
    </title>
  </head>

  <body>
    <h1 style="color:powderblue;">Welcome to Coding Ninjas</h1>
    <h2 style="color:green;">Welcome to Coding Ninjas</h2>
    <h3 style="color:red;">Welcome to Coding Ninjas</h3>
    <h4 style="color:yellow;">Welcome to Coding Ninjas</h4>
    <h5 style="color:blue;">Welcome to Coding Ninjas</h5>
    <h6 style="color:black;">Welcome to Coding Ninjas</h6>

  </body>
</html>
Output:
Avoid Skipping the Crucial Tags
The crucial tags include title, body, HTML, and body tags. Since the <title> element is crucial for search engine optimization(SEO), the search engine algorithms, in this case, employ the name of a web page. This is to determine the order in which similar search query pages are listed in the search results. The website should have a meaningful name and should be appropriately named.
Moreover, it also provides a title for the page when it is added to favourites.
Syntax:
<title> Coding Conventions in HTML </title>
Without the <html> and <body> elements, an HTML page may still validate, although doing so may cause DOM(Document Object Model) and XML(Extensible Markup Language) software to break or cause issues in outdated browsers.
Example:
<!DOCTYPE html>
<html>
  <head>

    <title>
        Welcome to Coding Ninjas
    </title>

  </head>
  <body>

    <p>
         Let’s learn about Coding Conventions in HTML at Coding Ninjas!
   </p>

  </body>
</html>
Adding lang Attribute in Html Element Tag
It is always recommended to use the lang attribute inside html tag as it helps to declare the language of the Webpage.
So, it also assists search engines and browsers.
Example:
<!DOCTYPE html>
<html lang = “en-us”>
  <body>

    <p>
        Let’s learn about Coding Conventions in HTML at Coding Ninjas!
    </p>

  </body>
</html>
Explanation:
The html lang="en-US"> indicates the language code of the html page followed by the country code, indicating that all text on the page is written in the US style of English. For multi-language screen reader users who would prefer a language other than the default, the HTML document element must have a valid lang property or match to a valid lang code. The language attributes allow us to vary our content's styling by language.
Using Header and Footer Tags
A container for introductory material or a group of navigational links is represented by the "header" element. It mainly includes heading elements, logos, authorship information, etc.
The footer for a document or section is defined by the <footer> tag.
Example:
<!DOCTYPE html>
<html>
  <head>
    <title>
        Learning Coding Conventions
    </title>
  </head>

  <body>
    <header>
      <h1>
          Welcome to Coding Ninjas
      </h1>
    </header>

    <footer>
      For great Learning follow Coding Ninjas
    </footer>
  </body>
</html>
Explanation:
Header tags generally appear at the top within the body content and it is used to specify a header for a document or topic. On the other hand, footer tags are generally attached at the end of the HTML document and it is used to specify the footer for a document or topic.
Comments
Comments are critical as they enhance the readability of our website. We can include both short and long comments in our HTML document depending on the size of the comment. If the comment is 6-7 words single line comments are good to use but if it’s a long comment of about 10-15 words or more, it’s better to use multi-line comments.
There are two types of comments in HTML:
1. Single Line comments
Syntax :
<!-- This is a single-line comment -->
2. Multi-line comments
Syntax:
<!--
This is a multi-line
Comment example.
-->
Example:
<!-- Article at Coding Ninjas -->
<p> Let’s learn about Coding Conventions in HTML at Coding Ninjas! </p>
Using CSS
While using style sheets and mentioning various properties of an element/tag, one must follow:
-
On the same line as the selector, place the opening bracket.
-
Before the starting bracket, add one space.
-
Use an indentation of four spaces.
-
After each set of property-value pairs, including the last property inclusive, use a semicolon.
-
Only include values in quotations if they also contain spaces.
-
Without any preceding spaces, start a new line and insert the closing bracket.
Example:
body {
  color:blue;
  font-family: "Arial";
  font-size: 16px;
}
Accessing HTML Elements with Javascript
It is not necessary to use the type attribute when linking the Javascript files. We can just use the script tag.
Syntax:
<script src="index.js">
To access HTML elements, the id attributes must be used correctly; otherwise, we may encounter errors.
Example:
<!DOCTYPE html>
<html>
  <body>

    <h1 id="Ninja">Welcome to Coding Ninjas.</h1>

    <script>
    <!-- document with id='Ninja' will be overwritten -->
    document.getElementById("Ninja").innerHTML = "HELLO! NINJAS WELCOME";
    </script>

  </body>
</html>
Output:

Explanation:
We have associated an id=" Demo" with the header tag <h1>. In our script function, we access that element using document.getElementById and previous HTML i.e., “Welcome to Coding Ninjas” is replaced by a new one “HELLO! NINJAS WELCOME”.
File Names and File Extensions
We should always use lowercase file names as some web servers(like Apache and Unix) are case-sensitive about file names, and using uppercase letters here could give tons of errors.
Also, HTML files must have a “.html” (or “.htm”)extension, CSS files must have a “.css” extension, and Javascript files must have a “.js” extension.
If a file's URL does not include its filename, the server will add a default filename like “index.html” or “default.html”. We can configure the server with different default filenames to prevent the same name from being used for another file.


