


Introduction
This article will discover how to configure SSO with various software. Single sign-on is an authentication method. It enables users to sign in with a single ID to any number of connected but separate software systems. With true single sign-on, users only need to log in once. After that, they can access services without repeatedly providing their login details.
If you're learning to use Postman to do a specific operation or workflow, you must know the following concepts:
- Requesting resources,
- Evaluating APIs,
- Creating and maintaining APIs,
- Releasing APIs,
- Developing using Postman, and
- Working with your team.
Let's dive into the article to learn more about configuring SSO.

Microsoft AD FS
Step 1: Create an AD FS authentication scheme
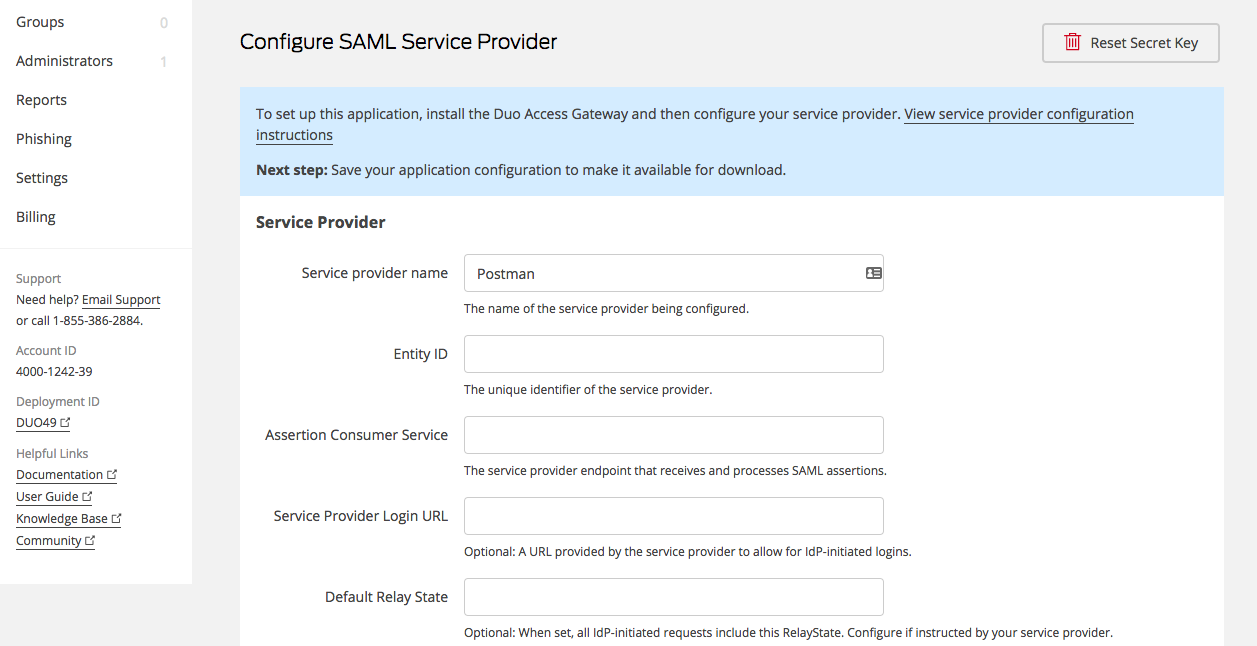
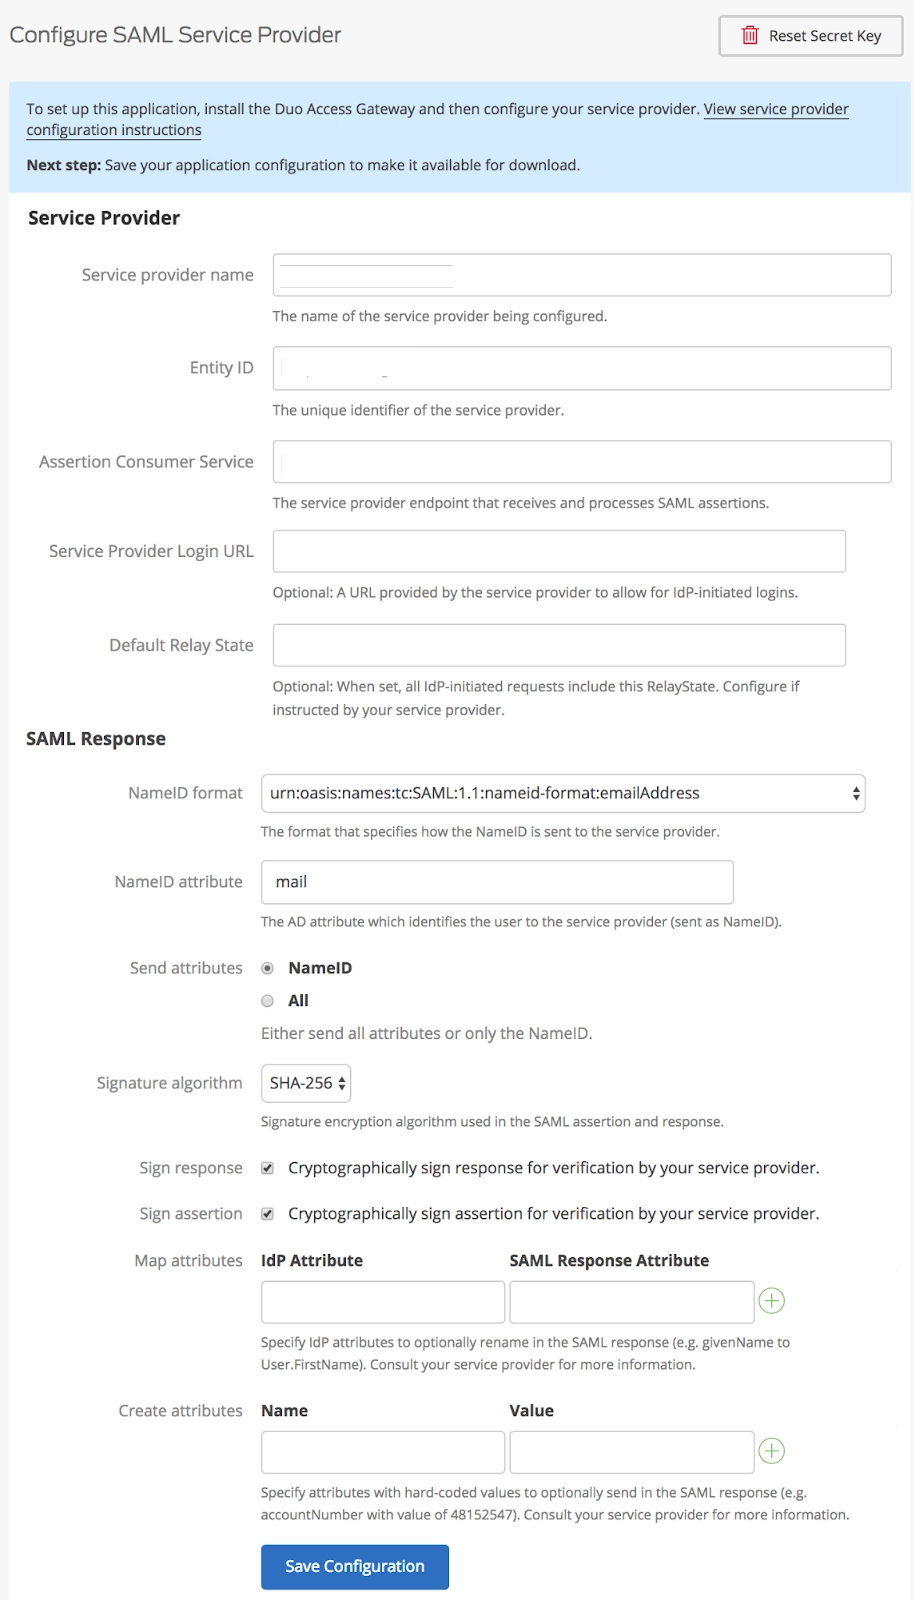
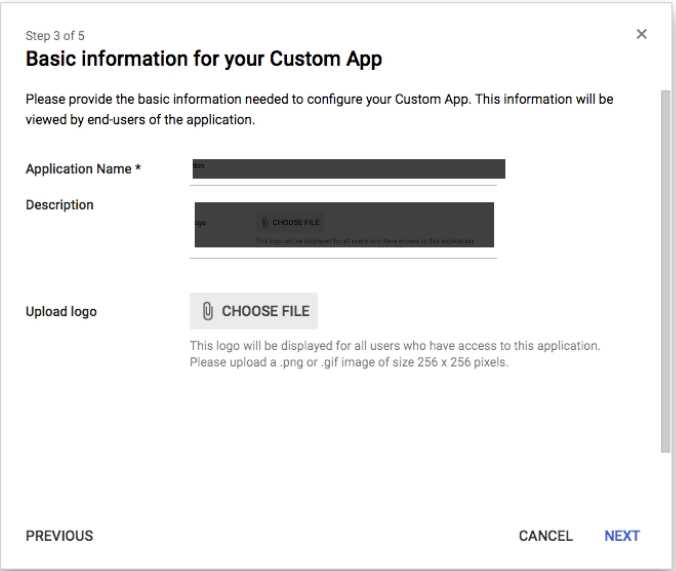
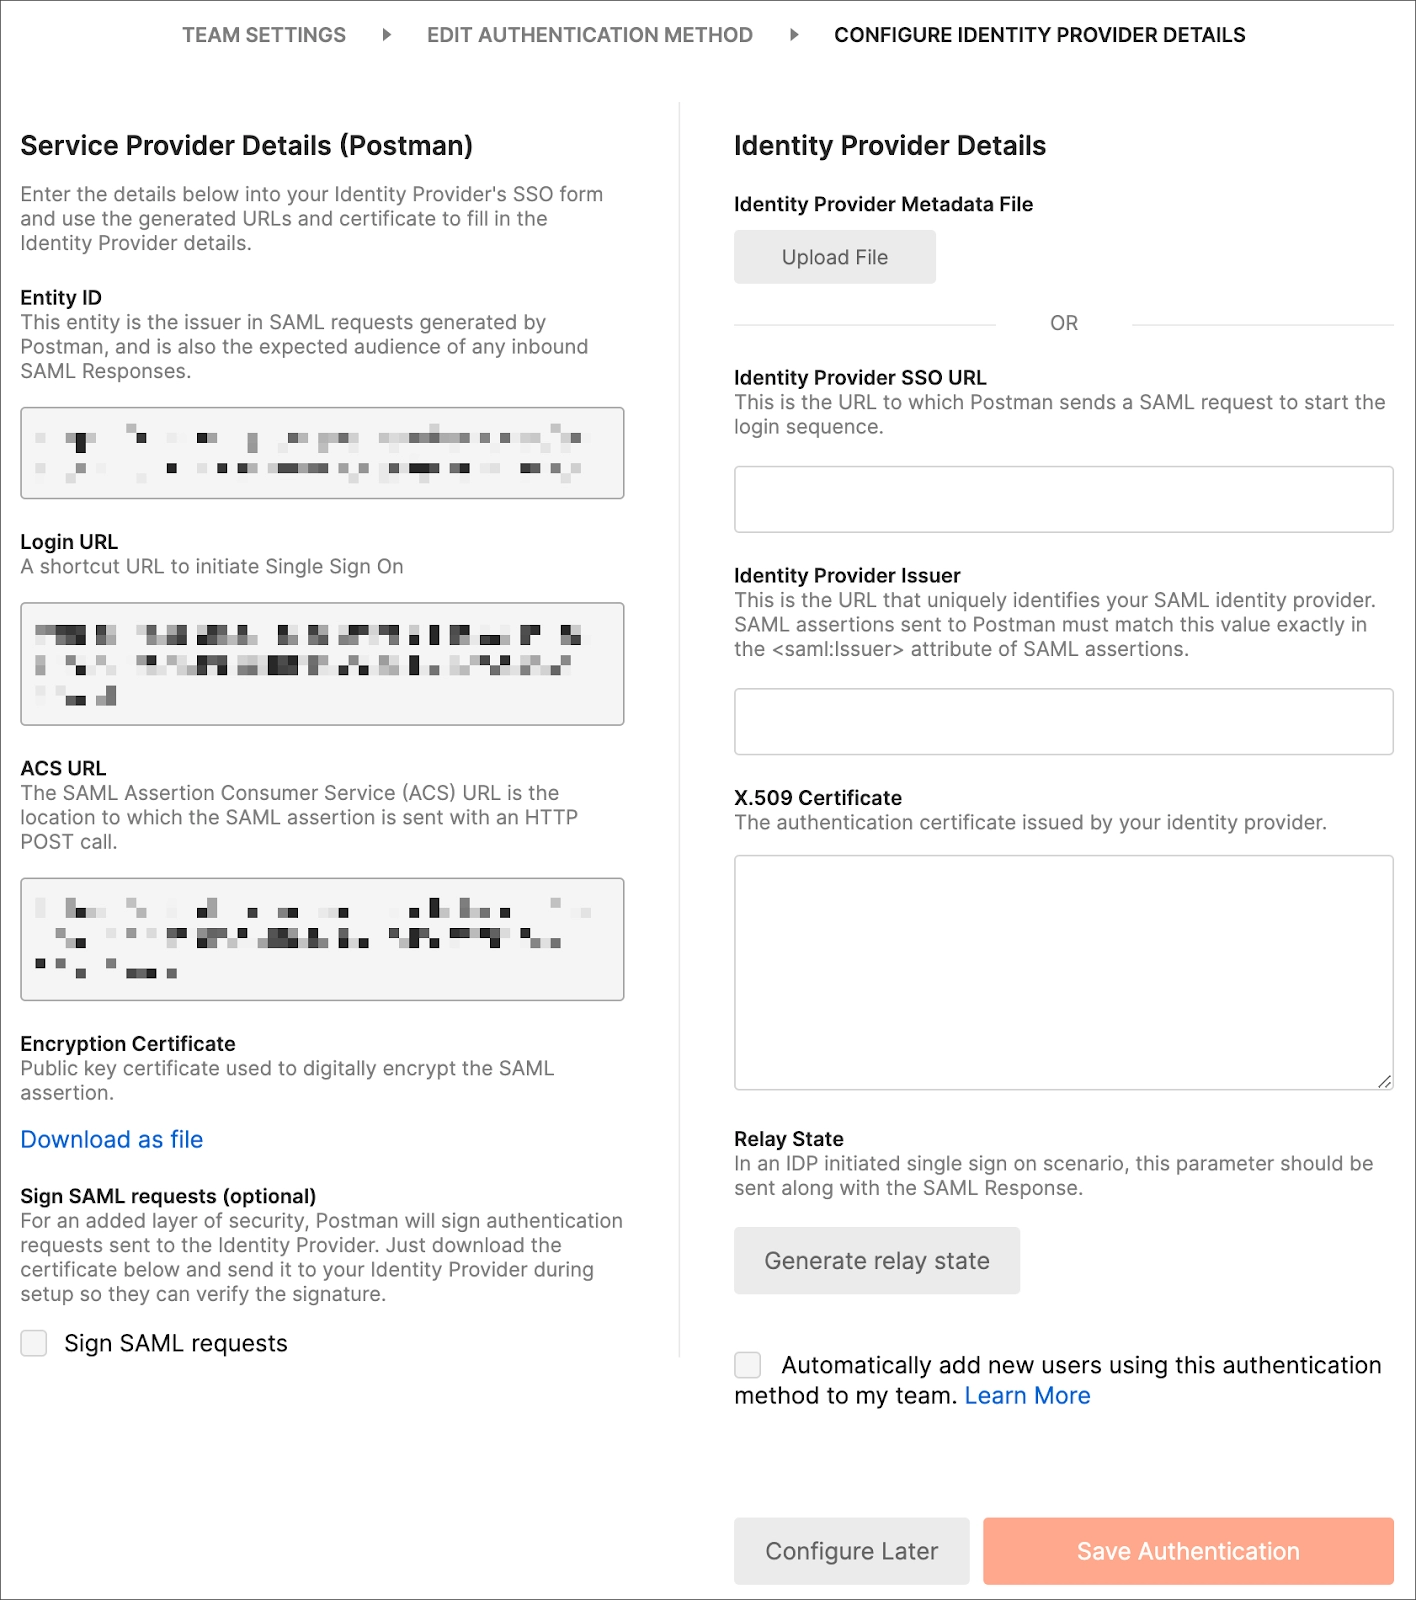
In Postman, you must first build an AD FS authentication scheme. See Configuring SSO for a team to learn how to create this authentication method. After creating the scheme, collect the data for these fields on the Team page.
Step 2: Incorporate a Relying Party Trust
The Relying Party Trust (RPT) protocol describes the link between AD FS and Postman. To include a Relying Party Trust:
- From AD FS Management, pick the Relying Party Trusts folder.
- Choose "Add Relying Party Trust" from the "Actions sidebar" to launch the configuration process for a new trust.
- When you see the Welcome screen, click "Claims aware" and click "Start."
- Choose "Enter Data About the Party Manually" from the "Select Data Source box."
- Choose a Display Name that you'll remember in the future. Notes are an optional addition.
- Use the "default certificate settings" or upload the encryption certificate on the Team page.
- Select SAML 2.0 WebSSO support to be enabled.
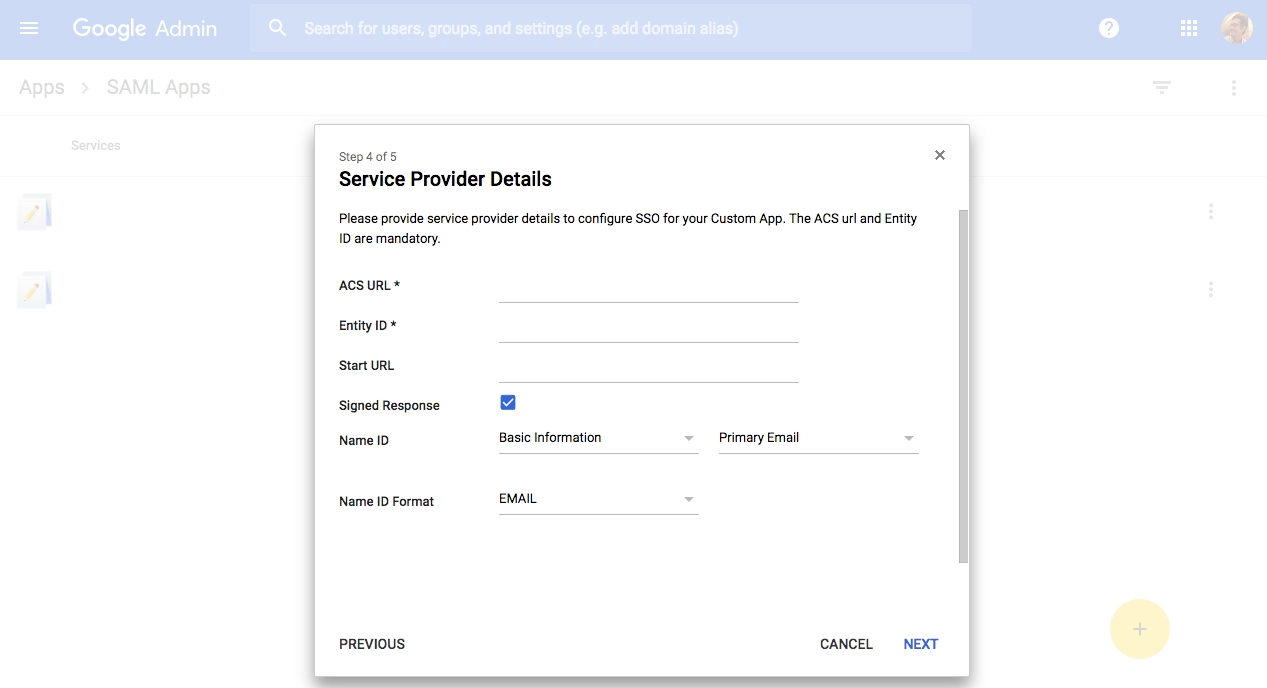
- It would help if you collected the service URL (ACS URL) on the team page.
- Include the following Relying Party Trust Identifier:
- https://identity.getpostman.com
- Choose "Permit everyone."
- The wizard shows an overview of your settings on the following two screens.
- Select Close to close the last screen and launch the Claim Rules editor.
Step 3: Make claim regulations.
You can establish the claim rules when the relying party's trust has been established. To establish a new rule:
- Choose Add Rule. Next, make a rule to Send LDAP Attributes as Claims.
- As your attribute store, use Active Directory. Choose E-Mail Addresses from the LDAP Attribute column.
- Select E-Mail Address under Outgoing Claim Type.
- To save the new rule, choose Finish.
- To add a new rule, choose Add Rule; for the template, choose to Transform an Incoming Claim.
- Select E-mail Address under Incoming Claim Type.
- Select Name ID under Outgoing Claim Type.
- Choose E-mail under Outgoing Name ID Format.
- To finish creating the claim rule, click Finish.
- Two transform rules exist. To confirm, click Edit Claim Issuance Policy.
Step 4: Configure the trust settings.
How to change the trust settings:
- Select RPT and then Properties in the Actions sidebar.
- You should set the secure hash algorithm to SHA-1 in the Advanced tab.
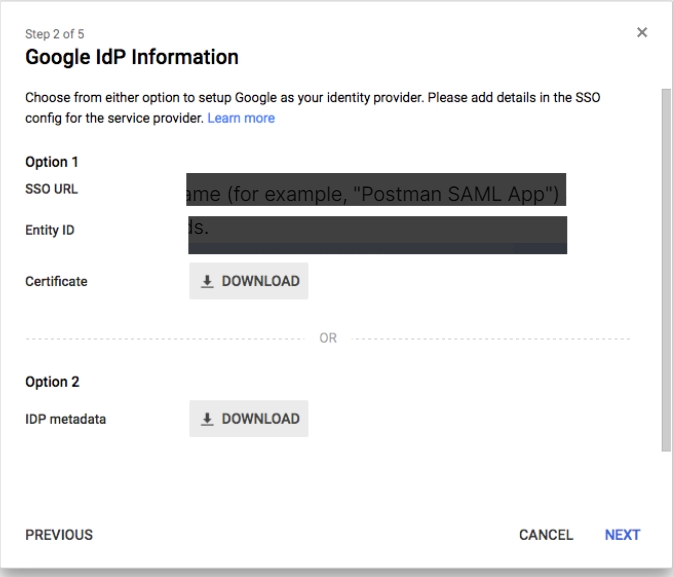
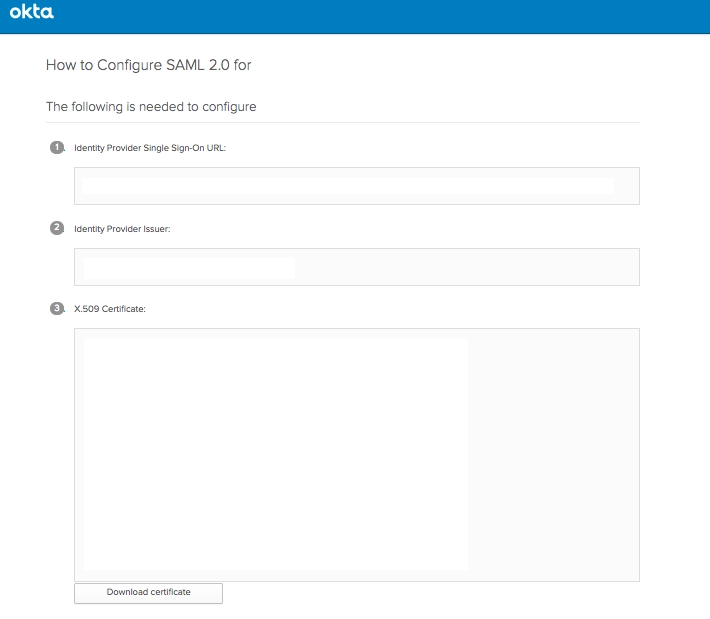
Step 5: Provide identity provider information
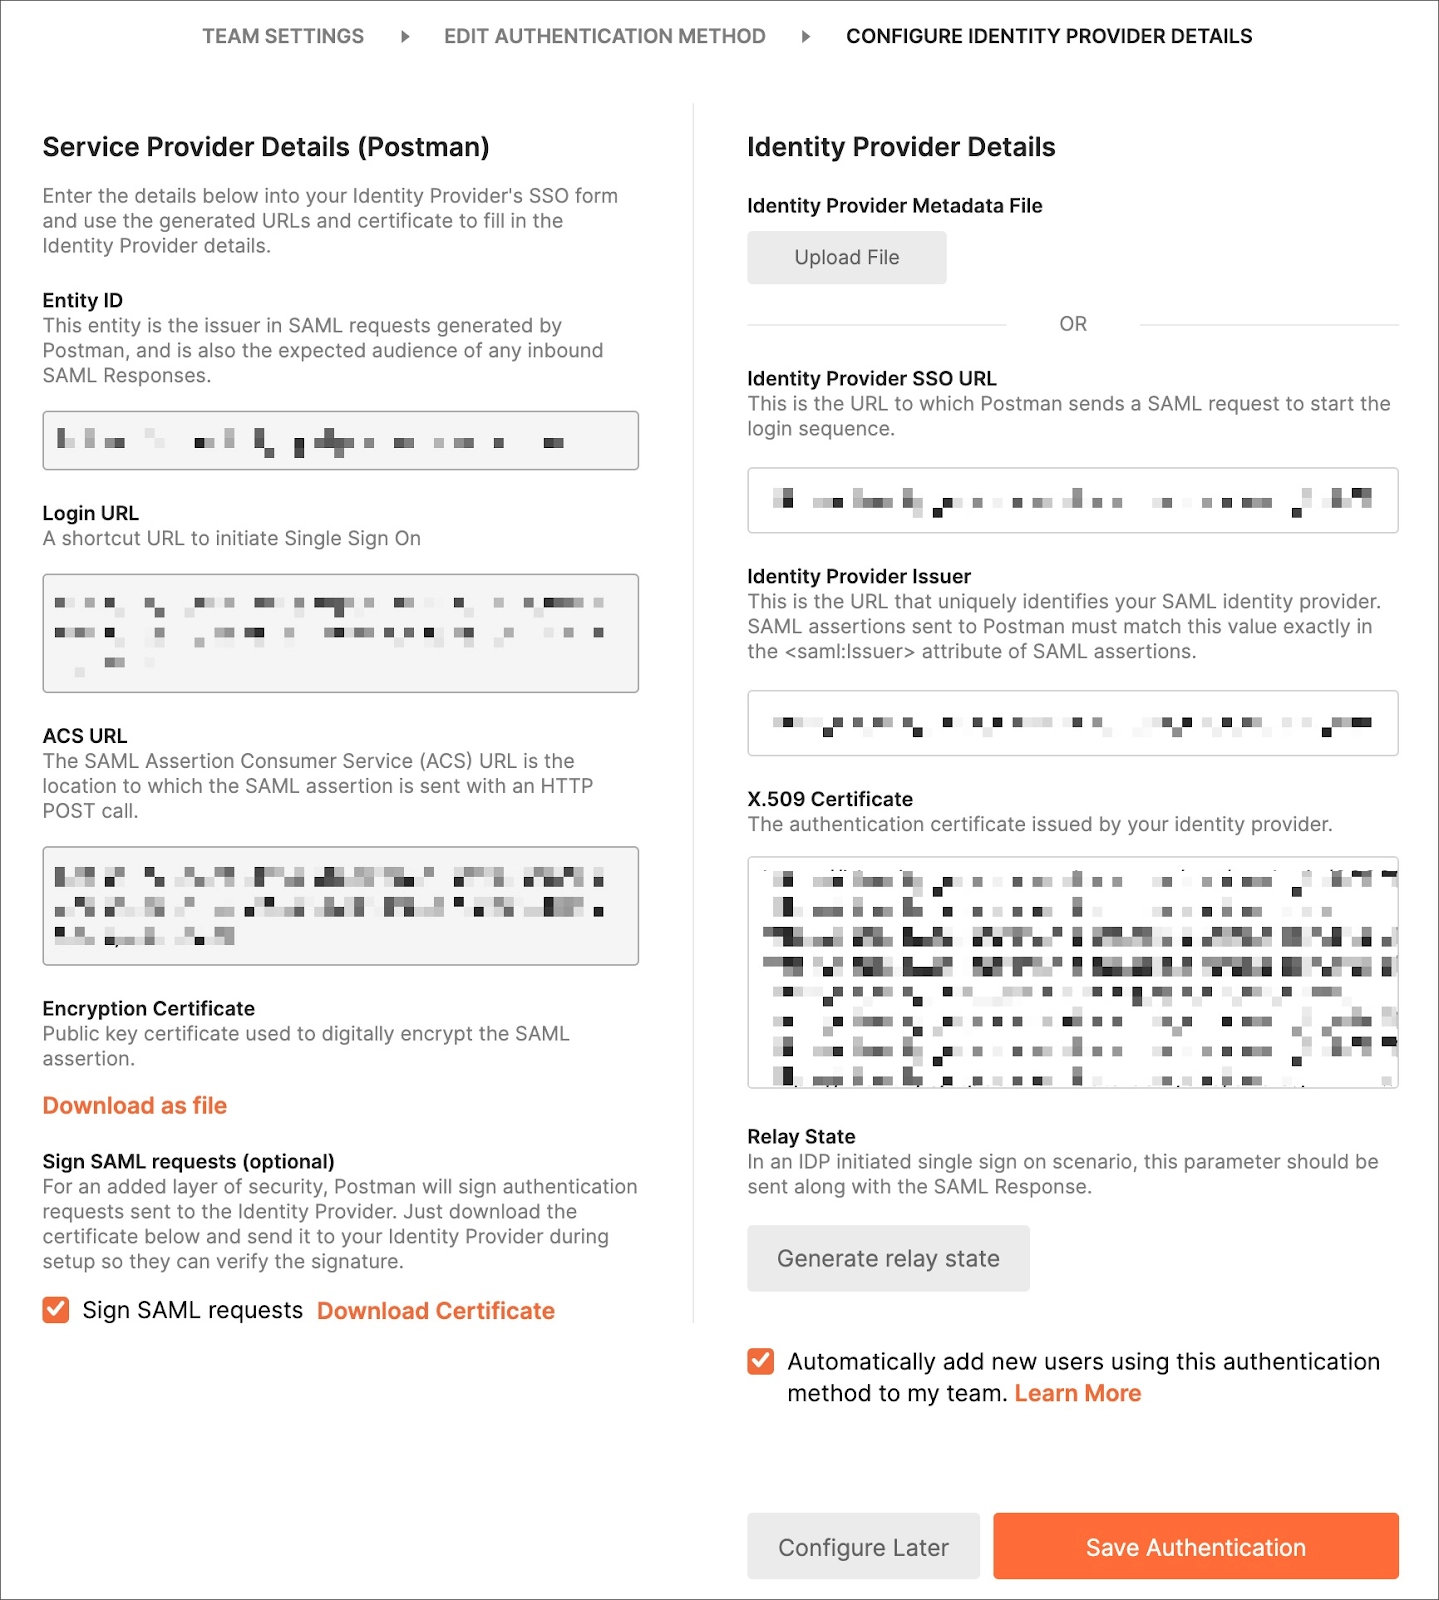
Following setup, Postman must receive the information from your Identity Provider.
- Get the FederationMetadata.xml document. This document is frequently located at: https://Federation Service name>/FederationMetadata/2007-06/FederationMetadata.xml.
- In the Team page's Identity Provider Details section, insert the Identity Provider Single Sign-On URL, Identity Provider Issuer, and X.509 Certificate you extracted from the metadata file.
Step 6: RelayState should be enabled on your AD FS servers.
The RelayState parameter on your AD FS servers must then be enabled.
- Open the following text editor file for AD FS 2.0:
%systemroot%\inetpub\adfs\ls\web.config
2. Open the following document with a text editor for AD FS 3.0:
%systemroot%\ADFS\Microsoft.IdentityServer.Servicehost.exe.config
- Add the following line for useRelyStateForIdpInitiatedSignOn in the microsoft.identityServer.web> section. Then save the change:
<microsoft.identityServer.web> ... <useRelayStateForIdpInitiatedSignOn enabled="true" /> ...</microsoft.identityServer.web>- Run IISReset to restart IIS for AD FS 2.0.
- Restart the Active Directory Federation Services (adfssrv) service on both systems.
- Make sure the code useRelayStateForIdpInitiatedSignOn enabled="true" /> at microsoft.identityServer.web has been inserted. Then perform the following to create a URL encoded string using the relay state and Entity ID.
- The RPID and Relay State value must be URL encoded.
-
Combine the URL-encoded values with the following string to create the entire string.
- String -
- RPID=<URL encoded RPID>&RelayState=<URL encoded RelayState>
- URL encoded string - RPID%3Dhttps%253A%252F%252Fidentity-example.getpostman.com%26RelayState%3D+35ef7ab89gh99hh00
- String with values - RPID=https%3A%2F%2Fidentity-example.getpostman.com&RelayState=35ef7ab89gh99hh00
- Add the last string to the URL for IDP-initiated sign-on.
Visit the final URL in the browser the first time you log in using Azure AD. In the future, users will be able to log in via SSO thanks to this setting of the relay state.


 18+ registered

