Types of Context in Android
In Android, there are primarily two types of context available. These are as follows:
- Application Context
- Activity Context
Let us discuss each one of them in detail with relatable examples.
Activity Context
Since we know that each and every screen got an activity. We log in to our Instagram id; during the login process, the login page on our screen is an activity. The page on our screen with recycler view after login is an activity. So, simply an app is a collection of activities, and in the case of activity context, the getContext() function is used to invoke the Activity Context.
Context is connected to an Activity and its lifecycle in getContext(). Context can be thought of as a layer that sits behind Activity and will last as long as Activity does. The context will die when the Activity dies(mean when on destroy is called in Activity).
Usage:
Activity Context is most useful when we are doing the UI-related work(front end work) like creating a toast or alert dialog box or an object with utilization only up to the lifecycle of that Activity.
Here is a set of features provided by Activity's Context: Start a Service, Bind to a Service, Show a Dialog, Start an Activity, Load Resource Values, Register BroadcastReceiver, Layout Inflation, Send a Broadcast.
Let us see the use of getContext() method with an example of onClick on a button for an intent.
Code:
MainActivity.java:
package com.akshitpant.codingninjas_context;
import androidx.appcompat.app.AppCompatActivity;
import android.content.Context;
import android.content.Intent;
import android.os.Bundle;
import android.view.View;
import android.widget.EditText;
import android.widget.TextView;
import java.io.Serializable;

public class MainActivity extends AppCompatActivity {
    Context mcontext;
    @Override
    protected void onCreate(Bundle savedInstanceState) {
        super.onCreate(savedInstanceState);
        setContentView(R.layout.activity_main);
    }

    public void clickMeWork(View view) {
        mcontext = view.getContext();
        EditText enterName = findViewById(R.id.enterName);
        Intent myIntent = new Intent(mcontext, MainActivity3.class);
        myIntent.putExtra("myName", enterName.getText().toString());
        mcontext.startActivity(myIntent);
    }
}
activity_main.xml:
<?xml version="1.0" encoding="utf-8"?>
<androidx.constraintlayout.widget.ConstraintLayout xmlns:android="http://schemas.android.com/apk/res/android"
   xmlns:app="http://schemas.android.com/apk/res-auto"
   xmlns:tools="http://schemas.android.com/tools"
   android:layout_width="match_parent"
   android:layout_height="match_parent"
   tools:context=".MainActivity">

   <Button
       android:id="@+id/clickMeBttn"
       android:layout_width="wrap_content"
       android:layout_height="wrap_content"
       android:onClick="clickMeWork"
       android:text="@string/clickme"
       app:layout_constraintBottom_toBottomOf="parent"
       app:layout_constraintEnd_toEndOf="parent"
       app:layout_constraintStart_toStartOf="parent"
       app:layout_constraintTop_toTopOf="parent" />

   <EditText
       android:id="@+id/enterName"
       android:layout_width="wrap_content"
       android:layout_height="wrap_content"
       android:hint="@string/enter_your_name"
       app:layout_constraintBottom_toTopOf="@+id/clickMeBttn"
       app:layout_constraintEnd_toEndOf="parent"
       app:layout_constraintStart_toStartOf="parent"
       app:layout_constraintTop_toTopOf="parent"
       />
</androidx.constraintlayout.widget.ConstraintLayout>
MainActivity3.java:
package com.akshitpant.codingninjas_context;
import androidx.appcompat.app.AppCompatActivity;
import android.os.Bundle;
import android.widget.TextView;

public class MainActivity3 extends AppCompatActivity {
    String myName;
    @Override
    protected void onCreate(Bundle savedInstanceState) {
        super.onCreate(savedInstanceState);
        setContentView(R.layout.activity_main3);
        myName  = (String)getIntent().getStringExtra("myName");
        TextView helloTxt = findViewById(R.id.helloTxt);
        helloTxt.setText(myName);

    }
}
activity_main3.java:
<?xml version="1.0" encoding="utf-8"?>
<androidx.constraintlayout.widget.ConstraintLayout xmlns:android="http://schemas.android.com/apk/res/android"
   xmlns:app="http://schemas.android.com/apk/res-auto"
   xmlns:tools="http://schemas.android.com/tools"
   android:layout_width="match_parent"
   android:layout_height="match_parent"
   tools:context=".MainActivity3">

   <TextView
       android:id="@+id/helloTxt"
       android:layout_width="wrap_content"
       android:layout_height="wrap_content"
       android:textSize="40sp"
       app:layout_constraintBottom_toBottomOf="parent"
       app:layout_constraintEnd_toEndOf="parent"
       app:layout_constraintStart_toStartOf="parent"
       app:layout_constraintTop_toTopOf="parent" />
</androidx.constraintlayout.widget.ConstraintLayout>
Output:


Here, we tried to open a new layout in activity3(3rd output); after clicking ClickMe button, We can add our desired layout in MainActivity3.class. The intent is passed from activity1 to activity3 using view.getContext() so this is how we can use Activity Context in Android.
Application Context
It's used to get the context associated with the Application, which contains all of the activities running within it. Our context is connected to the Application and its lifetime in getApplicationContext(). It can be thought of as a layer that sits behind the entire program. So, as long as it does not kill (on destroy call) the entire Application, this context stays alive.
As a result, the following is a list of functionalities for the Application's Context: Load Resource Values, Bind to a Service, Register BroadcastReceiver, Start a Service, Send a Broadcast.
Let us learn more about application context with the example given below.
Code:
MainActivity.java:
package com.akshitpant.codingninjas_context;
import androidx.appcompat.app.AppCompatActivity;
import android.os.Bundle;
import android.view.View;
import android.widget.Toast;
public class MainActivity extends AppCompatActivity {
    @Override
    protected void onCreate(Bundle savedInstanceState) {
        super.onCreate(savedInstanceState);
        setContentView(R.layout.activity_main);
    }
    public void clickMeWork(View view) {
        Toast.makeText(getApplicationContext(), "You Clicked Me :)", Toast.LENGTH_LONG).show();
    }
}
activity_main.xml:
<?xml version="1.0" encoding="utf-8"?>
<androidx.constraintlayout.widget.ConstraintLayout xmlns:android="http://schemas.android.com/apk/res/android"
    xmlns:app="http://schemas.android.com/apk/res-auto"
    xmlns:tools="http://schemas.android.com/tools"
    android:layout_width="match_parent"
    android:layout_height="match_parent"
    tools:context=".MainActivity">
    <Button
        android:id="@+id/clickMeBttn"
        android:layout_width="wrap_content"
        android:layout_height="wrap_content"
        android:onClick="clickMeWork"
        android:text="@string/toastclickme"
        app:layout_constraintBottom_toBottomOf="parent"
        app:layout_constraintEnd_toEndOf="parent"
        app:layout_constraintStart_toStartOf="parent"
        app:layout_constraintTop_toTopOf="parent" />
</androidx.constraintlayout.widget.ConstraintLayout>
Output:

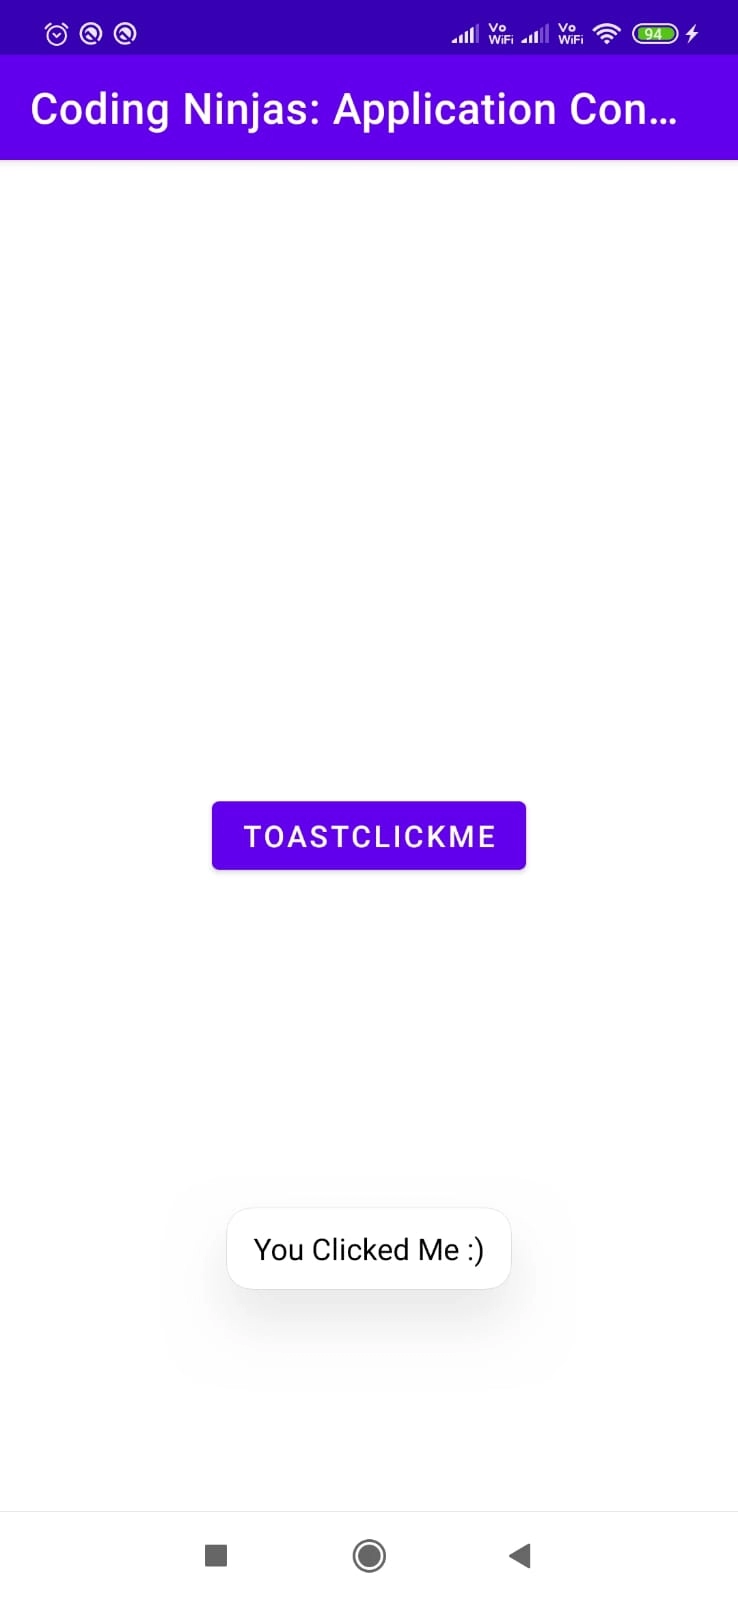
Here, We created a toast “ You Clicked Me :) ” in which context was passed using getApplicationContext() in the main Activity.
Activity vs Application Context
Now, as you have read about Activity context and Application context, This must be a thought in your mind that what is the difference between activity and application context and when to use which one of them.
The main difference is that the Application's Context is unrelated to the user interface. This means that We shouldn't utilize it to Inflate a Layout, Show a Dialog(alert dialogue builder) or Start an Activity. The rest of the functionality from the Activity's Context is likewise available in the Application's Context.
Choosing a context
By now, we have a basic idea of what is context types of context and how to use them. But, when determining which context to use, there is one thing to keep in mind, a context that is linked to the lifespan of a component.
But, Why is this so important?
Because picking the wrong one can result in a memory leak, which can lead to your app malfunctioning and result in very unsatisfactory consequences.
Check this out : usb debugging
FAQs
-
In Android, what is the context of a fragment?
We may access the Activity associated with a fragment by using getActivity() method.
-
When could one use getBaseContext()?
The getBaseContext() method can only be used if we have a ContextWrapper. Android provides a ContextWrapper class that wraps an existing context using the following syntax:
ContextWrapper myWrapper = new ContextWrapper(context);
-
Is there any benefit of using getBaseContext()?
Yes, Using a ContextWrapper has the advantage of allowing you to "change behavior without affecting the original Context.
-
How is 'this' used for passing context?
“this" is a type of context which can be used in a similar manner for passing Activity's recent value of context, for example:
Toast.makeText(this,"your toast message",Toast.LENGTH_LONG).show();
Key Takeaways
Cheers if you reached here!
The purpose of this article was to introduce the reader to the context and their types in Android and give some basic idea about how to choose, initialize and use them practically in our code.
You can head over to our Android Development Course on the Coding Ninjas Website to dive deep into Android Development and build future applications.
We hope that this blog has helped you enhance your knowledge regarding context and if you would like to learn more, check out our articles about UI elements and various layouts on articles. Do upvote our blog to help other ninjas grow.


 9+ registered

