


Introduction
This guide leads you to step by step process from setting up an empty basic Struts2 WebApp to the code part with a detailed code explanation and execution to build our first struts2 application.

Creating First Struts 2 Application
In a Struts 2 web application, when you click a link or submit an HTML form, the input is sent to a Java class called 'Actions' that you provide rather than to another server page. A Result chooses a resource to render the response after the Action fires. A server page serves as the resource most of the time, but it can also be an Excel spreadsheet, a PDF doc, or a Java applet window.
Consider making a straightforward "Hello World" example that shows a greeting. You need to perform four things to create a "Hello World" example after setting up an empty basic Struts2 WebApp:

- The Model - to store the welcome message, create a class
- The View - to present the message, create a server page
- The Controller - to control the interaction between the user, the model, and the view, create an Action class.
- Create a mapping (struts.xml) to couple the Action class and the View.
By constructing these components, we are dividing the workflow into three well-known concerns: the View, the Model, and the Controller. It is simpler to manage applications by separating the concerns as they become more complex.
Let us look at an example model class, Action, server page, and mapping. Start your Java IDE if you'd like to enter the code as we go.
Setting up an empty raw Struts 2 web application
Create A Dynamic Web Project
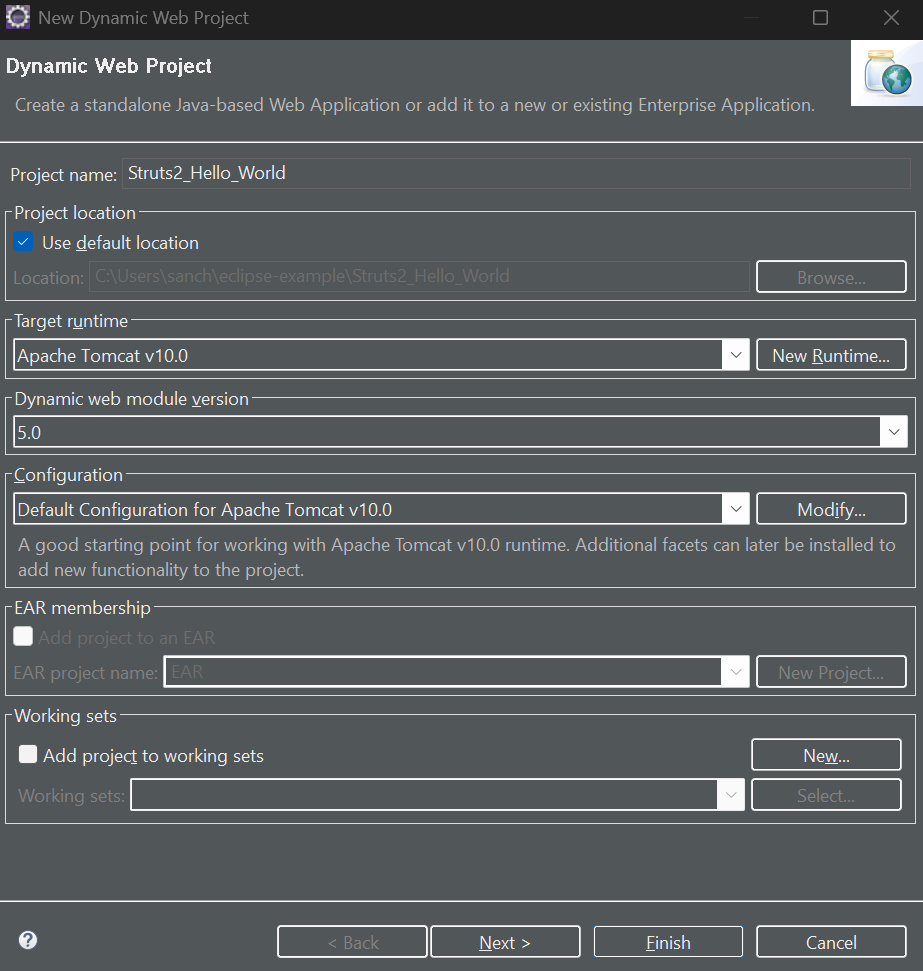
Open your Eclipse IDE and Navigate to File -> New -> Dynamic Web Project. Then input your project name (say Struts2_Hello_World) and Click on New Runtime and go to the Apache folder and select any version of Apache Tomcat (say Apache Tomcat v10.0) click on Next and select the appropriate Java Runtime Environment (say jdk-18.0.2) and now click on Finish, you will get back to main Dynamic Web Project screen as shown below -
Now click on Next twice and check the box to generate the deployment descriptor -
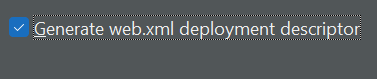
and click on Finish.
Must Read Apache Server
Project Explorer
Navigate to Windows -> Show View -> Project Explorer it will show like the image below -

Adding essential Dependencies
Click on this link and download the file, extract it and copy all files. Now navigate to Struts2_Hello_World/src/main/webapp/WEB-INF/lib and right click on the lib folder and click on paste it will show like the image below -

So far, we are done with setting empty basic Struts2 WebApp now, let us move on to creating the whole WebApp.
The Code and Execution
Let's modify the basic-struts project
Step 1 - Creating the Model Class MessageStore.java
In src/main/java create the MessageStore class
MessageStore.java
package org.apache.struts.helloworld.model;

public class MessageStore {
    private String message;

    public MessageStore() {
        message = "Hello Struts User";
    }


    public String getMessage() {
        return message;
    }
}
Step 2 - Creating the Action Class HelloWorldAction.java
To act as the controller, we require an Action class. A user action is responded to by the Action class (in this example, that user action will be clicking an -> HTML hyperlink and sending a specific URL to -> Servlet container). A String result is returned when one or more of the Action class's methods have been executed. A specific view page (in this case, HelloWorld.jsp) is rendered based on the value of the result.
HelloWorldAction.java
package org.apache.struts.helloworld.action;
import org.apache.struts.helloworld.model.MessageStore;
import com.opensymphony.xwork2.ActionSupport;


public class HelloWorldAction extends ActionSupport {
    private MessageStore messageStore;


    public String execute() {
        messageStore = new MessageStore() ;

        return SUCCESS;
    }


    public MessageStore getMessageStore() {
        return messageStore;
    }
}
Code explanation -
In response to a user action, the Struts 2 framework will generate an object of the HelloWorldAction class and invoke the execute method (clicking on a hyperlink that sends a specific URL to the Servlet container).
The execute method in this example creates an object of class MessageStore, and then it returns the String constant SUCCESS.
Step 3 - Creating The View HelloWorld.jsp
To display the message that is kept in the model class MessageStore, we require a server page. Create the below JSP file in the src/main/webapp folder.
HelloWorld.jsp
<!DOCTYPE html>
<%@ page language="java" contentType="text/html; charset=UTF-8" pageEncoding="UTF-8" %>
<%@ taglib prefix="s" uri="/struts-tags" %>
<html>
  <head>
    <meta http-equiv="Content-Type" content="text/html; charset=UTF-8">
    <title>Hello World!</title>
  </head>
  <body>
    <h2><s:property value="messageStore.message" /></h2>
  </body>
</html>
Code Explanation -
The taglib directive instructs the Servlet container that the Struts 2 tags on this page will be preceded by an s.
The value returned by invoking the getMessageStore function of the HelloWorldAction controller class is shown in the <s:property> tag. That method returns a MessageStore object. The Struts 2 framework is instructed to invoke the getMessage method of the MessageStore object by appending the .message prefix to the messageStore portion of the value attribute. A String is returned by the getMessage method of the MessageStore class. The <s:property> tag will present that String on the screen.
Step 4 - Adding the Struts Configuration in struts.xml
To connect the URL, the HelloWorldAction class (the controller), and the HelloWorld.jsp (the view), we need a mapping. The mapping instructs the Struts 2 framework on which class will react to the user's action (the URL), which function of that class will be executed, and what view to render in response to the String result the method returns.
To add the action mapping, edit the struts.xml file. After the action mapping with name="index" add the action node (action name="helloworld") between the opening and closing package nodes.
struts.xml
<?xml version="1.0" encoding="UTF-8"?>
<!DOCTYPE struts PUBLIC
"-//Apache Software Foundation//DTD Struts Configuration 2.5//EN"
"http://struts.apache.org/dtds/struts-2.5.dtd">
<struts>
    <constant name="struts.devMode" value="true" />


    <package name="basicstruts2" extends="struts-default">
        <action name="index">
            <result>/index.jsp</result>
        </action>

        <action name="helloworld" class="org.apache.struts.helloworld.action.HelloWorldAction" method="execute">
            <result name="success">/HelloWorld.jsp</result>
        </action>
    </package>
</struts>
We must add a Servlet filter class and filter mapping to web.xml in order for the Struts 2 framework to operate with our web application.
web.xml Servlet Filter
<?xml version="1.0" encoding="UTF-8"?>
<web-app id="WebApp_ID" version="2.4"
xmlns="http://java.sun.com/xml/ns/j2ee"
xmlns:xsi="http://www.w3.org/2001/XMLSchema-instance"
xsi:schemaLocation="http://java.sun.com/xml/ns/j2ee http://java.sun.com/xml/ns/j2ee/web-app_2_4.xsd">
<display-name>Basic Struts2 Application</display-name>
<welcome-file-list>
<welcome-file>index</welcome-file>
</welcome-file-list>


<filter>
<filter-name>struts2</filter-name>
<filter-class>org.apache.struts2.dispatcher.filter.StrutsPrepareAndExecuteFilter</filter-class>
</filter>


<filter-mapping>
<filter-name>struts2</filter-name>
<url-pattern>/*</url-pattern>
</filter-mapping>


</web-app>
Step 5 - Creating the URL Action
Let's add an Action URL to the index.jsp file (located in the src/main/webapp folder) so that when a user clicks a link, Struts 2 is instructed to execute the HelloWorldAction class's execute method and render the HelloWorld.jsp view.
At the top of the jsp, add the taglib directive by adding <%@ taglib prefix="s" uri="/struts-tags"%>. After the h1 tag, insert the following p tag: <p><a href="s:url action='helloworld'/>">Hello World</a></p>. Your updated index.jsp should resemble:
index.jsp
<!DOCTYPE html>
<%@ page language="java" contentType="text/html; charset=UTF-8" pageEncoding="UTF-8" %>
<%@ taglib prefix="s" uri="/struts-tags" %>
<html>
    <head>
        <meta http-equiv="Content-Type" content="text/html; charset=UTF-8">
        <title>Basic Struts 2 Application - Welcome</title>
    </head>
    <body>
        <h1>Welcome To Struts 2!</h1>
        <p><a href="<s:url action='helloworld'/>">Hello World</a></p>
    </body>
</html>
Code Explanation -
The hello action is used by the Struts url tag to build the URL. The HelloWorldAction class and execute method of the HelloWorldAction class were mapped to the hello action. The execute method of the HelloWorldAction class will be called by the Struts 2 framework when the user clicks on the aforementioned URL. The view page HelloWorld.jsp will be shown after that method returns the String success (constant SUCCESS).
Step 6- Enabling detailed Log
Under WEB-INF/classes folder, create a 'logging.properties' file to enable the complete logging functionality. Add below two lines in the property file.
org.apache.catalina.core.ContainerBase.[Catalina].level = INFO
org.apache.catalina.core.ContainerBase.[Catalina].handlers = \
   java.util.logging.ConsoleHandler
Step 7- Procedure for Executing the Application
Create a War file by right-clicking on the project name and go to Export -> WAR File. Deploy that WAR file in the WebApps directory of the tomcat. Now start the Tomcat server and access the URL http://localhost:8080/helloworld/index.action. It will show as image shown below -

Click on -> Hello World link, and you should get -> HelloWorld.jsp page:


 9+ registered

