Project Configuration
In the project configuration section, we will create an instance of the Flask application, set up the database configurations, create a database object, and create a marshmallow object.
Paste the code given below into the app.py file.
# Initialize app
app = Flask(__name__)
basedir = os.path.abspath(os.path.dirname(__file__))

# Database Configuration
app.config['SQLALCHEMY_DATABASE_URI'] = 'sqlite:///' + os.path.join(basedir, 'db.sqlite')
app.config['SQLALCHEMY_TRACK_MODIFICATIONS'] = False

# Initialize db
db = SQLAlchemy(app)

# Initialize ma
ma = Marshmallow(app)

You can also try this code with Online Python Compiler
db = SQLAlchemy(app) creates an object of SQLAlchemy and stores it in a variable db.
ma = Marshmallow(app) creates an object of Marshmallow and stores it in a variable ma.
Creating The Product Model
We will create a Product model that will be a Python class representing the Product table in the database.
Paste the code given below into the app.py file.
# Product Model
class Product(db.Model):
  id = db.Column(db.Integer, primary_key=True)
  name = db.Column(db.String(100), unique=True)
  description = db.Column(db.String(200))
  price = db.Column(db.Float)
  quantity = db.Column(db.Integer)

  def __init__(self, name, description, price, quantity):
    self.name = name
    self.description = description
    self.price = price
    self.quantity = quantity
You can also try this code with Online Python Compiler
Now, we will create and initialize a Product Schema.
Paste the code given below into the app.py file.
# Product Schema
class ProductSchema(ma.Schema):
  class Meta:
    fields = ('id', 'name', 'description', 'price', 'quantity')

# Init schema
product_schema = ProductSchema()
products_schema = ProductSchema(many=True)
You can also try this code with Online Python Compiler
product_schema will be used when dealing with a single product.
products_schema will be used when dealing with a list of products or multiple products.
Finally, we will create our Database (db.sqlite) where all the data will be stored.
With the help of sqlalchemy, we can quickly create our database in two simple commands.
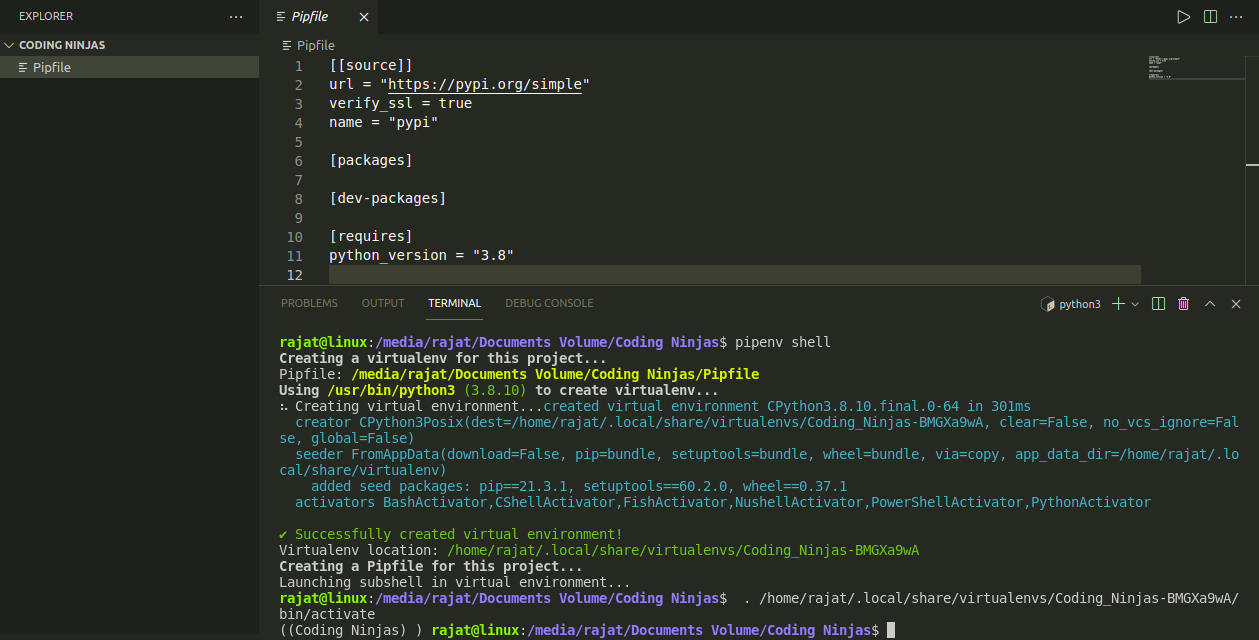
Switch to your python shell by writing python in the CLI and clicking enter. Then run the below commands one by one in sequence to create your database.
>> from app import db
>> db.create_all()
>> exit()
You can also try this code with Online Python Compiler
After successfully executing the above commands, a new file db.sqlite will be created in your project’s root folder.
We have created our database in the following picture.

Creating The API Endpoints
In this section, we will create all the REST Endpoints for our application.
POST Endpoint:
Paste the code given below into the app.py file.
# Create a Product
@app.route('/product', methods=['POST'])
def add_product():
  name = request.json['name']
  description = request.json['description']
  price = request.json['price']
  quantity = request.json['quantity']

  new_product = Product(name, description, price, quantity)

  db.session.add(new_product)
  db.session.commit()

  return product_schema.jsonify(new_product)
You can also try this code with Online Python Compiler
URL: http://localhost/product
The above endpoint allows us for a POST request and creates a new Product in the database. It only allows creating a single Product at a time.
GET Endpoint:
Paste the code given below into the app.py file.
# Get All Products
@app.route('/product', methods=['GET'])
def get_products():
  all_products = Product.query.all()
  result = products_schema.dump(all_products)
  return jsonify(result)
You can also try this code with Online Python Compiler
URL: http://localhost/product
The above endpoint returns a list of current products present in the database.
Paste the code given below into the app.py file.
# Get Single Products
@app.route('/product/<id>', methods=['GET'])
def get_product(id):
  product = Product.query.get(id)
  return product_schema.jsonify(product)
You can also try this code with Online Python Compiler
Example URL: http://localhost/product/1
The above endpoint returns a single Product with the specified ID in the database.
PUT Endpoint:
Paste the code given below into the app.py file.
# Update a Product
@app.route('/product/<id>', methods=['PUT'])
def update_product(id):
  product = Product.query.get(id)

  name = request.json['name']
  description = request.json['description']
  price = request.json['price']
  quantity = request.json['quantity']

  product.name = name
  product.description = description
  product.price = price
  product.quantity = quantity

  db.session.commit()

  return product_schema.jsonify(product)
You can also try this code with Online Python Compiler
Example URL: http://localhost/product/1
The above endpoint allows us for a PUT request and updates the Product with the specified ID in the database.
DELETE Endpoint:
Paste the code given below into the app.py file.
# Delete Product
@app.route('/product/<id>', methods=['DELETE'])
def delete_product(id):
  product = Product.query.get(id)
  db.session.delete(product)
  db.session.commit()

  return product_schema.jsonify(product)
You can also try this code with Online Python Compiler
Example URL: http://localhost/product/1
The above endpoint allows us for a DELETE request deleting a Product with the specified ID in the database.
Running & Testing The Application
Execute the below command in the project’s root directory to run the application.
flask run
You can also try this code with Online Python Compiler
Testing the Endpoints:-
We will use the REST Client extension present in the VisualStudio code extensions for testing purposes.
We have created a test.rest file in the root directory for testing purposes.
POST Endpoint:
Adding a product to the database.

We can see in the above picture, we have successfully added a product to our database. The database automatically provides the id field.
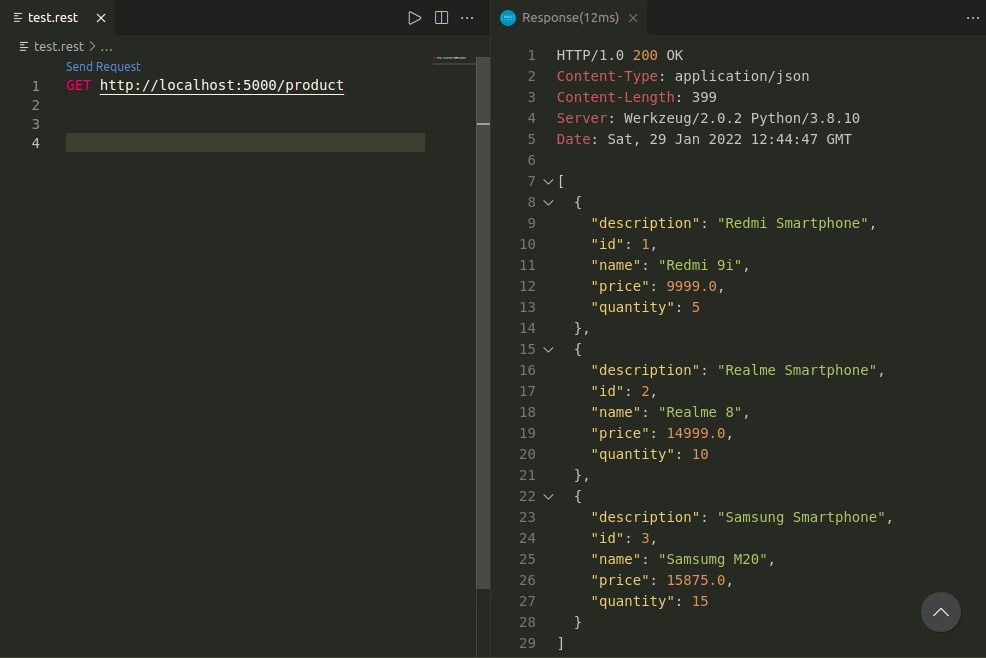
GET Endpoint:
Getting all the products.
Getting a product with id=3.

PUT Endpoint:
Updating a product with id=3.

We can see in the above picture the product with id=3 has been updated.
Previously its name was Samsung M20 which is now replaced with Iphone 13Pro.
DELETE Endpoint:
Deleting product with id = 4.

FAQs
-
What does CRUD stand for?
CRUD stands for Create, Read, Update, and Delete.
-
What is a REST API?
REST stands for Representational State Transfer. A RESTFUL API or REST API allows for interaction with RESTFUL web services by conforming to the constraints of REST architectural style. It specifies rules for a web application to send and receive data.
-
What is SQLAlchemy?
SQLAlchemy is an Object Relational Mapper (ORM). It connects the objects of an application to tables in a database management system like Mysql or Oracle. The objects can easily be stored in the database and accessed without writing raw SQL.
Key Takeaways
In this blog, we have learned how to build a Restful CRUD API in Flask, and we made a Product Management web application where we performed all the CRUD operations.
If you want to read more blogs related to Flask, you can visit Flask Introduction And Overview, Flask Environment and First Application and App Routing In Flask. If you want to learn advanced web development blogs, you can visit Coding Ninjas Web Blogs.
Check out the Samsung Interview Experience to learn about Samsung’s hiring process.
Happy Learning!!


 9+ registered

