


Introduction
Hey Ninjas! Welcome back to the blog. You must have made a website using HTML (Hypertext Markup Language) in web designing. Isn't it exciting to create and show the innovation inside you? Decorating web pages is also one of the fun tasks using CSS (Cascading Styling Sheets).
In this blog, we will discuss the topic of CSS Pseudo-element in detail. Before moving ahead, let's first understand what pseudo-element are.
Pseudo-Element
A pseudo-element in CSS is a keyword added to a selector that helps us style some parts of the selected elements. For example, you can style the first letter of your paragraph as per your choice. Also, you can add content before and after the element's content. There is no need for Javascript while using the pseudo-element.
Below is the syntax of the CSS Pseudo-Element:
selector::pseudo-element {
        property: value;
}
In the syntax of the CSS pseudo-element, we use a double colon notation (::). In CSS3, the double colon is replaced by the single colon notation for CSS pseudo-elements.
Now, Let’s discuss the widely used CSS Pseudo-Elements.
::first-letter
As the name says, the "::first-letter" pseudo-class class helps you to style the first letter of the first line of a block-level element. One limitation is that it applies style only when it is not preceded by other content, such as images or inline tables.
<!DOCTYPE html>
    <head>
        <style>
            p::first-letter {
                color: red;
                font-size: 50px;
                font-weight: bold;
            }
        </style>
    </head>
    <body>
        <h2>Welcome to Coding Ninjas</h2>
        <p>
            At Coding Ninjas, our mission is to continuously
            innovate the best ways to train the next generation
            of developers and to transform the way tech
            education is delivered.
        </p>
    </body>
</html>
Output:
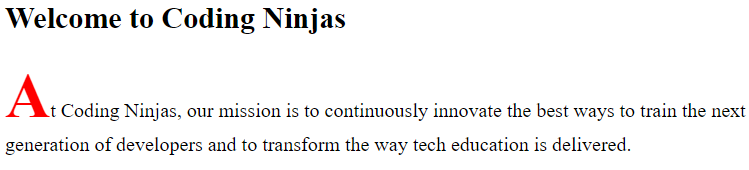
Explanation:
As you can see, the first letter of the paragraph has a different styling than other letters in the paragraph. You can add other properties too in the first letter, like padding, margin, font properties, etc.
::first-line
The '::first-line' pseudo-element styles to the first line of the element. Here, note that the first line's length depends on many criteria, like the document's width, elements' width, and text's font size.
<!DOCTYPE html>
    <head>
        <style>
            p::first-line {
                color: red;
                font-size: 50px;
                font-weight: bold;
            }
        </style>
    </head>
    <body>
        <h2>Welcome to Coding Ninjas</h2>
        <p>
            At Coding Ninjas, our mission is to continuously
            innovate the best ways to train the next generation
            of developers and to transform the way tech
            education is delivered.
        </p>
    </body>
</html>
Output:
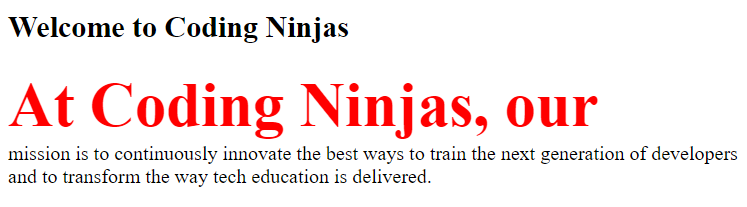
Explanation:
In the last example, the first letter was styled, but using '::first-line', we can style the complete line.
::before
The next element is "::before". Using this pseudo-element, you can add any text before the content part. You can use the "content" property to define the additional content.
Note: You cannot add images before the content using this '::before' pseudo-element.
<!DOCTYPE html>
    <head>
        <style>
            p::before {
                color: red;
                font-size: 40px;
                font-weight: bold;
                content: '“';
            }
        </style>
    </head>
    <body>
        <h2>Welcome to Coding Ninjas</h2>
        <p>
            At Coding Ninjas, our mission is to continuously
            innovate the best ways to train the next generation
            of developers and to transform the way tech
            education is delivered.
        </p>
    </body>
</html>
Output:
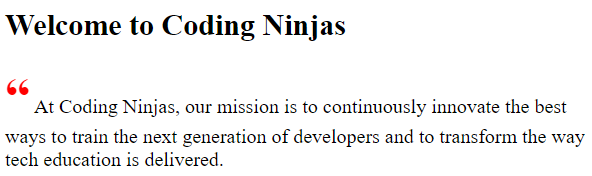
Explanation:
In this example, we have added an inverted comma before the content.
::after
The next element is "::after". This is similar to the previous one. The only difference is, in the last example, we added the content at the start, but here we will add the content at the end. You can use the "content" property to define the additional content.
<!DOCTYPE html>
    <head>
        <style>
            p::after {
                color: red;
                font-size: 40px;
                font-weight: bold;
                content: '”';
            }
        </style>
    </head>
    <body>
        <h2>Welcome to Coding Ninjas</h2>
        <p>
            At Coding Ninjas, our mission is to continuously
            innovate the best ways to train the next generation
            of developers and to transform the way tech
            education is delivered.
        </p>
    </body>
</html>
Output:
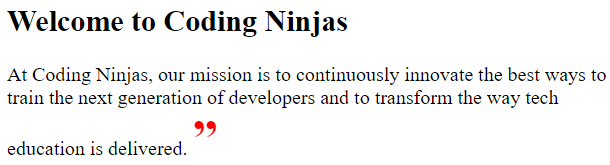
Explanation:
In this example, we have added an inverted comma at the end of the content.
::marker
'::marker' pseudo-element in CSS is used to select the marker box of a list item that contains a number or a bullet. It works on a pseudo-element set or any element to display list items such as the <summary> and <li> elements.
<!DOCTYPE html>
    <head>
        <style>
            ul {
                width: 40px;
            }

            ul li::marker {
                color: red;

                font-size: 30px;
            }

            ol {
                width: 40px;
            }

            ol li::marker {
                color: red;

                font-size: 22px;
            }
        </style>
    </head>

    <body>
        <h2>Welcome to Coding Ninjas</h2>
        <ul>
            <li>CSS</li>
            <li>Java</li>
            <li>C++</li>
        </ul>
        <ol>
            <li>CSS</li>
            <li>Java</li>
            <li>C++</li>
        </ol>
    </body>
</html>
Output:

Explanation:
As we all know, the default colour or bullets in a bullet list or numbered list is black in colour, but using marker pseudo-element, we can style bullets as per requirement.
::selection
'::selection' CSS Pseudo-element can be used to apply the style to the part of a document that has been selected by the user either by dragging the mouse or clicking across the text.
<!DOCTYPE html>
    <head>
        <style>
            p::selection {
                color: red;
                background-color: rgb(174, 243, 174);
                font-size: 30px;
            }

            ::selection {
                color: rgb(13, 83, 13);
                background-color: rgb(245, 222, 176);
                font-size: 30px;
            }
        </style>
    </head>
    <body>
        <h2>Welcome to Coding Ninjas</h2>
        <p>
            At Coding Ninjas, our mission is to continuously innovate the best ways to
            train the next generation of developers and to transform the way tech
            education is delivered.
        </p>
        <span>
            Coding Ninjas was founded in 2016 to bridge the knowledge gap between
            colleges and industry.
        </span>
    </body>
</html>
Output:
Explanation:
Here, the text in the first paragraph changes to red when we select the text by dragging the mouse with a green background. As the other lines are not in <p>, you can notice yellow background and green text on selection.


 8+ registered

