Do you think IIT Guwahati certified course can help you in your career?
Introduction
You have already learned about Deep Learning that it is a key component of data science, including statistics and predictive models, and extremely useful for data scientists who need to collect, analyze, and interpret large amounts of data. Now, In this article, you will learn about Deep Learning Virtual Images in detail.
Deep Learning VM Images
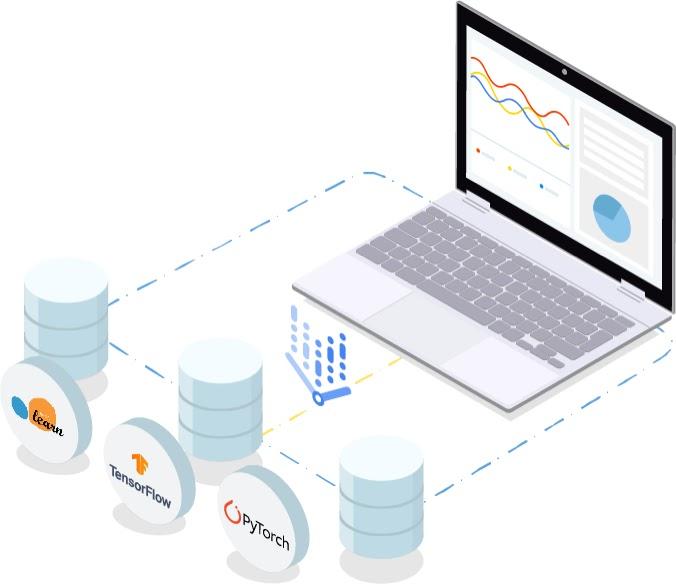
Deep Learning VM images are a set of virtual machine images optimized for data science and machine learning tasks. All images come pre-installed with leading ML frameworks and tools. Ready to use on GPU-equipped instances to accelerate data processing tasks. The
Deep Learning VM image supports many combinations of frameworks and processors. There are currently images supporting TensorFlow Enterprise, TensorFlow, PyTorch, and general high-performance computing, with versions for CPU-only and GPU-only workflows.
Create a Deep Learning VM instance by using the console
This page describes how to create a Deep Learning VM Image instance using Google Cloud Marketplace in Google Cloud Console.
Before you get started
If you are new to Google Cloud, create an account to evaluate the performance of your Google products in real-world scenarios. New customers will also earn $ 300 in free credit to run, test, and deploy their workloads.
Go to the Deep Learning Virtual Machine Cloud Marketplace page in the console.
Click Launch. Choose the project in which you need to create the instance if you see a project selection window.
The first time you start a Compute Engine virtual machine, you must wait for the first API configuration process to complete.
On the Deploy New Deep Learning VM page, enter a deployment name. This is the root of the virtual machine's name. Compute Engine adds -vm to this name when naming the instance.
Select a Zone, or keep the default.
Under Machine type, select the specs you want for your VM or leave the default.
Under GPU, select the type of GPU and the number of GPUs, or leave the defaults. If you don't want to use the GPU, click the Clear GPU button.
There is an option to select Enable access to JupyterLab via URL instead of SSH (Beta). After enabling this beta feature, you will be able to access your JupyterLab instance via a URL. Anyone with an Editor or Owner role on your GCP project can access this URL. This feature currently works only in the United States, European Union, and Asia.
Select a machine learning Framework, or keep the default.
Click Deploy.
Access your new Instance
When you create a deep learning VM instance, it starts automatically. To access:
In the Name column, click the name of the VM instance.
In the Remote Access section, click the first dropdown list and select how you want to access your instance. You can choose to interact using the graphical user interface or the command line.
Check the check box next to the Deep Learning VM instance.
Click Start.
Create a Deep Learning VM instance by using the gcloud CLI
This page shows how to use the Google Cloud CLI to create a deep learning VM image instance.
Before you get started
If you are new to Google Cloud, create an account to evaluate the performance of your product in real-world scenarios. New customers will also get $ 300 free credit to run, test, and deploy their workloads.
After a while, the VM instance will be created and you will see an overview of its configuration.
Created the first Deep Learning VM instance. To see the instances and view their status, use the gcloud list command to list all the instances as follows:
gcloud compute instances list
This will allow you to see all the zones in your current project. All Compute Engine instances in are displayed. You can also view and manage Deep Learning VM instances in the Google Cloud Console for
Compute Engine VM instances.
To view the status of this instance only:
gcloud compute instances describe $ INSTANCE_NAME
Access your new instance
When you create a Deep Learning VM instance, it starts automatically. You can access it via SSH using the following command:
gcloud compute ssh $ INSTANCE_NAME
Compute Engine shares an SSH key and creates a user. For more information, see Connecting to Instances.
Stop the instance
Run the following command from your local machine (not on the instance):
After the instance is initially created, Compute Engine starts it. To start the instance manually when it's stopped, run the following command:
gcloud compute instances start $INSTANCE_NAME
The start command starts a stopped virtual machine instance.
Clean up
To avoid incurring charges to your Google Cloud account for the resources used on this page, follow these steps.
To delete the Deep Learning VM instance that you created, at the command line, enter the following command:
gcloud compute instances delete $INSTANCE_NAME
The delete command deletes Compute Engine instances.
Choose an image
Depending on the framework and processor you choose, a specific deep learning VM image is available. We currently have images that support TensorFlow, PyTorch, and general high-performance computing, with versions for CPU-only and GPU-only workflows. Refer to the table below to find the image you need.
Deciding on an image of family
Which deep learning VM image family you use depends on your needs. The given table lists the latest versions of the image family, organized by framework type. You can always get the latest version of an image by referencing an image family with the latest name in the name and creating an instance. If you need a specific framework version, go to the Listing all available versions.
Choosing an operating system
Debian 10 is the default operating system for most frameworks. Ubuntu 20.04 images are available for some frameworks. These are identified by the image family name suffix -ubuntu-2004 (see Listing all available versions). Debian 9 images are obsolete. The
PyTorch and TensorFlow Enterprise image families support the A100 GPU accelerator.
Included dependencies
A list of Python dependencies included in each release is available on Cloud Storage at
Replace RELEASE_MILESTONE with your release milestone. For example m88. For example, a list of M88 releases can be found at gs://deeplearning-platform-release/installed-dependencies/images/m88/.
TensorFlow Enterprise images
The TensorFlow Enterprise image family provides a distribution of TensorFlow optimized for Google Cloud. Certain versions of the TensorFlow Enterprise distribution also have Long Term Version Support. For more information about TensorFlow Enterprise, see TensorFlow Enterprise overview.
Use the following table of available TensorFlow images to select an image that contains the desired version of TensorFlow or TensorFlow Enterprise.
Experimental images
Some Deep Learning Virtual Machine image families are experimental, as shown in the table of image families. Experimental images are supported as much as possible and may not be updated with each updated or new release of the framework.
Specifying an image version
If the latest image is newer, also you can reuse the same image. This is very useful, for example, if you are creating a cluster and want to ensure that all images used to create new instances are always the same. Do not use image family names in this situation. This is because when the latest image is updated, some instances in the cluster will have different images.
Alternatively, you can find the exact name of the image, include the version number, and use that particular image to spawn new instances in your cluster.
To find the exact name of the latest image, use the following command on your device of choice or in Cloud Shell with the Google Cloud CLI: Replace IMAGE_FAMILY with the name of the image family for which you want the latest version number.
Look for the name field in the output and use the image name specified there when creating a new instance.
Listing all available versions
If you need a specific framework or CUDA version, you can search the complete list of available images. To list all available Deep Learning VM images, use the following gcloud CLI command.
gcloud compute images list \
        --project deeplearning-platform-release \
        --no-standard-images
Image families are named in the format FRAMEWORK-VERSION-CUDA_VERSION(-experimental), where FRAMEWORK is the target library, VERSION is the framework version, and CUDA_VERSION is the version of the CUDA stack, if present.
For example, an image from the family tf-ent-2-8-cu113 has TensorFlow Enterprise 2.8 and CUDA 11.3.
Images, image families, and instances
Deep Learning Virtual Machine Images is a set of pre-built VM images with ready-to-use deep learning frameworks. Deep learning VM images make it easy to set up your deep learning model training environment by pre-configuring dependencies, pre-installing key tools, and by optimizing performance. It is very important to differenciate between the images, image families, and instances.
Image families
An image family is a set of images preconfigured for a specific purpose or using a specific architecture.
There are many deep learning VM image families. They are listed below for each main framework installed:
TensorFlow Enterprise family, with or without GPU, no GPU
To choose between the TensorFlow Enterprise family and the TensorFlow family, consider the desired version of TensorFlow. The TensorFlow Enterprise family includes TensorFlow 1.15 and TensorFlow 2.1. The TensorFlow family includes previous versions of TensorFlow.
If you know which framework to use and whether to enable one or more GPUs, choose between using the latest version of the framework or an older version if available. increase. Deep learning VM images are available for some previous versions of the framework. For more information, see Choosing an Image.
Images
An image is an individual template of a virtual machine. Deep Learning Virtual Machine images are preconfigured public Compute VM images. For more information about Virtual Machine images, see the Concept Images topic in the Compute Engine documentation.
An instance is a single virtual machine hosted on Google's infrastructure. A Deep Learning Virtual Machine instance is based on one of the preconfigured Deep Learning VM images. Create an instance from an image using the Google Cloud Console or Google Cloud CLI.
To select a deep learning VM image, see Choosing an Image. To create an instance of the Deep Learning VM image, see:
2. Use your local browser to access the JupyterLab session. After running the command on your local machine, go to https://localhost:8080 to access JupyterLab. Access JupyterLab from Web Preview on port 8080 if you run the command using Cloud Shell,.
Frequently Asked Questions
What is image classification in deep learning?
Image classification is a supervised learning problem: define a set of target classes (objects to identify in images), and train a model to recognize them using labeled example photos. Early computer vision models relied on raw pixel data as the input to the model.
Which tool can be used to build virtual machine images?
Virt-builder is a tool for quickly building new virtual machines. You can build a variety of VMs for local or cloud use, usually within a few minutes or less. Virt-builder also has many ways to customize these VMs.
What is a VM image?
A VM image is an executable image file from a VM; this image file is in a special storage format. We can create a new VM by uploading the image file to the physical machine. Usually some software, like mysql or ms office, is installed on these new VMs beforehand.
Conclusion
In this article, we discussed Deep Learning VM Images . We also discussed how to create a Deep Learning VM instance using different ways. We also discussed other terms like Images, image families, and instances etc.


 9+ registered

