Do you think IIT Guwahati certified course can help you in your career?
Introduction📑
Postman is one of the most popular tools for API testing. It is well known for being the most efficient when using APIs. The amazing fact about Postman is that it is used by more than 6 million developers and 2 lakh companies worldwide.
In this article, we will understand what an API is in Postman, the methods to develop it, and the testing of an API in Postman. So, without further ado, let's get started.
Defining API Specifications🖥️
The specification of your API in Postman can be used to specify its structure. A collection can also be created from a specification.
Editing your Schema✍️
Each API version page has an editor for your API definition under the Definition tab (either one you imported or a sample Postman added when you created the API).
The default format is YAML, and the default schema type is OpenAPI 3.0. Select it from the dropdown list to use a different schema type or form.
An outline of your schema is visible in the left pane of the schema editor. The top level of nodes will be extended, and the lower levels will be compacted when you first launch the editor. To expand or collapse a node, choose it. To access an element in the editor, click on it in the outline. The outline can also be shown or hidden by selecting the icon for the schema's summary.
The first 200 characters of a reference component are shown in a popover in the schema editor when you mouse over a #ref component and press the Command key. The reference component will jump to the reference location when you Command-select it.
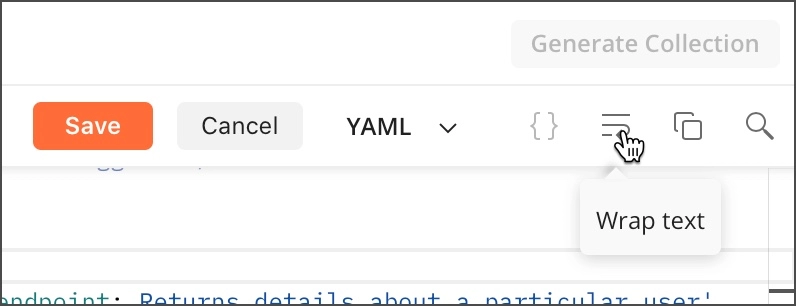
There are choices to enhance the content, wrap text, copy, and search right beside the format drop-down menu. Select Save once you've finished updating your schema.
NOTE:🎯 Postman will notify you of validation problems as you change your schema.
Generating a Collection📚
The API in Postman Builder makes it easier to construct APIs first by allowing you to create Postman Collections directly from a schema.
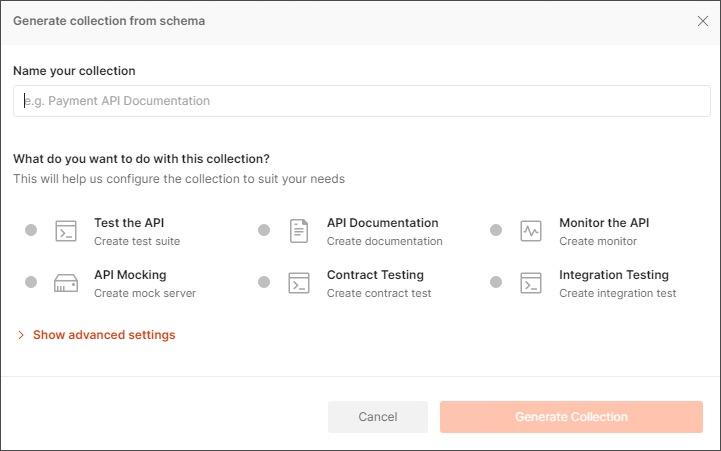
Select Generate Collection to build a collection using your saved structure. The group can be added as a test, monitor, fake server, or documentation. The sidebar's Collections section will display the collection. It will be connected to the same API version as the schema.
You can change how the collection is created by selecting Show advanced settings.
Developing an API👩💻
You can create your API via the API in Postman Builder by connecting it to environments, fake servers, and documentation.
NOTE🎯Postman displays the components in the current workspace in the selection dropdown list when you add documentation, tests, mocks, monitors, and environments.
Adding Documentation📜
You can associate specific API versions with the documentation generated from your collections.
Generating New Documents
From your schema, build a new collection and generate the documentation for an API in Postman:
✅Select + and choose to Create new documentation under the Documentation heading in the API version Overview pane.
✅Give the collection a name, choose Show advanced settings to change how it is generated, and then select Create Documentation.
Adding Existing Documentation
🧣Select + and choose to Add existing documentation under Documentation in the API version Overview tab.
🧣Select Add Documentation after choosing the collection that contains the documentation you want to link. This list includes only the available collections.
Viewing the Documentation👀
The API in the Postman Builder program allows you to view the documentation for your API. To open any documents under the header "Documentation," select it.
The Documentation tab also allows you to view the documentation. Use the dropdown list in the tab's top left corner to select which collection to display and create or add new documentation collections.
Choose View Collection from the Documentation menu to access the documentation's collection.
Adding an Environment🌩️
You can associate particular workspace environments with distinct API versions.
🚀Select + next to Environments in the tab for the API version Overview.
🚀Choose Add environment after choosing a domain from the list. This list contains only the available fields.
Adding a Mock Server🔎
Adding an existing fake server or creating a new one can link mock servers for a collection to an API in Postman.
Building a New Mock Server
📌Next to Mock Servers in the API version Overview tab, select + and Create new mock server.
📌According to the instructions in "Creating a mock from an API," choose a collection and set up the fake server.
Adding an existing mock server
✅Select + and pick Add existing mock server under Mock Servers in the API version Overview tab.
✅Select Add Mock Server, then choose a mock server from your workspace. This list contains only the available mocks. Your mock server is added to the API in Postman.
Eliminating components from an API⏳
An environment, mock server, or documentation collection connected to an API in Postman can be deleted.
Hover your mouse over an element in the API version Overview tab and click the delete icon.
The relationship between the element and the API version will only be removed. The element won't be removed from your workspace or deleted.
Generating Server Code🧑💻
You can create server-side boilerplate code using server code generation and your OpenAPI 3 specification. This makes it possible to design business logic using an API-first approach, where you may download a server already up and running based on your API definition.
The languages and frameworks that are supported are:
Go - Chi server
NodeJS - express
Java - JAX-RS
Python - Flask
Steps to Generate Server Code🤖
Using your OpenAPI 3 standard, create a server-side boilerplate:
Activate the API tab.
Choose an API that adheres to the OpenAPI 3 definition.
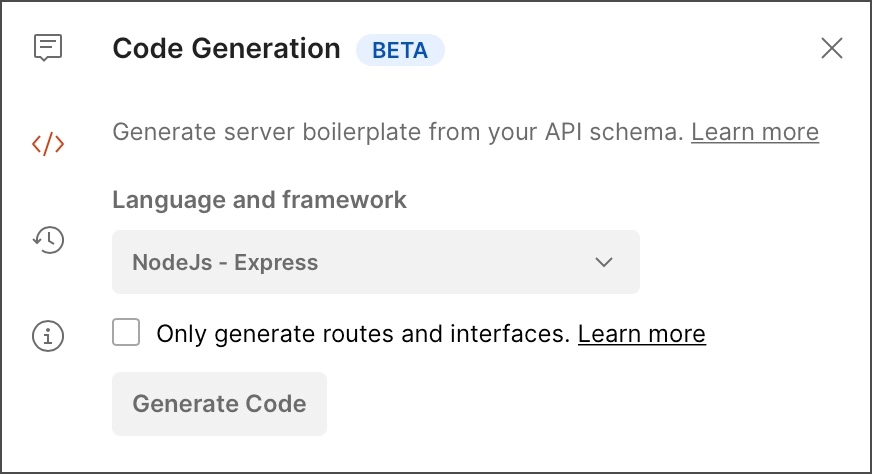
Choose the Code snippet icon from the right sidebar's code creation section.
Select Produce Code in the Code Generation window, then select the language and framework for which you wish to generate the boilerplate.
A zip bundle containing the created code will be downloaded automatically. You might need to access your browser's Downloads menu to find the library to find the archive. The language and framework chosen and the name of the API from which the code was created are all included in the file name.
Using the Generated Code🔥
Depending on the language you select, a specific code structure will be generated depending on the language you choose. All of the supported languages will cover some of the key components of your OpenAPI 3.0 standard. You can anticipate the resulting code to have the following characteristics:
Each endpoint will have a stubbed block of code where you can add your business logic, and all operations will be produced as routes in your server boilerplate. A default response, often obtained from the API description Response section of the related endpoint, may be included in this stub.
In each of these routes, you can access the request bodies, parameters, path parameters, and headers, which you can use in your business logic when appropriate.
The code that was generated can be used to launch a server. The README.md file that contains the prerequisites and instructions to start the server will be available.
To learn more about configuring or modifying the generated code, read the relevant documentation for the framework.
Testing an API🚀
The process of creating an API in Postman must include testing. Your API tests can be organized into a collection that you can link to a particular release of your API. Additionally, you can incorporate your API using supported CI (Continuous Integration) solutions.
Adding Tests💻
A test collection can be linked to an API version that you've specified in the Postman API Builder. Select Add Test under Tests in the Test tab.
You can include a new or ongoing test:
🔥Create a new test: Establish a new test by typing a name, selecting Show advanced settings to customize how the collection will be generated, and then clicking Create Test.
🔥Add an existing test: Select Add Test and select an available collection from the list. This list contains only the available collections.
Adding CI integration🎭
Some of the most preferred Continuous Integration and Continuous Delivery (CI/CD) tools are integrated with Postman. Once you've configured CI integration for your API, you can access Postman to check the status of existing builds or start a new one. As part of your CI pipeline, you can also run API tests that you've generated in Postman.
Go to API > Test > Connect to CI/CD Builds and choose the integration you wish to add to set up CI integration. See CI integrations for comprehensive configuration instructions and other information on how CI integrations operate.
Frequently Asked Questions
What is the Postman API testing tool?
Postman is an application employed for testing APIs. It is an HTTP client that examines HTTP requests using a graphical user interface, allowing us to get different results that must then be verified.
How is an API tested?
The flow of an API test consists of three basic steps: Send the request along with the required data. Obtain a response with output information. Check if the answer met the requirement and was returned as expected.
Why is API testing necessary?
An application program interface (API) is examined during an API test to ensure that it satisfies functionality, security, performance, and dependability requirements.
What are the various types of API?
Public, partner, private, and composite are the four primary forms of API that are frequently used in web-based applications.
What does API endpoint mean?
A software program connects to an API endpoint, where the API's code, which enables two software programs to communicate with one another, is executed.
Conclusion
This article has vividly defined Postman in API, how to develop it, and the testing of API in Postman. So we can say that Postman meets all the requirements that a developer has for an API testing tool. It exceeds your expectations because it considers your ease of use, your project's needs, and other factors.
If you liked this blog, you should check out these fantastic blogs to upskill yourself in API, Web Testing, and API Testing.


 8+ registered

