Do you think IIT Guwahati certified course can help you in your career?
Introduction
MongoDB is a database suitable for many uses and stores information flexibly. Just like things need to grow bigger and be quick, MongoDB also cares about that. When MongoDB teams up with Kubernetes, they make large databases to produce and transmit information quickly. These unique databases are great when you have a lot of information, traffic, and user requests, which make it very busy.
This article is like a guidebook. It will show you how to put MongoDB on Kubernetes. It will explain how a user can Deploy, Run, and Install MongoDB on Kubernetes.
Kubernetes and MongoDB
Kubernetes
Kubernetes, often shortened to K8s, is a refined system that manages and coordinates containers. Containers comprise condensed packages that encompass all the essential components required to facilitate an application's seamless operation. Kubernetes attracts developers because it streamlines deployment complexity, enhances scalability, ensures consistency across different environments, accelerates updates, and optimizes resource usage.
MongoDB
MongoDB is a distinctive database type that differs from traditional ones reliant on tables and rows. As a NoSQL database, it offers flexibility by organizing data into documents rather than rigid structures. It excels in scalability, accommodating vast datasets and high traffic, and providing fast query performance. MongoDB's features encompass document-based storage, flexible schema, replication for data redundancy, geospatial data handling, and ad hoc querying. Developers opt for MongoDB because it can swiftly adjust to changing data requirements, seamless scalability, quick query responses, and accommodating various data formats.
Setting up the MongoDB on Kubernetes
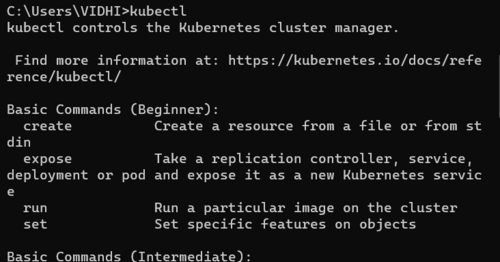
Here are the steps involved in setting up the MongoDB on Kubernetes. Before running the following steps, verify whether you have installed the Kubectl correctly or not.
Step 1: Label the Node
Give a name that will be used in MongoDB deployment. This name helps determine which programs (pods) go to which node.
First, get the nodes of the cluster. To do so, run the following command.
kubectl get nodes
Second, choose the deployment node from the list.
Third, run the kubectl to label the node.
kubectl label nodes <node> <key>=<value>
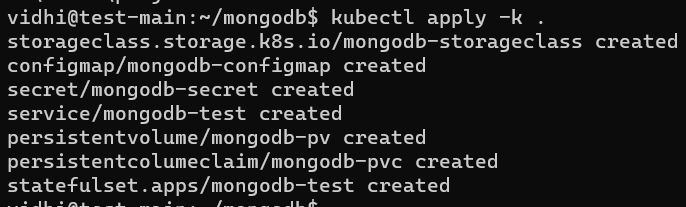
Step 2: Create a Storage class
StorageClass is like a helper for pods. It helps them get volume on the node. To make a StorageClass, run the following command.
1) Using a text editor to keep the storage setup information, You need to make a particular file using a text editor.
nano StorageClass.yaml
2) Put the storage class setup details in the file. Here's an example of how the MongoDB-storage class is described and saved in the file.
To save data for MongoDB on Kubernetes, make a persistent space that keeps data even if things restart.
1) To do this, create a file written in YAML.
nano PersistentVolume.yaml
2) In the file, assign storage space that matches the style you defined earlier. Specify the node for pod deployment in the nodeAffinity section. This node is picked based on the unique label you made in Step 1.
Kubernetes uses the StatefulSet controller to deploy stateful applications, as these types of apps need distinct identities since they interact with other pods.
1) Create a YAML file.
nano StatefulSet.yaml
2) Put deployment details into the file, including the MongoDB Docker image to use. The file also points to the ConfigMap, and PersistentVolumeClaim made earlier.
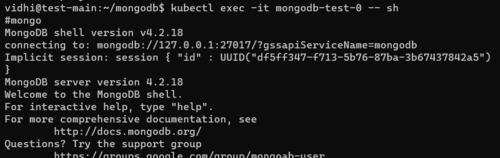
When you see number 1 in the output, it means authentication was successful.
Deploy a ReplicaSet
Deploying MongoDB as a ReplicaSet ensures that you have a certain number of pods running all the time. People suggest using ReplicaSet deployments for production environments.
Step 1: Set up Role-Based Access Control (RBAC)
1) Use a text editor to create a YAML file.
nano rbac.yaml
2) Set up access rules for your MongoDB deployment. The example below demonstrates creating an RBAC YAML file.
5) Ensure the configuration by carrying out the following command.
rs.reconfig(cfg)
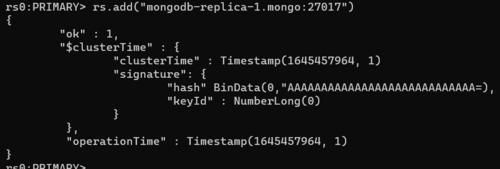
6) Use the rs.add() instruction to include an additional pod in the configuration.
rs.add("mongodb-replica-1.mongo:27017")
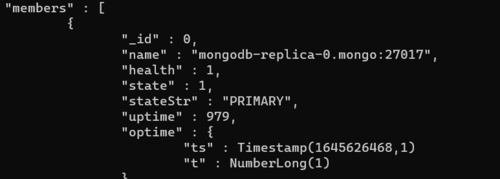
7) Check the status
rs.status()
The "members" section is expected to display a pair of replicas, with the primary replica featured at the top of the results.
Frequently Asked Questions
What is Kubernetes used for?
Kubernetes are used in Containerized application deployment. Scalability and management are all automated by Kubernetes. It offers methods and tools for high availability and effective container lifecycle management.
What is Kubernetes Pod?
The smallest deployable unit in the Kubernetes ecosystem is a Kubernetes Pod. It may include one or more containers with the same IP address, storage volumes, and network namespace.
What is Kubernetes Service?
A Kubernetes Service abstraction gives one or more pods a reliable network identity and endpoint. Network traffic is divided among several pods to achieve load balancing and automatic failover.
What do you mean by ReplicaSet in Kubernetes?
In Kubernetes, a ReplicaSet is a controller that ensures a certain number of replicas, or identical pod copies are always active.
What is Kubernetes Namespace?
You can build virtual clusters inside of actual clusters using Kubernetes Namespaces. Teams can manage and isolate several applications or environments inside the cluster since it gives resources.
Conclusion
In this article, we learn how we can deploy, run, and install MongoDB on Kubernetes. One must follow different steps to install MongoDB correctly on Kubernetes. Be careful while putting the correct variable path in your system. We have deployed ReplicaSet.
Check out the link to learn more about such a topic.
You can find more informative articles or blogs on our platform. You can also practice more coding problems and prepare for interview questions from well-known companies on your platform, Coding Ninjas Studio.


 8+ registered

