Do you think IIT Guwahati certified course can help you in your career?
Introduction
This article will look into one of the most prominent postman utilities and features. The first feature, one of Postman's most essential elements, is workspaces. Workspaces are where we can collaborate with different team members and organise all the APIs, collections and everything we write in Postman. So it helps us collaborate seamlessly with other team members if we are working in a team. Working in a personal workspace, we can organise our projects according to our needs.
Types of Workspaces
There are two kinds of workstations. One is the individual workplace, while the other is the team workspace. The personal workspace is visible to us, and the team workspace is visible to the team members who have been added to that workspace. Workspaces in Postman allow us to organise, share, and work with other team members. All updates get synchronised in real time across all devices. There are two sorts of workspaces:
Personal - This workspace can only be accessible by the logged-in user and cannot be shared with anyone else.
Team - This workspace can be shared with other team members by emailing them.
Creating Workspace
We will look at how we can create a personal workspace and a teamwork space. How can we invite our team members to it? How we can share our workspace and how we can do some version controlling of our workspaces.
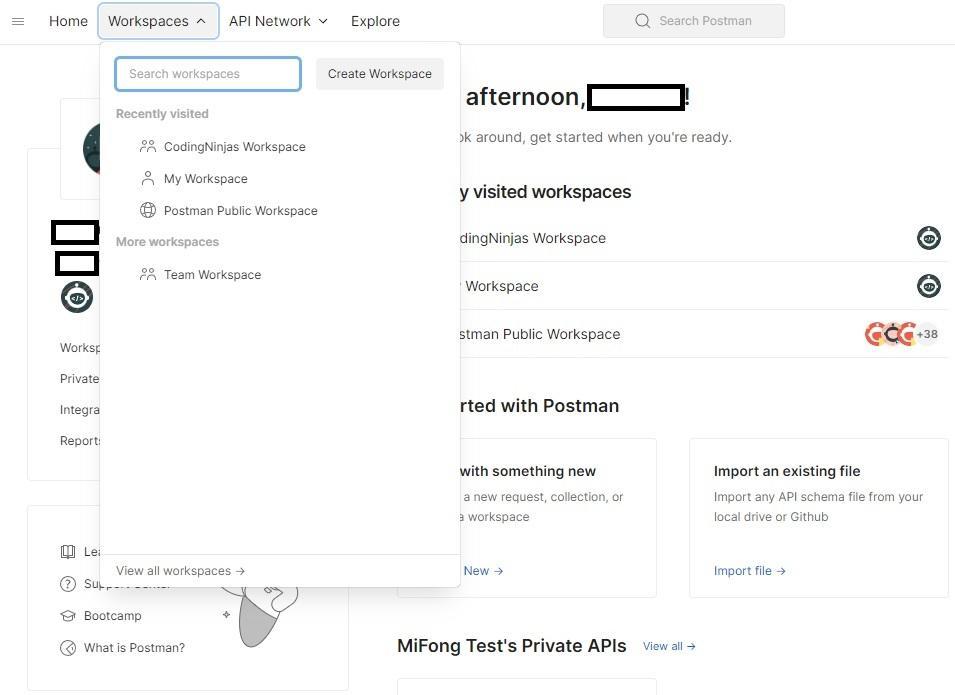
Let us jump quickly into Postman. Once we log into Postman, we will land on the dashboard, where we can create different requests and collections. On the top bar, we will find our workspace. So this is where we will choose our current workspace. We can even invite someone, but it will turn this workspace into a team workspace. So once we click on this, we will see two tabs. One is personal, and one is the team. The team workspace will list all our workspaces shared with other team members. The personal workspace is where we will have the elements.
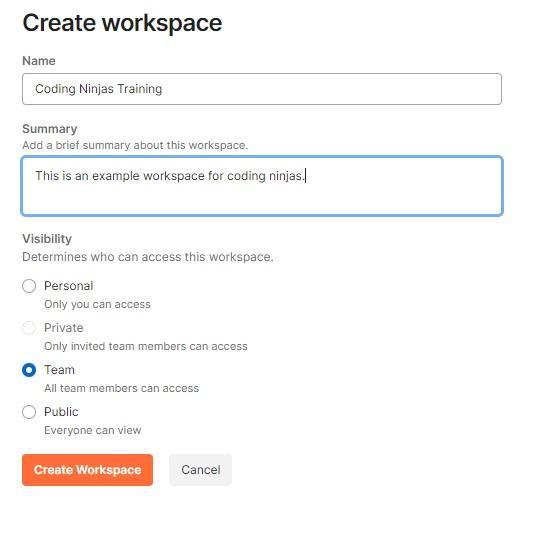
So let us go ahead and create another personal workspace for ourselves. We will select the "Workspaces" button in the top bar and click on "Create Workspace".
Here, we give it a name and summary. So we name it "Coding Ninjas Training". Here we will have an option to choose a team workspace or a personal workspace. If we create a private workspace, it will generate this workspace. However, if we enter a team workspace, We can also invite other people to join this workspace. If we give some email address here, it will send an invite asking the person to join this particular workspace.
Now there are some other features which are not available in the open-source version. We can select what kind of privileges the person will have, whether admin or collaborator. But, in the free version, the user will be admin by default. Similarly, the visibility will be public so everybody can view this workspace. In the paid version, we can make it private.
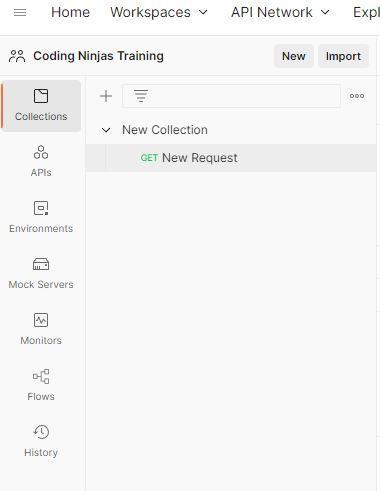
So this is our team workspace. We do not have any collections or history, or APIs here. Everything is empty, and so similarly, if we want to share this workspace with someone, we can create a CSV with any number of people or a text file with their email addresses. We can also generate a link. We can make this link, copy this, and share it with our team members or friends or whomever we want to invite to this particular workspace.
Once we invite our team members, everybody can contribute to this workspace. They can add their collections, and they can add their API requests. They can create their APIs, and everything will be synced a real-time across the workspaces. Also, the accounts added into the workspaces will sync all those collections or APIs we have created across to our team members. this is how we can collaborate effectively in Postman. Other features include creating a fork and creating a pull request to merge those changes.
Creating a Collection
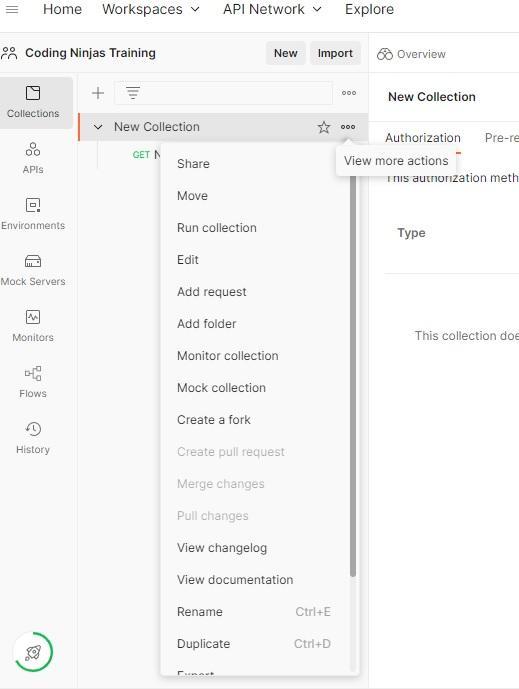
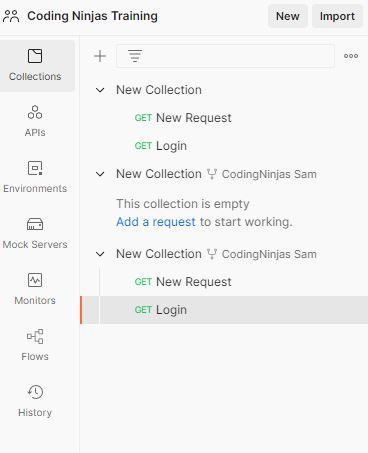
So let us create a sample collection. So this is our sample collection. If we click on the collection button, it will give us all the options. So we can share this collection, manage rules, rename, edit, and even create a fork. So we can create a fork of this particular collection.
Adding Fork
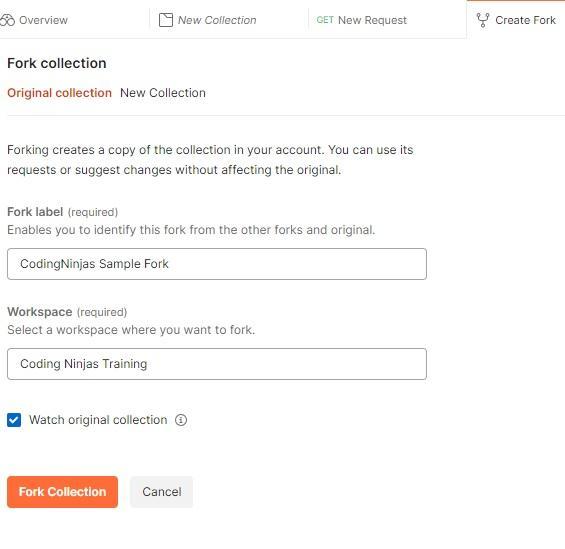
We can fork this collection here. Once we do it, we have to name the collection. This creates a fork in the collection. Forking creates a copy of the collection. We can suggest changes using it without affecting the original.
We can see a window asking us to give a fork label and workspace.
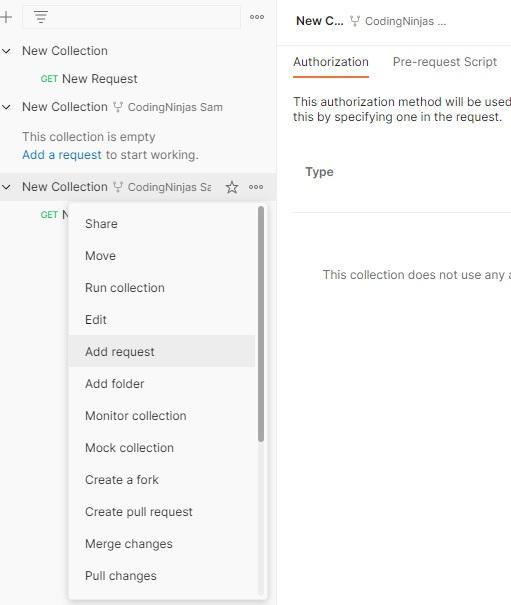
Adding Request
Now what we can do is we can add a request here.
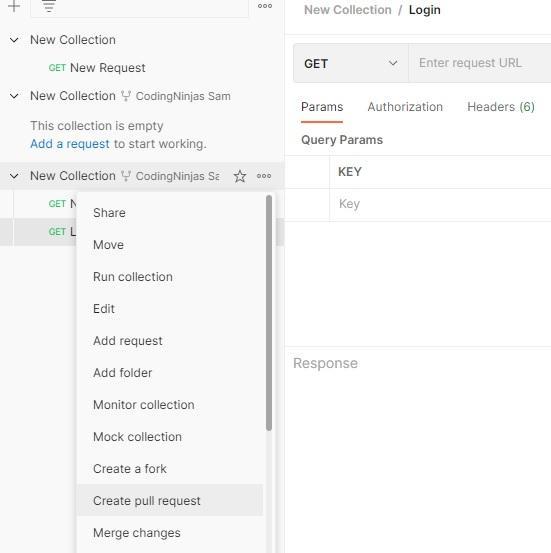
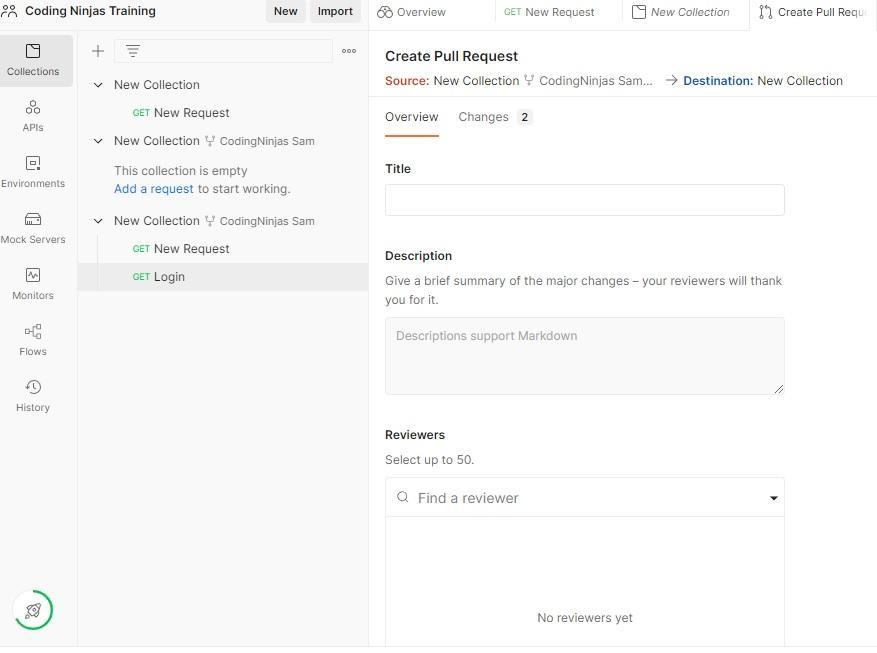
We will add a request named "Login" to our collection, and now we can create a pull request for this. This functionality will look similar if we have worked with code repositories like git or GitHub. Because we do the same thing in the code repository, we create a fork of the code repository. Then we make our changes.
Creating Pull Request
We create a pull request and add some reviewers. They will review the code, and they will merge those changes. Similarly, we can do it here in Postman.
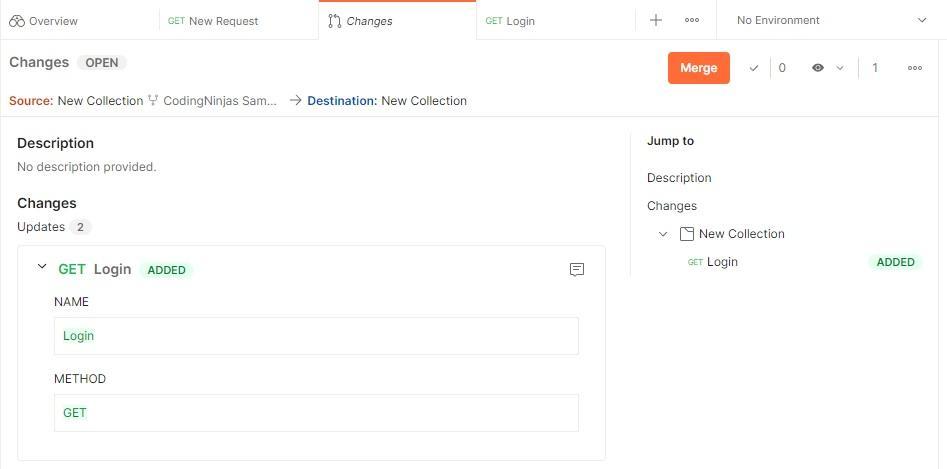
These are the changes we made, so a get request was added with this name and method. Then we can also find a reviewer who can review our differences, and we can create the pull request. Let us give it title changes and make the pull request.
Now we can review other changes and approve them if we want. We can put some comments on the changes. If we are not happy with the changes, we can put some comments and then, if we are happy, we can go ahead. We can also decline the changes or approve their changes. So this change request or pull request was approved now.
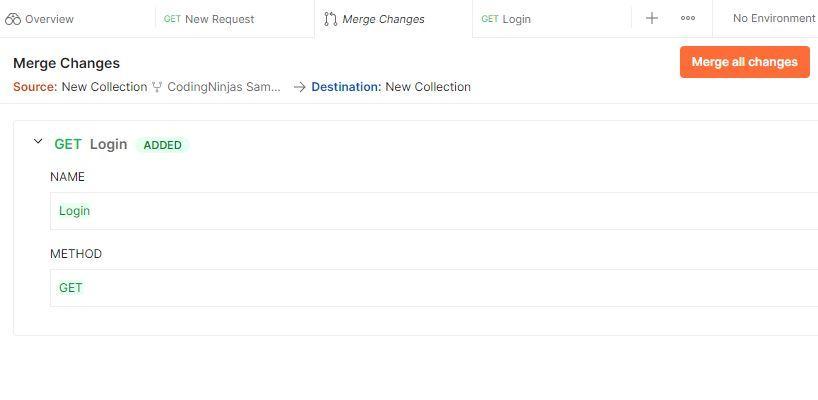
Merging Changes
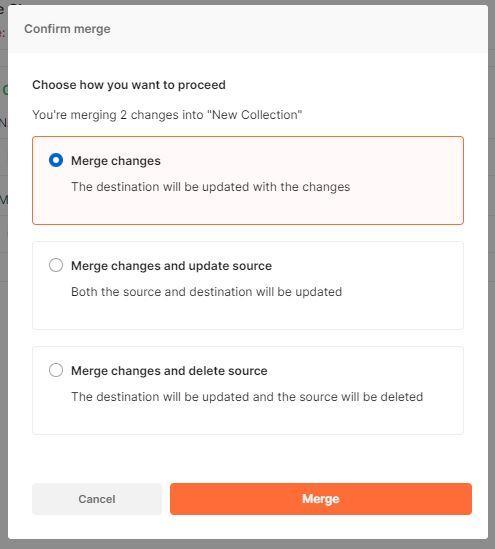
We can merge the changes, so there are three options: "merge changes" and "merge changes and update the source". Both the source and destination will be updated.
Merge changes and delete the source so the destination will be updated, the source will be deleted, and the first change will be updated. Destination will be updated with the changes, so let us go ahead with the first option, and the request was merged successfully.
Let us go back to our primary collection; we will see a request already added here.
So which was merged from the fork collection. This is how we can do version control and collaboration across different workspaces. It is a pretty cool feature of Postman. We do not need to put all our collections or API requests into a GitHub repository and then manage that. We can work directly in Postman itself. It is an inbuilt feature of Postman.
Frequently Asked Questions
How to open workspace in Postman?
Select Workspaces from the Postman heading to open a workspace. To open a workspace, click on it or View all workspaces to see a list of all accessible workspaces. Based on our workspace visibility and role, it will only show workspaces that we can access.
How many environments can there be in Postman?
There might be numerous variables inside a single setting. We can only work in one environment at a time, even though we can build multiple environments in Postman.
How do I copy a Postman collection between workspaces?
Select the action Move by clicking the three dots to the right of the collection name. On the next screen, choose the workspace we wish to relocate our collection and press the Move Collection button.
Conclusion
Workspaces are one of the most valuable elements of Postman. It helps us collaborate seamlessly with our team members. When working in a team or a personal workspace, we can organise our projects according to our needs. This dramatically increases our productivity and helps us be efficient. In this article, we read about Postman's different features of workspaces. We also went through its features and saw ways to use them. Check out blogs and find out about React Native State and Installing and Running Newman in Postman. If you’re interested, you can find out How to Collaborate on Postman. Have a look at our blogs on APIs and API Testing to explore. You can discover all about web testing too. Explore Coding Ninjas Studio to find more exciting stuff. Happy Coding!


 18+ registered

