Do you think IIT Guwahati certified course can help you in your career?
Introduction
We already know that many numerous built-in events are available to be used by users. For example, the onclick event is used to execute some code when the user clicks on something. So now the doubt arises, what if we want our unique custom event? This article will talk about the various methods to achieve this goal. Such events are commonly called synthetic events compared to the events fired by the browser itself.
The Event constructor is used to create custom events as follows:
Syntax:
const event = new Event('build');

// Listen for the event.
elem.addEventListener('build', function (e) { /* ... */ }, false);

// Dispatch the event.
elem.dispatchEvent(event);
In the above steps, we create an event using the Event constructor. Then we listen to this event using the addEventListener() method. The event is triggered or dispatched using an element.dispatchEvent(eventName) method. At last, a custom Event has been created.
Example:
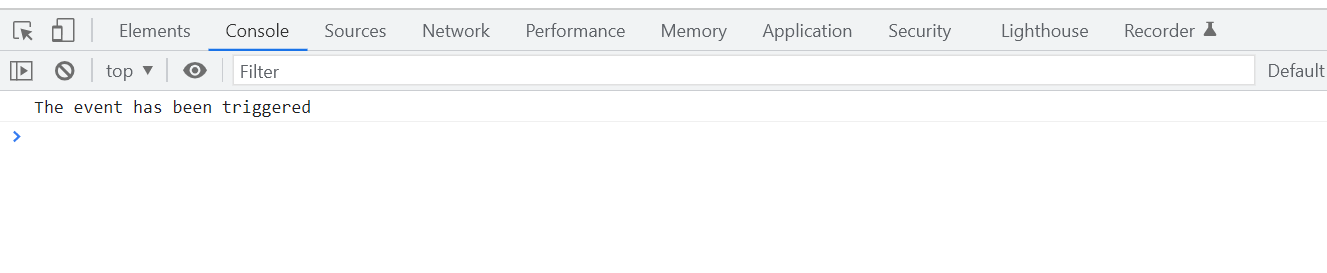
let x = 5;
const event = new Event("start");

document.addEventListener('start', () => {
    console.log("The event has been triggered")
});

if (x == 5) {
    document.dispatchEvent(event);
}
You can also try this code with Online Javascript Compiler
This is used when we want to add more data to the event object. The CustomEvent interface exists and the detailed property can be used to pass custom data. The event could be created as follows:
Syntax:
//assign event
const event = new CustomEvent('build',
                        { detail: elem.dataset.time });

// to access additional data in the event listener:
function eventHandler(e) {
  console.log('The time is: ' + e.detail);
}
Example:
//assign event
const event = new CustomEvent('build', {
    detail: elem.dataset.time
});

// to access additional data in the event listener:
function eventHandler(e) {
    console.log('The time is: ' + e.detail);
}
You can also try this code with Online Javascript Compiler
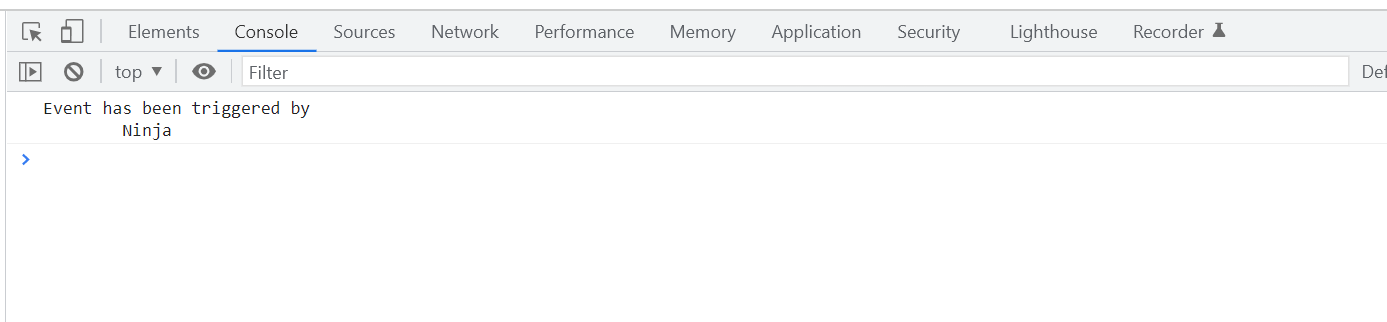
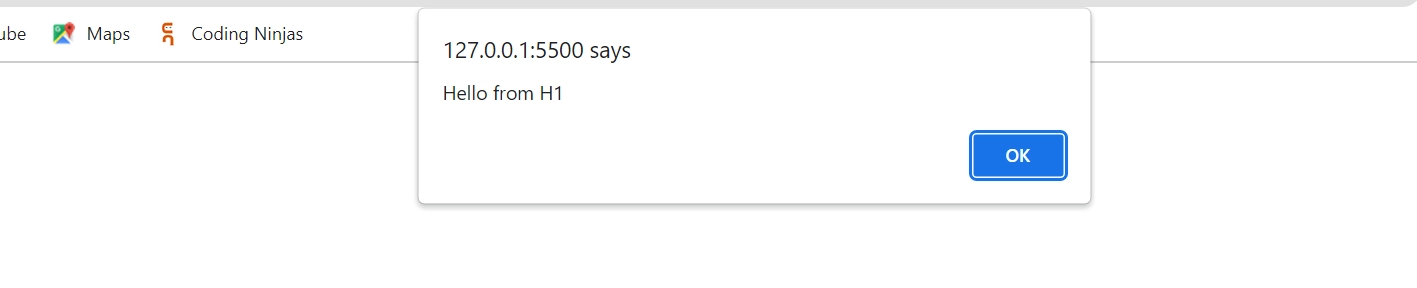
Sometimes, it is desirable to trigger an event from a child element and have an ancestor catch it with data. Therefore, in the case of event bubbling, the Event is first captured and handled by the innermost element and then propagated to outer elements.
Example:
<h1 id="elem">Hello from Coding Ninjas!</h1>

<script>
  // catch on document...
  document.addEventListener("hello", function(event) { // (1)
    alert("Hello from " + event.target.tagName); // Hello from H1
  });

  // ...dispatch on elem!
  let event = new Event("hello", {bubbles: true}); // (2)
  elem.dispatchEvent(event);

  // the handler on a document will activate and display the message.

</script>
You can also try this code with Online Javascript Compiler
We can already make and trigger our own custom events and event listeners in Javascript. So, now we will learn how we can do something similar to triggering a pre-existing event artificially.
Example:
document.addEventListener('DOMContentLoaded', (event) => {
  console.log('DOMContentLoaded triggered');
});

const event = new Event('DOMContentLoaded', {
  view: window,
  bubbles: true,
  cancelable: true
});

const cancelled = !document.dispatchEvent(event);
if (cancelled) {
  // A handler called preventDefault.
  console.log('The event was cancelled...');
} else {
  // None of the handlers called preventDefault.
  console.log('The event was not cancelled...');
}
You can also try this code with Online Javascript Compiler
UI Events are those events which are implemented by visual user agents for handling user interaction such as mouse and keyboard input. Some classes for UI events are:
FocusEvent
MouseEvent
WheelEvent
KeyboardEvent
Using a new MouseEvent("click"), as compared to using of new Event, is more beneficial if we want to create such events. This is because the right constructor allows us to specify standard properties for that type of Event. Example: clientX/ clientY for a mouse event.
What are events in Javascript? An event can be any action performed by the browser or the user. For example, when an HTML web page finishes loading or a button clicks.
How to trigger a custom event? Custom events can be activated with the help of the Events constructor. We can also use CustomEvent if we want to use more data in the event object.
How to trigger events in Javascript? Events can be triggered by using a document.addEventListener() method. Some HTML events are onload, onchange, onclick, and onmouseover.
Conclusion
I hope this blog helped you provide some meaningful insights on creating and dispatching DOM events. We learned how to create an Event object to generate an event from code, use the CustomEvent constructor for custom events, use clientX for mouse and keyboard events, bubbling events and trigger built-in events.
We hope that this blog has helped you enhance your knowledge regarding Javascript, and if you liked this blog, check other links. Do upvote our blog to help other ninjas grow. Happy Coding!"


 6+ registered

