


Introduction
If you’re reading this article, let me guess that you already know what Dropwizard is, but what after that?
After learning about Dropwizard, we must know how to use it. When talking about setting up Dropwizard, using Maven is definitely what comes up.
Now, what is Maven?
Maven is a tool used for project management (introduced by the Apache Software Foundation). It provides a complete framework for build cycles. Primarily used for projects developed in Java, Maven is driven by a project object model (POM). POM is the central repository for all dependencies. Here, the same folder rules across the organizations and can easily be integrated with continuous integration tools such as Jenkins. It is also responsible for project reporting and documentation developed in Java.
Thus, we can see that Maven is used to manage projects in Java. Also, we know that Dropwizard is a Java framework. So, now we need to know the process of setting up Dropwizard using Maven. Let’s see how it’s done in this article.
Setting Up Dropwizard Using Maven
For setting up Dropwizard using Maven, there are three alternatives:
(i) Create a project using Dropwizard - archetype according to the following syntax:
mvn archetype:generate -DarchetypeGroupId=io.dropwizard.archetypes -DarchetypeArtifactId=java-simple -DarchetypeVersion=[REPLACE WITH A VALID DROPWIZARD VERSION]
(ii) Use Dropwizard - example
(iii) Use the Dropwizard.core library to incorporate Dropwizard into an existing project.
The third method is explained in the tutorial below.

Tutorial
The tutorial below starts with the very basics of setting up Dropwizard using Maven. Each step is explained in detail for thorough understanding.
Step 1: Java Installation
Before we start setting up Dropwizard using Maven, we must install Java. It is usually installed on most systems, but we should still check for our system. To do this, first, we have to open the command prompt. To do this, press Windows+R, in the run prompt type “cmd” and press ok.
In the command prompt, we will run the following command:
java - - version
If the output is similar to the one shown below, Java is already installed in the system.
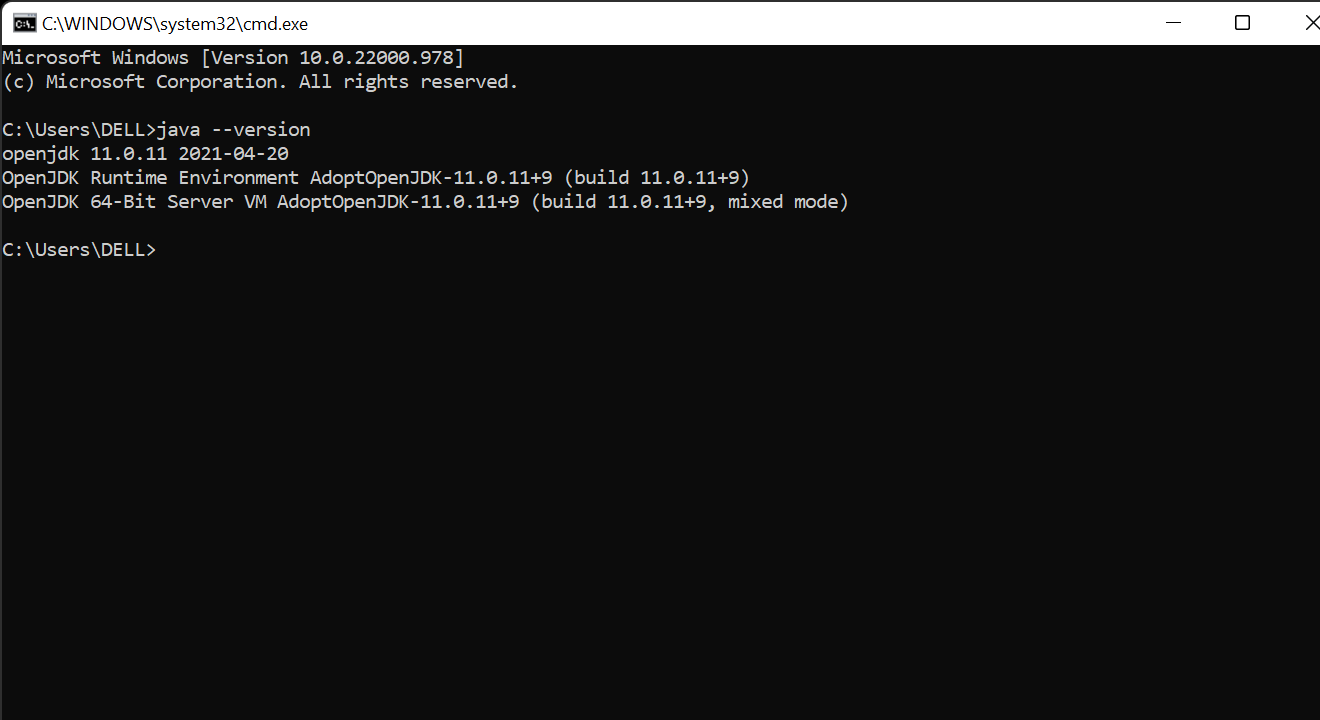
If the output shows “'java' is not recognized as an internal or external command, operable program or batch file” then Java is not installed and can be installed here.
Step 2: Maven Installation
Now that Java is installed, we need to install Maven.
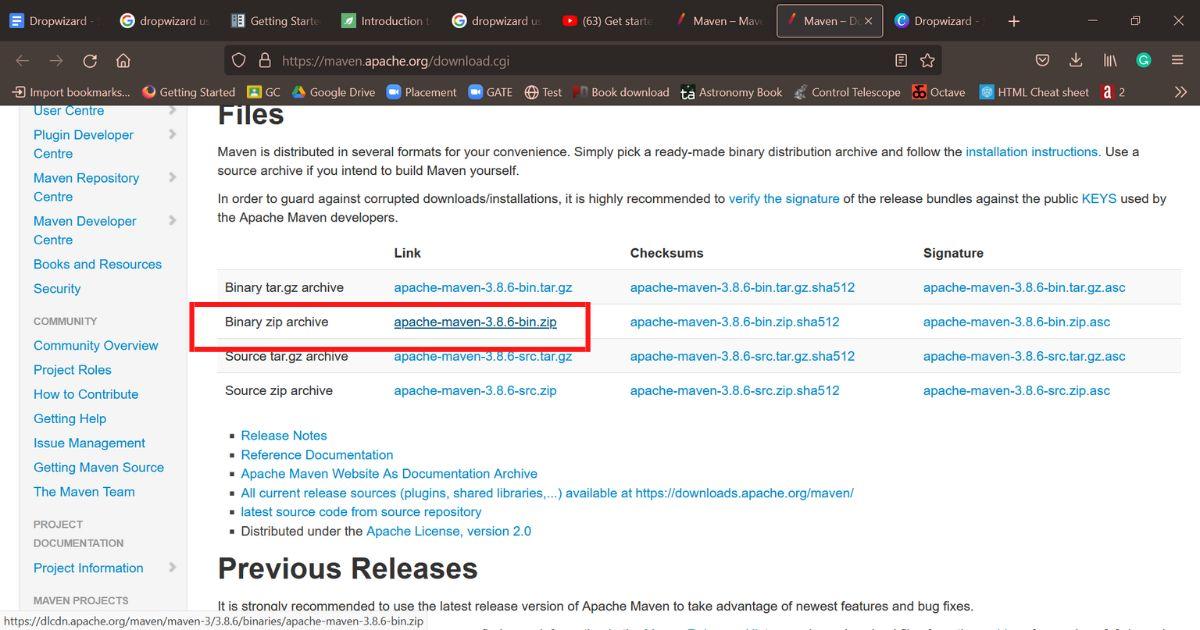
Firstly, download the “Binary zip archive” file from the link given here.
Then, to install Maven, extract the contents of the downloaded file into the “Program Files” directory.
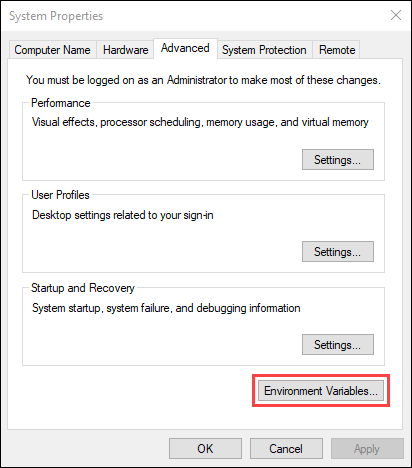
We will then open the “Edit the system environment variables” menu on windows and select the “environment variables” under the advanced tab.
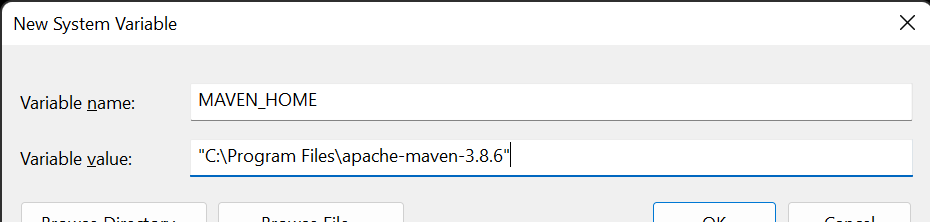
Create a new system variable with the specifications shown below. The variable value should be the path of the folder in which Maven has been extracted.
Select the “path” system variable and click edit.
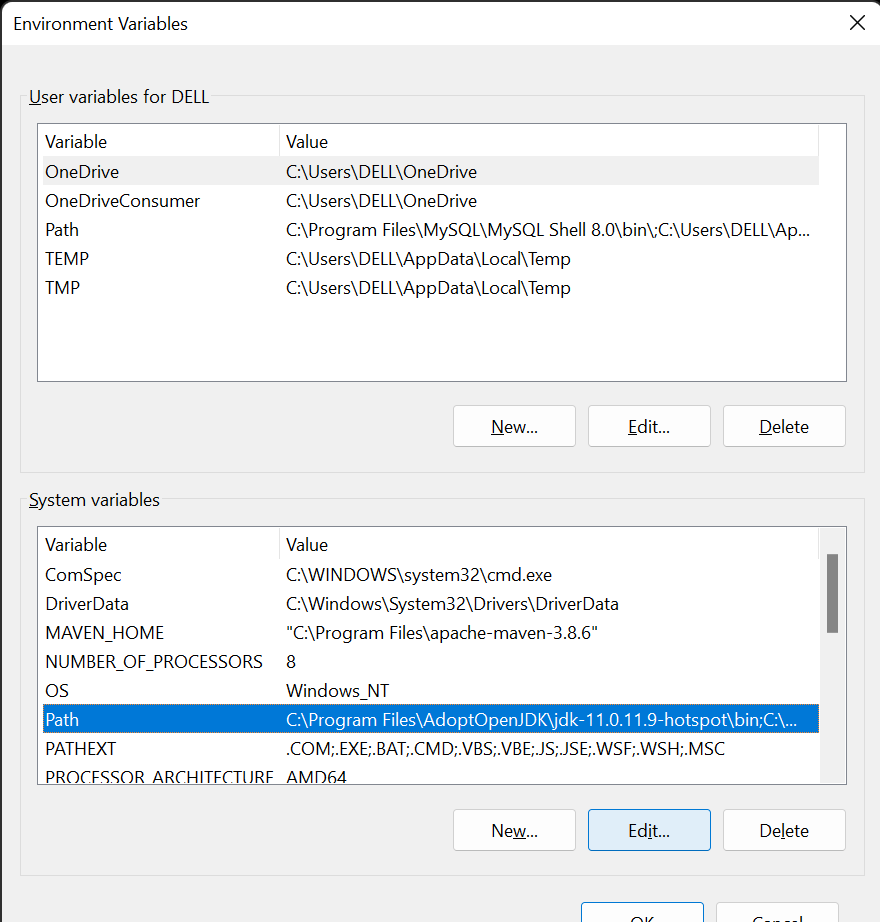
There, create a new path variable named “%MAVEN_HOME%\bin”. We can save all the changes by clicking "ok" on each window.
To verify the installation, run the following command in the command prompt.
mvn --version
Your output should give the details of the version of Maven installed as shown below.

Step 3: Creating a new Maven project
Run the following command to create a Maven project with the name maven-proj.
mvn archetype:generate -DgroupId=com.yammer -DartifactId=maven-proj -DarchetypeArtifactId=maven-archetype-quickstart -DarchetypeVersion=1.4 -DinteractiveMode=false
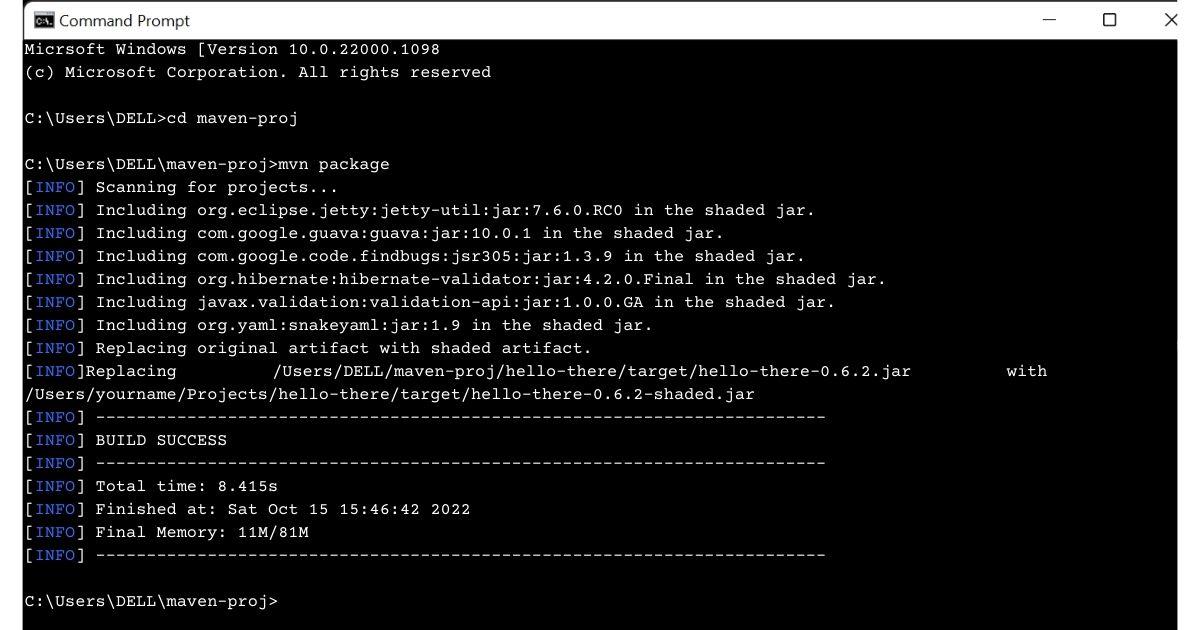
To check if the project was created, run the following:
cd maven-projStep 4: Install IntelliJ IDEA
For setting up Dropwizard using Maven, we must edit the pom.xml file of our project. To do this, we need an editor. Here, we will be using the IntelliJ IDEA.
Step 5: Add the dropwizard.version property
After installing IntelliJ IDEA, we need to add the current version of Dropwizard to the project object model (POM). To do this, we will use the dropwizard.version property. The syntax to do this is given below.
<properties>
    <dropwizard.version>ADD VERSION</dropwizard.version>
</properties>
Step 6: Add the dropwizard.core as a dependency
Add the dropwizard.core library as a dependency. The syntax for this is:
<dependencies>
    <dependency>
        <groupId>com.yammer.dropwizard</groupId>
        <artifactId>dropwizard-core</artifactId>
        <version>ADD VERSION </version>
    </dependency>
</dependencies>
Note: The version of dropwizard we have used is 0.6.2.
To sum it up, the ‘pom.xml’ file will look like this.
<?xml version="1.0" encoding="UTF-8"?>

<project xmlns="http://maven.apache.org/POM/4.0.0" xmlns:xsi="http://www.w3.org/2001/XMLSchema-instance"
 xsi:schemaLocation="http://maven.apache.org/POM/4.0.0 http://maven.apache.org/xsd/maven-4.0.0.xsd">
 <modelVersion>4.0.0</modelVersion>

 <groupId>com.yammer</groupId>
 <artifactId>maven-proj</artifactId>
 <version>1.0-SNAPSHOT</version>

 <name>maven-proj</name>
 <!-- FIXME change it to the project's website -->
 <url>http://www.example.com</url>

 <properties>
   <project.build.sourceEncoding>UTF-8</project.build.sourceEncoding>
   <maven.compiler.source>1.7</maven.compiler.source>
   <maven.compiler.target>1.7</maven.compiler.target>
   <dropwizard.version>0.6.2</dropwizard.version>
 </properties>

 <dependencies>
   <dependency>
     <groupId>junit</groupId>
     <artifactId>junit</artifactId>
     <version>4.11</version>
     <scope>test</scope>
   </dependency>
 </dependencies>

 <dependencies>
   <dependency>
     <groupId>com.yammer.dropwizard</groupId>
     <artifactId>dropwizard-core</artifactId>
     <version>0.6.2</version>
   </dependency>
 </dependencies>

 <build>
   <pluginManagement><!-- lock down plugins versions to avoid using Maven defaults (may be moved to parent pom) -->
     <plugins>
       <!-- clean lifecycle, see https://maven.apache.org/ref/current/maven-core/lifecycles.html#clean_Lifecycle -->
       <plugin>
         <artifactId>maven-clean-plugin</artifactId>
         <version>3.1.0</version>
       </plugin>
       <!-- default lifecycle, jar packaging: see https://maven.apache.org/ref/current/maven-core/default-bindings.html#Plugin_bindings_for_jar_packaging -->
       <plugin>
         <artifactId>maven-resources-plugin</artifactId>
         <version>3.0.2</version>
       </plugin>
       <plugin>
         <artifactId>maven-compiler-plugin</artifactId>
         <version>3.8.0</version>
       </plugin>
       <plugin>
         <artifactId>maven-surefire-plugin</artifactId>
         <version>2.22.1</version>
       </plugin>
       <plugin>
         <artifactId>maven-jar-plugin</artifactId>
         <version>3.0.2</version>
       </plugin>
       <plugin>
         <artifactId>maven-install-plugin</artifactId>
         <version>2.5.2</version>
       </plugin>
       <plugin>
         <artifactId>maven-deploy-plugin</artifactId>
         <version>2.8.2</version>
       </plugin>
       <!-- site lifecycle, see https://maven.apache.org/ref/current/maven-core/lifecycles.html#site_Lifecycle -->
       <plugin>
         <artifactId>maven-site-plugin</artifactId>
         <version>3.7.1</version>
       </plugin>
       <plugin>
         <artifactId>maven-project-info-reports-plugin</artifactId>
         <version>3.0.0</version>
       </plugin>
     </plugins>
   </pluginManagement>
 </build>
</project>
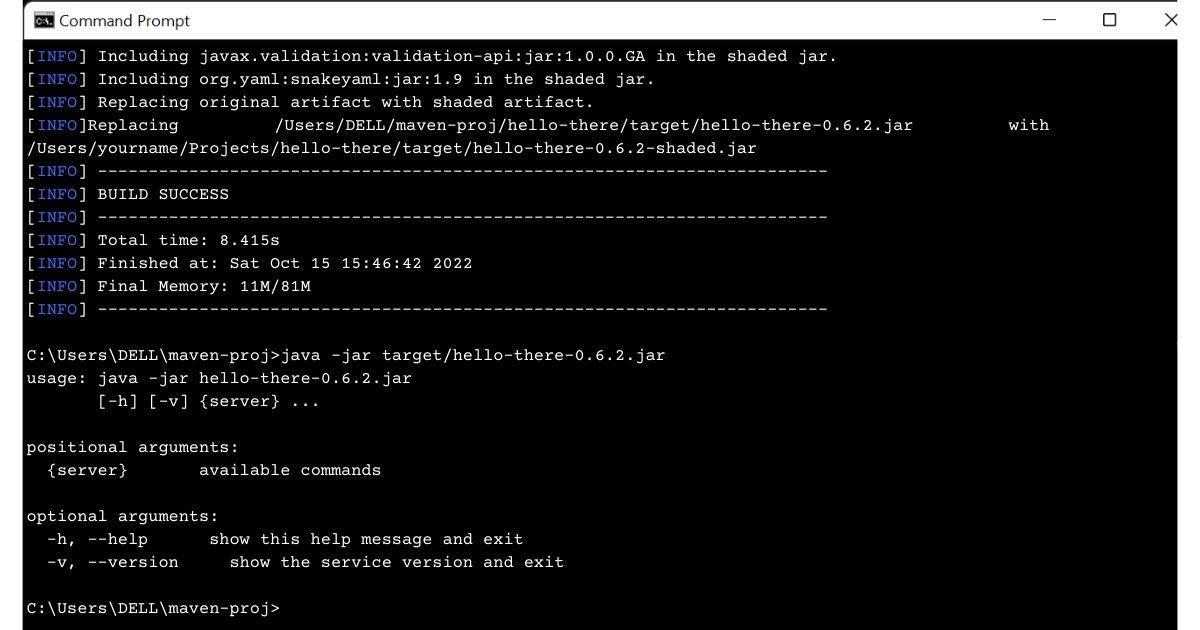
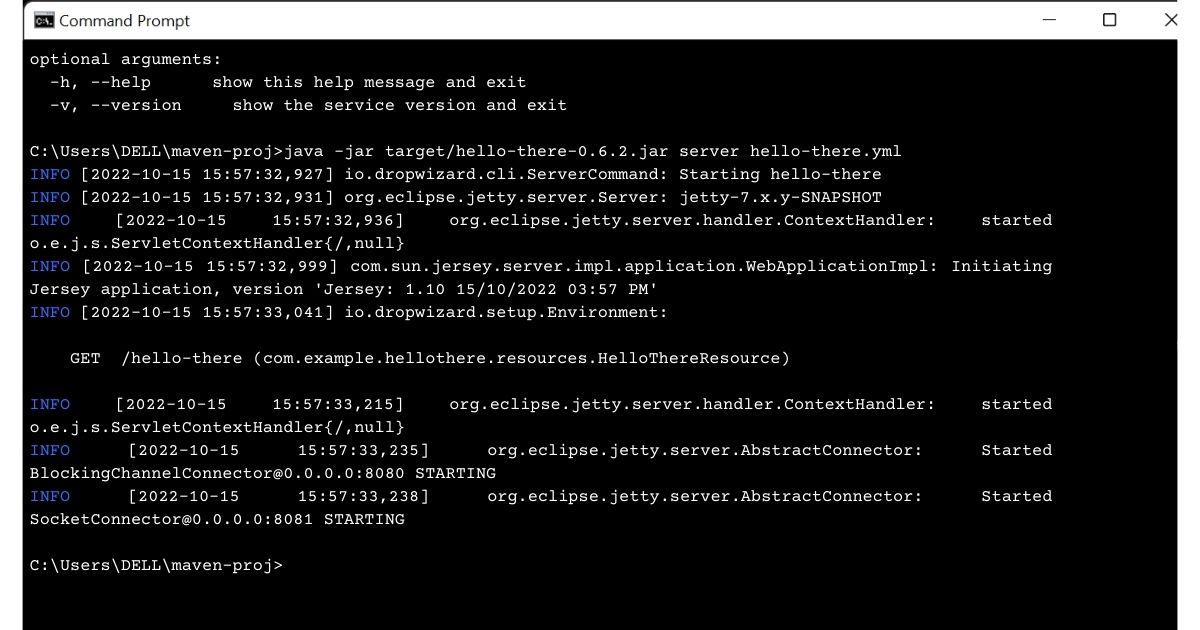
With this, we have set up a Maven project, but this isn’t much.
Let’s see how to write the code in the subsequent sections.


 9+ registered

