


Introduction
Data is an essential key to success in this technologically enhancing world, and if you want to be an active part of it, you should be good at dealing with data. Dealing with data involves monitoring, analyzing, gathering, consolidating, and connecting the data.
Excel is an excellent tool for dealing with data and performing different operations with the given data. We can either perform each operation manually or write the code in the Visual Basic Editor and let it deal with all the new and old data. Using the Visual Basic Editor mode may be difficult initially, but it is the most used technique in the long term as it saves a lot of time and effort.
So how are events related to Visual Basic Editor? We will learn about this while moving further in this blog. So without wasting any further time, let’s get on with our topic.
Some Basic Events
Before moving on to examples of events, let us first understand what an event is.
Events are the actions performed by the users that directly or indirectly trigger the Excel VBA to execute the code.
Workbook Open Event
Follow the steps given below to execute the code in the workbook.
- Open the Visual Basic Editor and double click on this workbook in the project explorer.
- Select open from the right drop-down list and workbook from the left drop-down list.
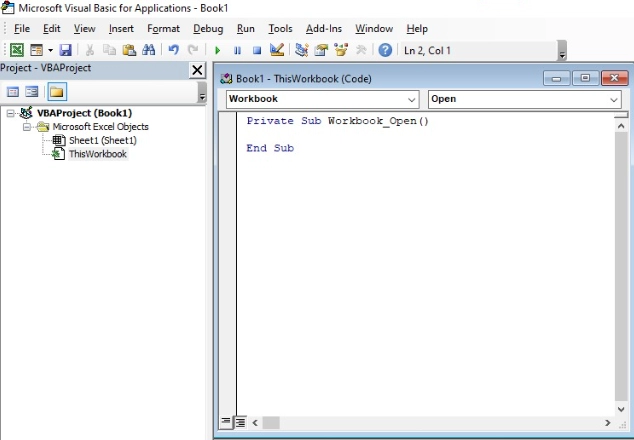
- Add the following code in the open event of the workbook:
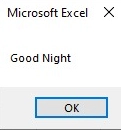
MsgBox "Good Night"- Now save and close the excel file and open it again. The result will be as follows:
Result:
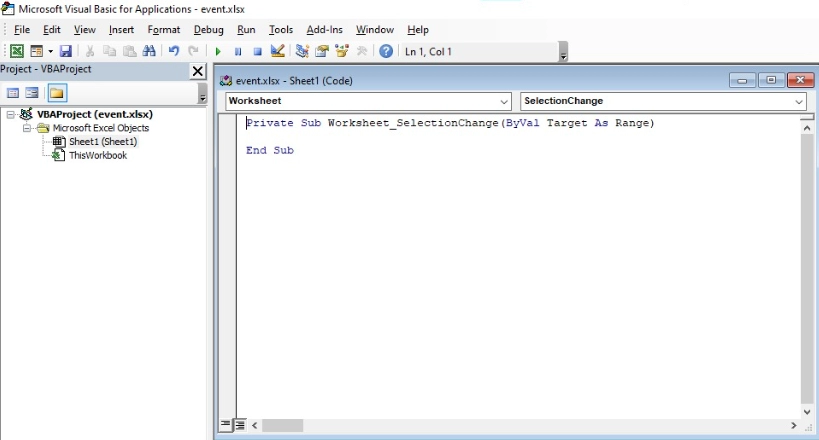
Worksheet Change Event
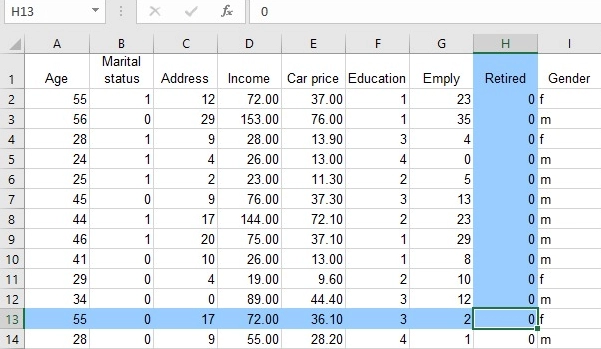
As the name suggests, the code for worksheet change will be executed when you change a cell on the worksheet.
- Open the Visual Basic Editor and double click on this sheet in the project explorer.
- Select change from the right drop-down list and worksheet from the left drop-down list.
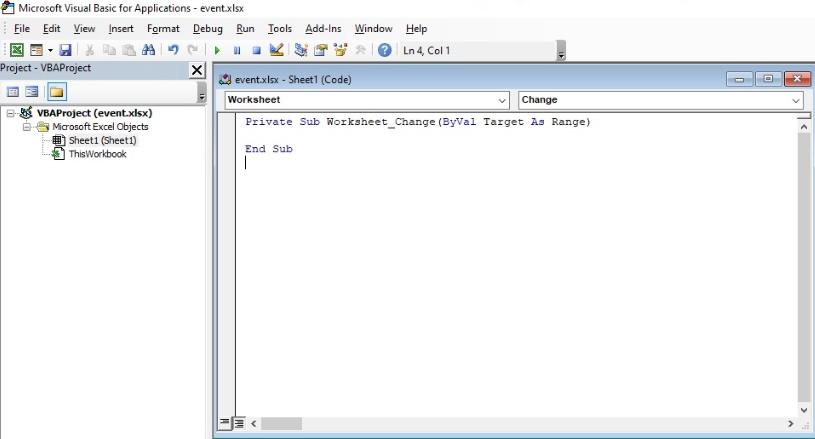
- Add the following code. This will perform when we change the value of cell B2:
If Target.Address = "$B$2" Then


End If- Now we will add the condition for the change in cell B2 like the below code:
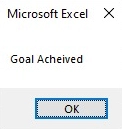
If Target.Value > 60 Then MsgBox "Goal Achieved"- When you enter a value greater than 60 in cell B2 the result will be like this:
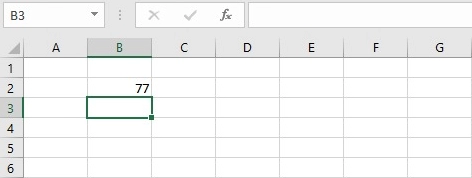
Result:
BeforeDoubleClick Event
It will execute the code when you double-click on the cell on the worksheet. Follow the steps given below:
- Open the Visual Basic Editor and double click on this sheet in the project explorer.
- Select BeforeDoubleClick from the right drop-down list and worksheet from the left drop-down list.
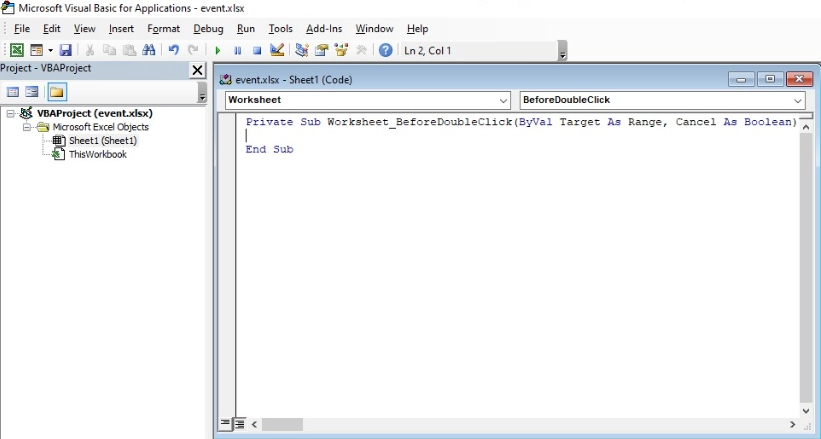
- Now add the following lines of code:
Target.Font.Color = vbRed
Cancel = True- The above code will change the color of the cell to red when doubleclicked on the cell, and the cancel statement is true when you don't want this to be your default variable.
- Test the given code. The result will be like this:
Result:
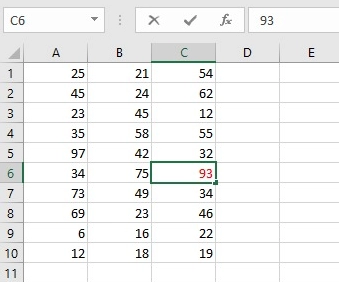
Highlight Active Cell
In this blog section, we will learn about the program that highlights the column and row of the active cell. Each time you select a new cell, the corresponding column and row change.
- Open the Visual Basic Editor and double click on this sheet in the project explorer.
- Select SelectionChange from the right drop-down list and worksheet from the left drop-down list.
- Add the following lines of code first, and we will declare four variables like this:
Dim rowNumberValue As Integer, columnNumberValue As Integer, i As Integer, j As Integer- First, we add the line that changes the background color of the corresponding cells to 'No Fill.'
Cells.Interior.ColorIndex = 0- Now we take the active cell row and column into different variables shown below:
rowNumberValue = ActiveCell.row
columnNumberValue = ActiveCell.column- Now, we highlight the row and column that has the value less than our active cell row and column respectively with blue color by using for loops like below:
For i = 1 To rowNumberValue
    Cells(i, columnNumberValue).Interior.ColorIndex = 37
Next i
For j = 1 To columnNumberValue
    Cells(rowNumberValue, j).Interior.ColorIndex = 37
Next j- Now run the code. The result will be like the below:
Result:
Create a Footer
Here, we will learn the program that creates a footer before printing the workbook. Follow the steps given below to perform the above operation.
- Open the Visual Basic Editor and double click on this workbook in the project explorer.
- Select before print from the right drop-down list and workbook from the left drop-down list.
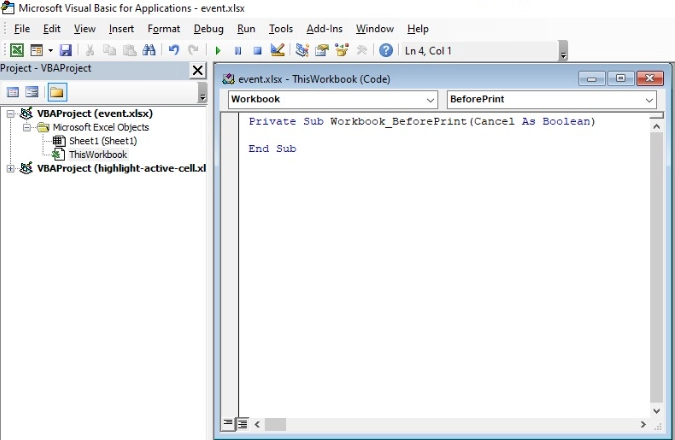
- To create a footer before printing of workbook, add the following code in the Visual Basic Editor.
ActiveSheet.PageSetup.LeftFooter = ActiveWorkbook.FullName- Now run the code. The output will be as follows:
Result:


 8+ registered

