


Introduction
TestNG (Test Next Generation) is an open-source test automation framework based on JUnit and NUnit. Consider TestNG to be a more sophisticated version of the other two frameworks. It adds new features to the code, such as test annotations, grouping, prioritization, parameterization, and sequencing techniques, which were not previously available.
Not only does the TestNG framework manage test cases, but it also generates detailed reports on them. It includes a detailed summary that shows the number of failed test cases. The report also allows testers to precisely locate bugs and fix them as soon as possible.
In this article, we will be learning how to execute failed test cases using TestNG. So Let us dive in!
Running Failed Test Cases in Selenium WebDriver
Let's start by making a simple Java project and writing some test cases. Then, as shown below, create three class files.

Also, make sure TestNG is configured in Eclipse. In this case, the tester has written simple test cases in each of the three class files, as shown below.
Test1.java
package testngtest;
import org.testng.annotations.Test;
@Test
public class Test1 {
public void testwhatsapp() {
@Asert.assertTrue(true);
System.out.println("Whatsapp is working fine");
}
}
Test2.java
package testngtest;
import org.testng.annotations.Test;
@Test
public class Test1 {
public void testlinkedin() {
@Asert.assertTrue(true);
System.out.println("Linkedin is working fine");
}
}
Test3.java
package testngtest;
import org.testng.annotations.Test;
@Test
public class Test1 {
public void testgoogle() {
@Asert.assertTrue(false);
System.out.println("Google is working fine");
}
}
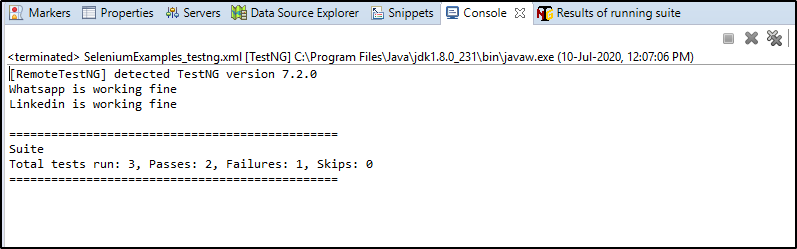
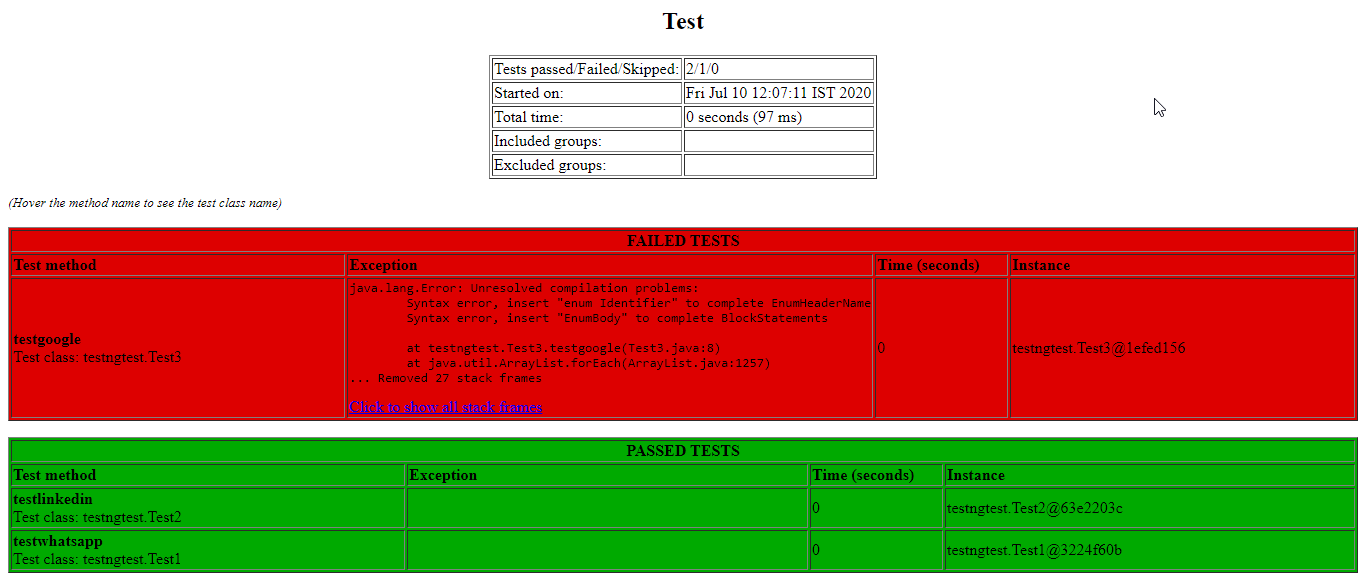
Tests 1 and 2 will run smoothly and without errors. In Test3, the tester is attempting to cause the test case to fail on purpose in order to demonstrate how to run failed test cases. As a result, @Asert.assertTrue(false); is included in the code to fail this particular test case.
All of these test cases should be saved.
Now go to the project folder, right-click on the project, and select TestNG. Then choose Convert to TestNG from the menu. The same can be seen in the image below.

This will create a testng.xml file for you, as shown below.
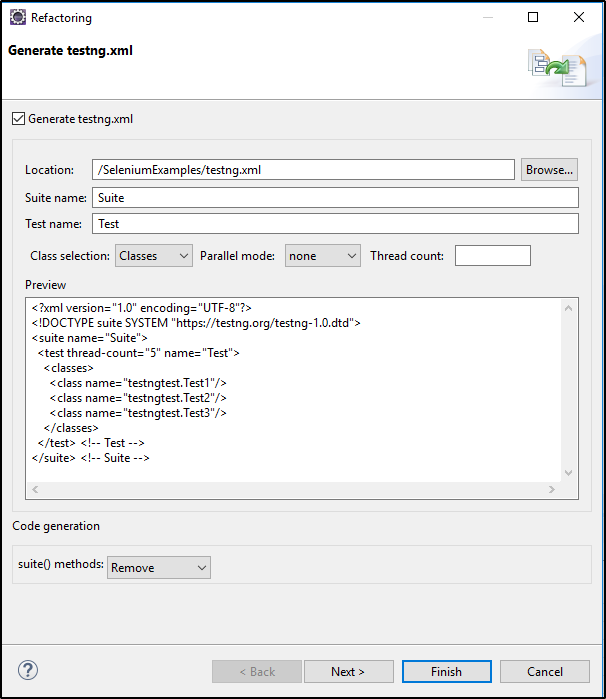
Now click the testng.xml file, then run as, and then TestNG Suite. Take a look at the image below.

Output:


 9+ registered

