Get a skill gap analysis, personalised roadmap, and AI-powered resume optimisation.
Introduction
Whenever we create a user in MySQL, we grant or assign some privileges to it. Privileges like permission to perform certain operations on the database and access to it. To maintain the security of the database, separate sets of permissions are given to separate users so that unwanted changes are not made to the database. These user-specific privileges are called user privileges.
Permission for multiple important database operations, which include DELETE, UPDATE, INSERT, SELECT, and CREATE, can be provided to the users by granting permissions and removed by revoking the permission. After the permissions for a user are modified, there are two ways by which we can make the changes effective. The first is to restart the entire database server; this new set of privileges will be applied on restart. The second way is to use Flush Privileges. In this article, we will discuss the use of the Flush privileges statement in MySQL.
Working with Flush Privileges in MySQL
The Flush Privileges command is an important command used for refreshing user privileges. Whenever a new user is created, or the user's permissions are updated, this information is stored in the database's memory by MySQL, particularly a collection of system tables called grant tables which stores data about user accounts, their related privileges, and other relevant information. All these tables play an important role in managing user authentication and access to the MySQL server and are a part of MySQL data dictionary.
MySQL consists of five main grant tables:
db
This table is for maintaining database-level privileges for the user's account; it also specifies which user has which privileges on specific databases.
tables_priv
Indicating which users have particular access to particular tables inside a database, this table keeps track of user account table-level privileges.
procs_priv
Related to stored procedures and functions, this table keeps track of privileges.
user
This table stores data about user accounts, like global privileges, authentication credentials such as username and password, and other account settings.
columns_priv
This table manages user accounts' column-level privileges, determining which users have specific capabilities on particular columns inside a database.
Whenever a user tries to connect to a MySQL server or database, the server first verifies the user's privileges with the help of information stored in the grant tables
Now, if the user attempts to make any changes to the system, firstly, it checks if the user has the appropriate permissions to perform the requested changes
If the user doesn't have the required permissions, access is denied by the system to the requested user
The user can then ask the admin or the root user for granting access for the needed permissions. And after this, the admin or root user can alter the grant tables with the help of SQL commands such as REVOKE, GRANT, and ALTER USER to administer user permissions
The Flush Privileges statement enters the picture at this point. A flush Privilege statement is used to refresh the user privileges so that whatever changes the user has made are applied to the system
The Flush Privilege command reloads grant table privileges, ensuring that any changes made to user permissions are instantly applied without needing to restart the MySQL server
Syntax
The syntax for FLUSH PRIVILEGES in MySQL is as follows:
FLUSH PRIVILEGES;
Uses of Flush Privileges
Now let's see how we can use the Flush privileges commands with a detailed explanation. Now we will create a new user to see the uses of these commands.
Connecting with MySQL Server
For connecting to the MySQL server, we have to run the following command:
Here, you are required to enter your MySQL password.
Creating a New User
Once connected to the MySQL server, we have to run the following command to create a new user.
CREATE USER 'user1'@'localhost' IDENTIFIED BY 'password@123';
Suppose we have to create a user named ‘alisha’ password being 'pass123'; then we can use the following command:
CREATE USER 'alisha'@'localhost' IDENTIFIED BY 'pass123';
Whenever a new user is created in MySQL, some default permissions are already set for that user, which is stored in the user table. This table has all the permissions-related data for that particular user. Let us now see how this table looks by taking an example.
User table can be generated by using the following command:
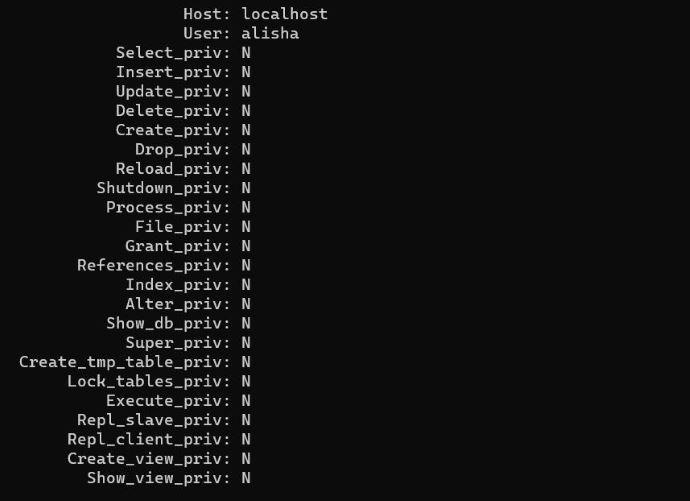
SELECT * FROM mysql.user WHERE user='alisha' \G;
Output:
Only a small fraction of the output is shown above to give you an idea. In the table, as we can see, no permission is granted for our user 'alisha'.
Updating User’s Permission
Permissions can be set using the UPDATE or GRANT command in MySQL. The only difference is that the UPDATE command is used to change the permissions; the FLUSH PRIVILEGES command makes those changes effective. And if the GRANT command is used to make the changes, the Flush Privileges command is not needed to make the changes effective.
Let's see an example in which we use a simple query to change the Select_priv for our user.
UPDATE mysql.user set Select_priv='Y' WHERE user='alisha';
After this, we have to use the flush privileges command to make sure that changes are applied to it.
FLUSH PRIVILEGES;
Now we will look at what the new permissions for the user look like, to see that we will use the following command:
SELECT * FROM mysql.user WHERE user='alisha' \G;
Output:
As we can see in the above output, the Select_Priv section has been changed to Y, and the remaining other sections are N. Here, Y stands for Yes, and N stands for No.
Next, we will see the GRANT command to set the INSERT and DELETE permissions for user 'alisha'; here, we don't have to use the flush privileges command to apply changes. The Syntax for the GRANT command is as follows:
GRANT INSERT, DELETE ON *.* TO alisha@'localhost';
Now we will check if the insert and delete permissions have been assigned to alisha.
SELECT * FROM mysql.user WHERE user='alisha' \G;
Output:
We can see in the above output that user 'alisha' has been granted both Insert and Delete privileges by using the GRANT command without the Flush privileges command.
Changing the Password of the User
There are multiple commands using which we can change the user's password; some of the many commands are SET, ALTER, and UPDATE commands. Now we will see how we can change the password ALTER command as well as the UPDATE command.
To get the authentication_string for our user, we will run the following command:
SELECT authentication_string FROM mysql.user WHERE user='alisha';
Output:
As we can see, we have got the authentication_string for the user with the password "pass123". Now we will use the following ALTER command to change the password for our user 'alisha'.
ALTER USER 'alisha'@'localhost' IDENTIFIED BY 'newpass123';
Here, we are not required to use the Flush privileges command to make the changes effective if we are using the ALTER command. We will run the SELECT command again to check whether the auth string is changed.
SELECT authentication_string FROM mysql.user WHERE user='alisha';
Output:
As we can see, the password is changed successfully using the ALTER command.
Now, we are going to use the UPDATE command to make the changes. We will use the following command to change the auth string for the user 'alisha'
UPDATE mysql.user SET authentication_string = NULL WHERE user='alisha';
As discussed earlier, whenever the UPDATE command is used, we have to use the Flush Privileges command to make the changes instantly and effectively.
FLUSH PRIVILEGES;
We will again use the SELECT command to check the new auth string for the user 'alisha'.
SELECT authentication_string FROM mysql.user WHERE user='alisha';
Output:
As we can see, the auth string for the user has been changed to null by using the UPDATE command and, after that Flush Privilege command.
Examples of Flush Privileges in MySQL
In the following examples, we are using ‘alisha’ in place of the new user.
1. Granting privileges to new user
Syntax
GRANT SELECT, INSERT, UPDATE ON *.* To 'alisha'@'localhost';
After this, we have to use the flush privileges command to make sure that changes are applied to it.
FLUSH PRIVILEGES;
Now we will look at what the new permissions for the user look like, to see that we will use the following command:
SELECT * FROM mysql.user WHERE user='alisha' \G;
Output:
As we can see from the above image, user 'alisha' has been granted the privileges of select, insert, and update, which is denoted by the 'Y' sign.
2. Revoking Privileges from the User
Syntax
REVOKE SELECT ON *.* FROM 'alisha'@'localhost';
After this, we have to use the flush privileges command to make sure that changes are applied to it.
FLUSH PRIVILEGES;
Now we will look at what the new permissions for the user look like, to see that we will use the following command:
SELECT * FROM mysql.user WHERE user='alisha' \G;
Output:
As we can see from the above image, that select privilege has been revoked for the user 'alisha'.
3. Removing the User from MySQL
For removing a MySQL user and revoking all privileges, we have to use the following command:
DROP USER 'alisha'@'localhost';
After this, we have to use the flush privileges command to make sure that changes are applied to it.
FLUSH PRIVILEGES;
4. Revoking all privileges
Syntax
REVOKE ALL PRIVILEGES, GRANT OPTION FROM 'alisha'@'localhost';
After this, we have to use the flush privileges command to make sure that changes are applied to it.
FLUSH PRIVILEGES;
Effects of Using Flush Privileges in MySQL
Clearing cache
Immediate change of Permissions
Maintaining Database security
Simplifying Database Administration
Improving Database Performance
Frequently Asked Questions
What happens when I use FLUSH PRIVILEGES?
When you use FLUSH PRIVILEGES, the server will reload the grant tables and apply any changes made since the server was started. This may cause temporary delays in MySQL operations, but it is usually very quick.
What are the risks of using FLUSH PRIVILEGES?
There are no major risks associated with using FLUSH PRIVILEGES. However, it is important to be aware that if you use FLUSH PRIVILEGES while a user is logged in, the user may lose access to the database until the grant tables have been reloaded.
When should I use FLUSH PRIVILEGES?
You should use FLUSH PRIVILEGES if you have made changes to the grant tables and you want those changes to take effect immediately. For example, if you have granted a new privilege to a user, you would need to use FLUSH PRIVILEGES before the user would be able to use that privilege.
What is FLUSH PRIVILEGES?
FLUSH PRIVILEGES is a MySQL statement that forces the server to reload the grant tables. This means that any changes made to the grant tables since the server was started will be applied.
Conclusion
In this article, we have discussed the FLUSH PRIVILEGES Statement in MySQL. We have covered the introduction, Syntax, uses of Flush Privileges, examples of flush privileges, and effects of the Flush Privileges statement in MySQL.
We hope this blog has helped you enhance your knowledge of the FLUSH PRIVILEGES Statement in MySQL. If you want to learn more, then check out our articles:


 8+ registered

