Do you think IIT Guwahati certified course can help you in your career?
Introduction
Flutter is a cross-platform development framework used to write code and can deploy on various platforms like android, iOS, and desktop.
Let us learn how to create a form in flutter using dart. This blog will cover flutter forms and form validation with working code and its output. At last, we will go through one example and implement the code to understand the concept better.
Flutter Forms
Forms are now a critical part of any mobile or web application. Forms are used to gather information from the user. According to your business niche, requirements, and logic, you can create a form for the user, including user authentication, searching, ordering, filtering, booking, etc. The form can have text fields, checkboxes, and radio buttons.
Creating a Form
A form widget is provided by the flutter to create forms. This form widget acts as a container, which allows us to group multiple form fields. To create a form, we have to provide a GlobalKey to uniquely identify the form, which will enable us to validate form fields.
To allow users to enter the text fields, the flutter form widget uses a child widget called TextFormField. This child widget is used to render a material design text field. TextFormField also allows us to display validation errors when they occur.
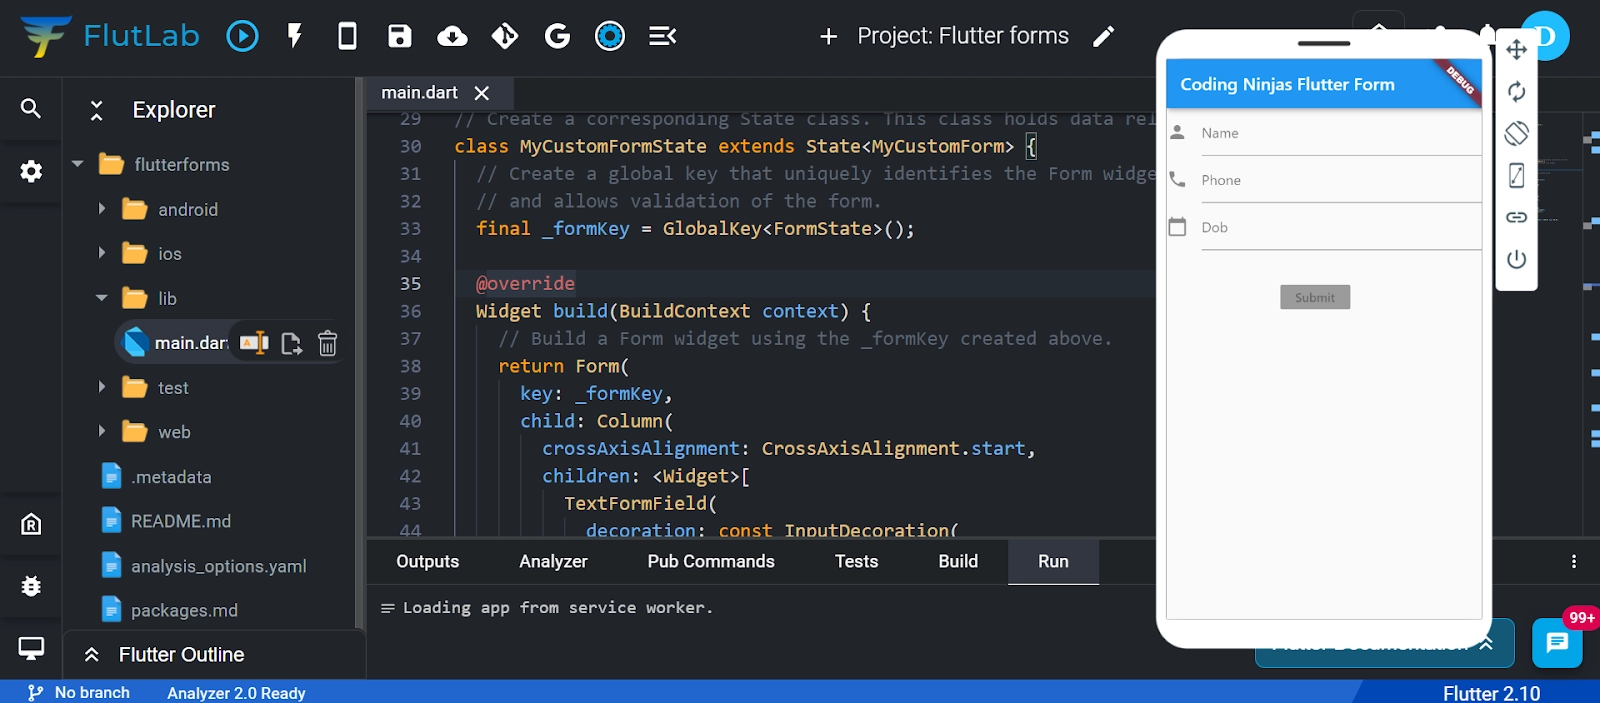
You can go to the FlutLab website, where you will see something like this with the main.dart file open-
Now you can replace the main.dart file code with the following given code-
import 'package:flutter/material.dart';

void main() => runApp(MyApp());

class MyApp extends StatelessWidget {
  @override
  Widget build(BuildContext context) {
    final appTitle = 'Coding Ninjas Flutter Form';
    return MaterialApp(
      title: appTitle,
      home: Scaffold(
        appBar: AppBar(
          title: Text(appTitle),
        ),
        body: MyCustomForm(),
      ),
    );
  }
}

// Create a Form widget.
class MyCustomForm extends StatefulWidget {
  @override
  MyCustomFormState createState() {
    return MyCustomFormState();
  }
}

// Create a corresponding State class. This class holds data related to the form.
class MyCustomFormState extends State<MyCustomForm> {
  // Create a global key that uniquely identifies the Form widget
  // and allows validation of the form.
  final _formKey = GlobalKey<FormState>();

  @override
  Widget build(BuildContext context) {
    // Build a Form widget using the _formKey created above.
    return Form(
      key: _formKey,
      child: Column(
        crossAxisAlignment: CrossAxisAlignment.start,
        children: <Widget>[
          TextFormField(
            decoration: const InputDecoration(
              icon: const Icon(Icons.person),
              hintText: 'Enter your name',
              labelText: 'Name',
            ),
          ),
          TextFormField(
            decoration: const InputDecoration(
              icon: const Icon(Icons.phone),
              hintText: 'Enter a phone number',
              labelText: 'Phone',
            ),
          ),
          TextFormField(
            decoration: const InputDecoration(
              icon: const Icon(Icons.calendar_today),
              hintText: 'Enter your date of birth',
              labelText: 'Dob',
            ),
          ),
          new Container(
              padding: const EdgeInsets.only(left: 130.0, top: 40.0),
              child: new RaisedButton(
                child: const Text('Submit'),
                onPressed: null,
              )),
        ],
      ),
    );
  }
}
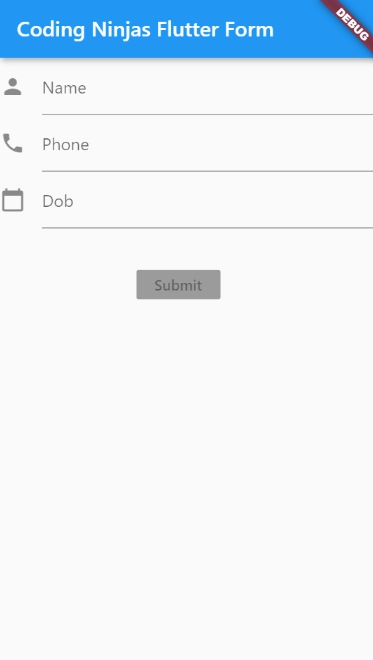
Now you can run the program, and the output of the above will be like this -
Code explanation -
A custom class of name MyCustomForm is created. A global key is defined inside this class with the name _formKey, which holds FormState, used to receive the form widgets. Some custom styles are also inside the Build method of this class and using the TextFormField device to provide form fields such as name, phone number, date of birth, or just a standard field. InputDecoration is used inside TextFormField to style your form by changing the properties like borders, labels, icons, hints, styles, etc. At last, we have added a button for submitting the form.
Creating a Form With Validation
For correcting specific standards, we use a method called validation. It is used to authenticate the user entered data. In all digital interactions with users, validation of the form is common.
The following three steps need to be followed to create a validating flutter form.
Step 1: Use the form widget with the global key.
Step 2: Use TextFormField to provide the input field with validating property.
Step 3: Create a button that, when clicked, validates flutter form fields, and if any error is there, it displays it.
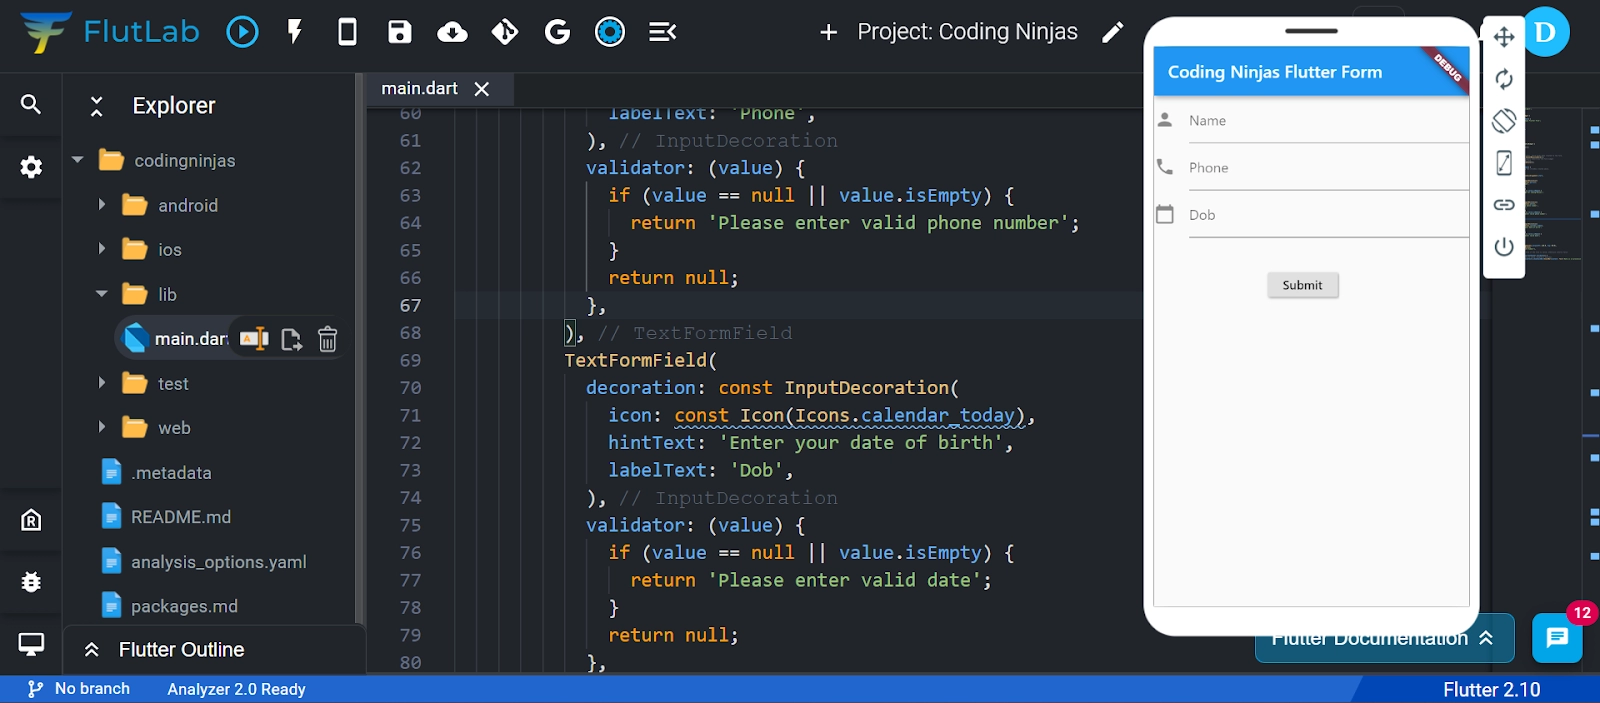
You can go to the FlutLab website, where you will see something like this with the main.dart file open-
Now you can replace the main.dart file code with the following given code-
import 'package:flutter/material.dart';

void main() => runApp(MyApp());

class MyApp extends StatelessWidget {
  @override
  Widget build(BuildContext context) {
    final appTitle = 'Coding Ninjas Flutter Form';
    return MaterialApp(
      title: appTitle,
      home: Scaffold(
        appBar: AppBar(
          title: Text(appTitle),
        ),
        body: MyCustomForm(),
      ),
    );
  }
}

// Create a Form widget.
class MyCustomForm extends StatefulWidget {
  @override
  MyCustomFormState createState() {
    return MyCustomFormState();
  }
}

// Create a corresponding State class, which holds data related to the form.
class MyCustomFormState extends State<MyCustomForm> {
  // Create a global key that uniquely identifies the Form widget
  // and allows validation of the form.
  final _formKey = GlobalKey<FormState>();

  @override
  Widget build(BuildContext context) {
    // Build a Form widget using the _formKey created above.
    return Form(
      key: _formKey,
      child: Column(
        crossAxisAlignment: CrossAxisAlignment.start,
        children: <Widget>[
          TextFormField(
            decoration: const InputDecoration(
              icon: const Icon(Icons.person),
              hintText: 'Your Name',
              labelText: 'Name',
            ),
            validator: (value) {
              if (value == null || value.isEmpty) {
                return 'A message for Coding Ninjas';
              }
              return null;
            },
          ),
          TextFormField(
            decoration: const InputDecoration(
              icon: const Icon(Icons.phone),
              hintText: 'Enter a phone number',
              labelText: 'Phone',
            ),
            validator: (value) {
              if (value == null || value.isEmpty) {
                return 'Please enter valid phone number';
              }
              return null;
            },
          ),
          TextFormField(
            decoration: const InputDecoration(
              icon: const Icon(Icons.calendar_today),
              hintText: 'Enter your date of birth',
              labelText: 'Dob',
            ),
            validator: (value) {
              if (value == null || value.isEmpty) {
                return 'Please enter valid date';
              }
              return null;
            },
          ),
          new Container(
              padding: const EdgeInsets.only(left: 130.0, top: 40.0),
              child: new RaisedButton(
                child: const Text('Submit'),
                onPressed: () {
                  // It returns true if the form is valid, otherwise returns false

                  if (_formKey.currentState!.validate()) {
                    // If the form is valid, display a Snackbar.
                    Scaffold.of(context).showSnackBar(SnackBar(content: Text('Data is in processing.')));
                  }
                },
              )),
        ],
      ),
    );
  }
}
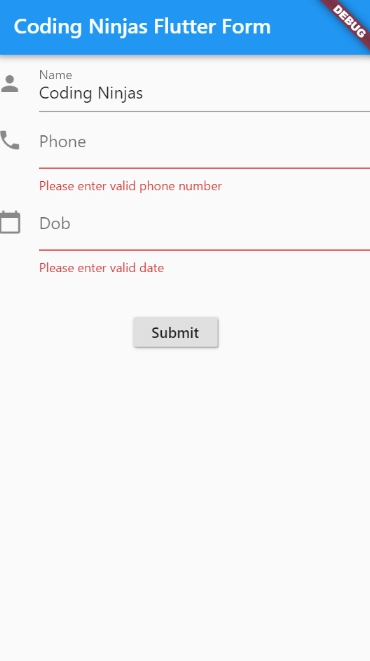
Now you can run the program, and the output of the above will be like this -
Error message when you leave the input text field empty-
Code explanation -
For validating the input properties, we have used validator() in the TextFormField. Whenever the user enters the wrong input, the validator() function returns a string containing an error message; otherwise, it returns a null value. This needs to be ensured that the TextFormField need not be empty; otherwise, it will return an error message.
Frequently Asked Questions
What is Flutter?
Flutter is a cross-platform development framework used to write code and can deploy on various platforms like android, iOS, and desktop.
What are the advantages of using Flutter?
A flutter is a potent tool. Following are a few advantages of using Flutter-
Faster Development
Live and Hot Reloading
Good Community
Minimal Code
Documentation
Cross-Platform Development
UI Focused
UI Focused
How to focus a Text field?
As soon as the text field is visible and you want to focus the text field, then you should use the autofocus property.
TextField(
  autofocus: true,
);
What is the onchanged() function?
It is recommended to use this function to run a callback function whenver in the text feild the text changes.
TextField(
  onChanged: (text) {
    print('First text field: $text');
  },
)
How to style the text field?
By default text, fields are decorated with underlines but we can style them in different way also.
In this blog, we covered the topic of flutter form. We learnt how to create a form and form validation with working code and its output and if you would like to learn more, check out our articles onFlutter Checkboxand Flutter Stateful and Stateless Widgets.


 9+ registered

