Do you think IIT Guwahati certified course can help you in your career?
Introduction
For a developer, the most crucial thing he thinks about when he is making an app is that people come to his app and use it. But there are many similar apps available in almost every field, so how will you make your app keep up with the competition?
The answer is either to provide some extra features other than the rest of the competition or to make your existing app more interesting than the others. So let me ask you what the first thing the user sees after opening an application is?
The answer is the splash screen(the first screen after opening the application), so it will make an impression on the user's mind continuously or subconsciously. So if you make your splash screen attractive, this will be a plus point in your application. Don’t worry if you don’t know about the splash screen. We will help you learn and under about it. So, without wasting any time, let's further get on with our topic.
Splash Screen and its Overview
The splash screen or launch screen is the first screen a user sees when he opens the application, even before the main page loads. The splash screen generally contains the current version, app logo, and an image.
Most developers think that a splash screen is not much as it is visible only for some time. But it is the first impression of the application by the user. It will give an overall idea about the theme of the application. This will also be visible in case of any network issue, as the app's main page will not be loaded, so the user will only see the splash screen.
You have to realize the importance of a splash screen, so if you want to implement it in your app, you must also learn to integrate it properly with other elements.
We will use a package known as splashscreen to integrate the splash screen. We will use this package because it will help us set up a splash screen and the time for which it will be visible, and that also by not affecting the native or original code.
Characteristics of Splash Screen
There are many characteristics of splash screens available, but here we will discuss some of the important ones.
It is mainly used for identifying recognition and branding.
When the loading time of the splash screen completes, the user will see the home screen or menu screen.
It can also be used to show the loading progress indicator while the hardware loads.
Steps to create Flutter Splash Screen
In this blog, the section will follow specific steps to make a splash screen in a flutter. We will see every step in detail.
Create a new Flutter Project
Make sure you have all the flutter app development and Flutter SDK-related components installed as we have to create a new flutter project. Now set up everything properly, and after completing that run the following command in any local directory of your choice.
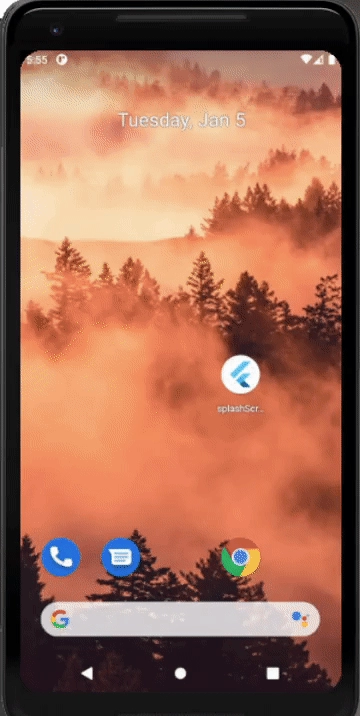
flutter create splashSceenExample
This will set up your project. You can navigate through the directory, execute the given command in the terminal, and run the project on either the actual device or the emulator screen.
flutter run
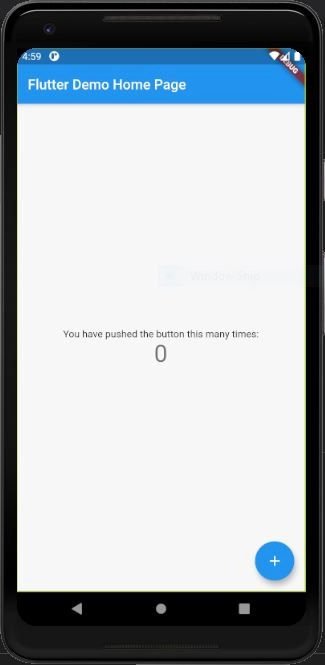
After building the project, the result will be as follows:
Now we have our project running, so now we can add a splash screen by changing the native code. But we can also add a splash screen without changing the native code, and that is by using the splashscreen package. This will make adding the splash screen in your futter application easy. The package provides many features like various widgets and customization parameters for the splash screen.
You first need to add it to your list of dependencies, and to do so, copy the code given below in your .yaml file:
splashscreen: ^1.3.5
This package will provide you with a splashscreen widget that you can use in your app's splash screen or launch screen.
Add a Splash Screen in your App
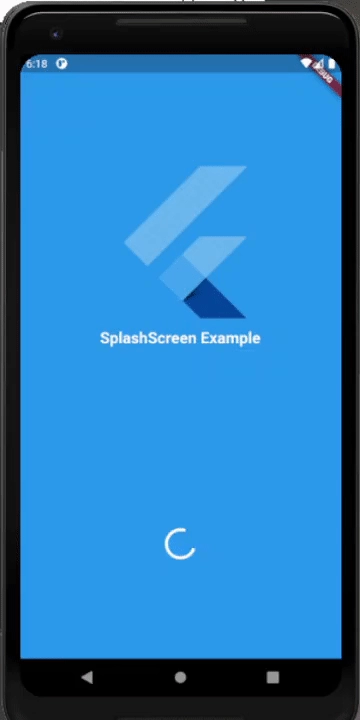
Now we will use the splashscreen package that we installed earlier. The basic approach will be to use the installed widgets with your MaterialApp widgets. The code for doing the above procedure will look like this:
The above method will work for both Android and IOS.
Frequently Asked Questions
What is the general function of Splash Screen?
The general purpose of the splash screen is to enhance the feel and look of the website or application.
Can we adjust the size of the splash screen?
Yes, you can adjust the splash screen size by using the photoSize option.
What is Dart?
Dart is an object-oriented and general-purpose programming language with C syntax and is used for creating a front-end for the user interface in web and mobile apps.
Mention some of the advantages of using Flutter?
It has FLexible and Expressive UI. It provides Faster Deployment, and With the help of Flutter, you can use a wide variety of applications globally.
Conclusion
In this article, we have extensively discussed Splash Screen in Flutter, its overview, splashscreen plugin, its characteristics, adding text in the splash screen, adjusting its visible time, adding logos and images in the splash screen, and much more.
We hope this blog has helped you enhance your knowledge of Splash Screen in Flutter.
And if you have any questions about Flutter, you must visit this blog here. You will most probably have answers to all of your questions.


 9+ registered

