How to use a stack widget in Flutter?
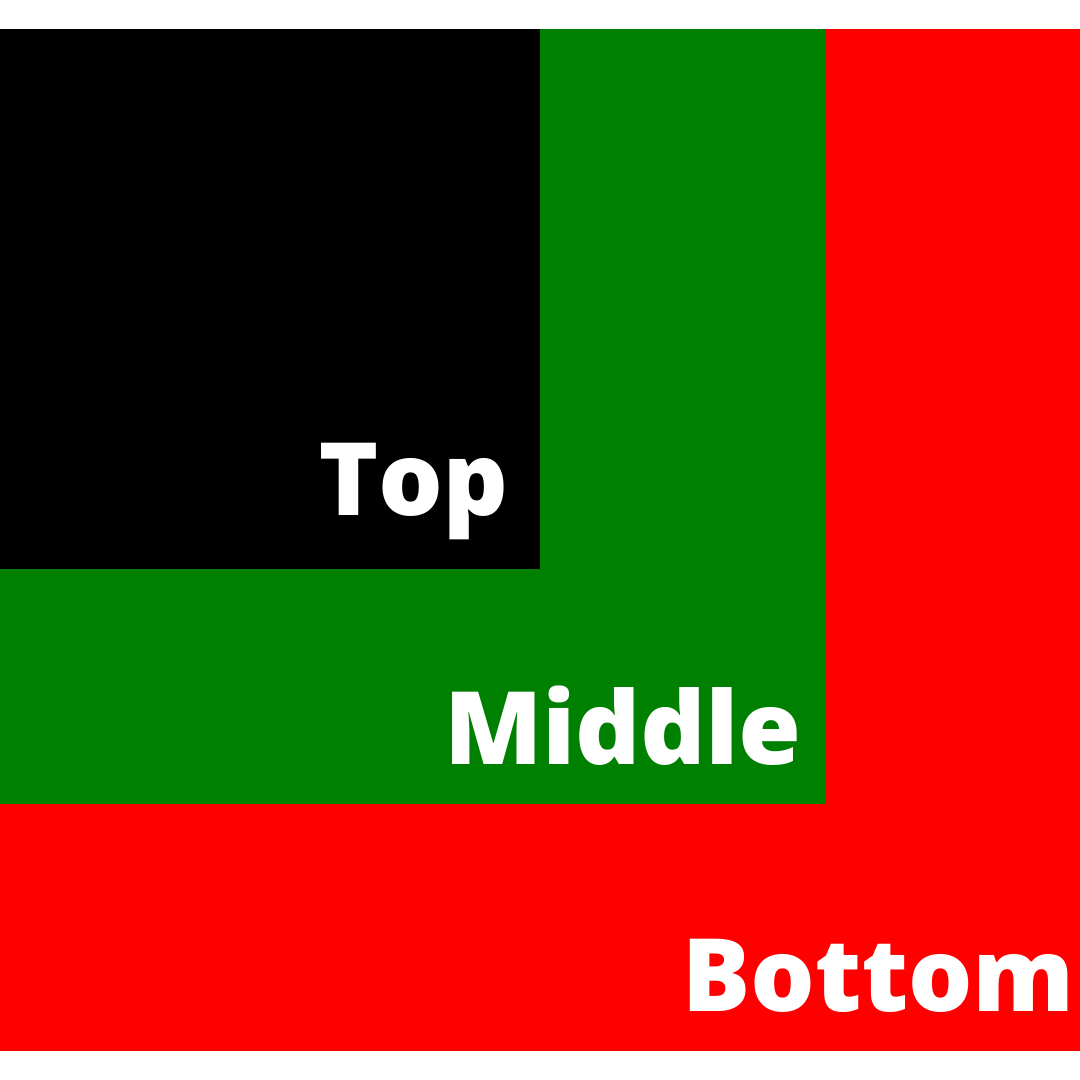
The following example, which comprises three containers of shrinking size, will help you rapidly understand how to use the stack widget:
Stack(
  children: <Widget>[
    // Maximum_Size
    Container(
      color: Colors.red,
    ),
    Container(
      color: Colors.green,
    ),
    Container(
      color: Colors.black,
    )
  ],
),
It will produce the following results:
Properties of Flutter Stack Widget
The properties utilized with the stack widget are as follows:
- alignment: The position of the children's widgets in the stack is determined by alignment. It can be at the top, bottom, middle, center-right, or other positions.
- textDirection: It determines which way the text should be read. It can draw text in either ltr (left to right) or rtl (right to left) format (right to the left).
- fit: It will regulate the size of the stack's non-positioned offspring widgets. It comes in three different varieties: loose, expand, and passthrough. The flexible attribute makes the child widget as small as feasible, while the extended attribute makes it as large as possible. In contrast, the passthrough attribute makes the child widget dependent on its parent widget.
- overflow: When content overflows outside the stack, it affects whether the children's widgets are shown or clipped.
- clipBehavior: It decides whether or not the content will be clipped.
Positioned Stack in Flutter
It is not a stack parameter, but it can be used to locate the children's widgets in the stack. The constructor for the positioned stack is as follows:
const Positioned({
Key key,
this.left,
this.top,
this.right,
this.bottom,
this.width,
this.height,
@required Widget child,
})
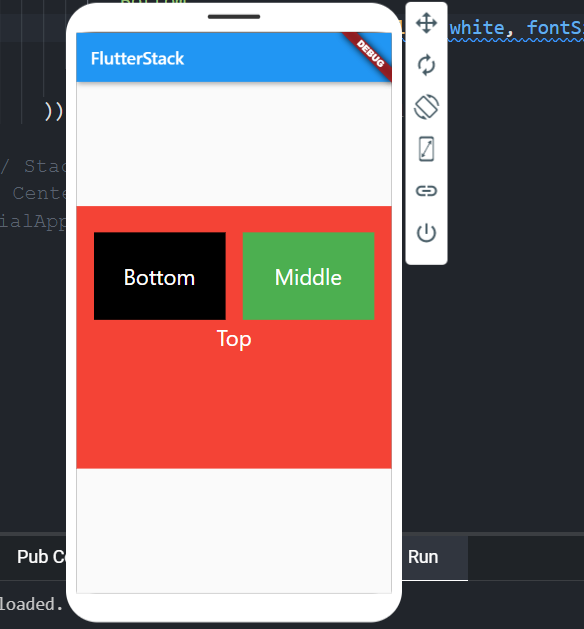
Example of Flutter Stack
The stack widget in Flutter is demonstrated in the code below. We'll test the majority of the stack widget's critical characteristics with this code.
import 'package:flutter/material.dart';

void main() => runApp(MyApp());

//This Widget is the application's main widget.
class MyApp extends StatelessWidget {
  @override
  Widget build(BuildContext context) {
    return MaterialApp(
      home: MyStackWidget(),
    );
  }
}

class MyStackWidget extends StatelessWidget {
  @override
  Widget build(BuildContext context) {
    return MaterialApp(
      home: Scaffold(
          appBar: AppBar(
            title: Text("FlutterStack"),
          ),
          body: Center(
            child: Stack(
              fit: StackFit.passthrough,
              overflow: Overflow.visible,
              children: <Widget>[
                Container(
                  height: 300,
                  width: 400,
                  color: Colors.red,
                  child: Center(
                    child: Text(
                      'Top',
                      style: TextStyle(color: Colors.white, fontSize: 25),
                    ),
                  ),
                ),
                Positioned(
                  top: 30,
                  right: 20,
                  child: Container(
                    height: 100,
                    width: 150,
                    color: Colors.green,
                    child: Center(
                      child: Text(
                        'Middle',
                        style: TextStyle(color: Colors.white, fontSize: 25),
                      ),
                    ),
                  ),
                ),
                Positioned(
                    top: 30,
                    left: 20,
                    child: Container(
                      height: 100,
                      width: 150,
                      color: Colors.black,
                      child: Center(
                        child: Text(
                          'Bottom',
                          style: TextStyle(color: Colors.white, fontSize: 25),
                        ),
                      ),
                    )),
              ],
            ),
          )),
    );
  }
}
Output
Flutter IndexedStack
It's another Flutter stack widget that only shows one element at a time by choosing its index. Take a look at the following code snippet:
IndexedStack(
  index: 1,
  children: <Widget>[
    Container(
      color: Colors.green,
    ),
    Container(
      color: Colors.blue,
    ),
    Container(
      color: Colors.yellow,
    )
  ],
)
IndexedStack accepts children in the same way that a regular stack does, but it only displays one kid at a time. As a result, it isn't a stack. We utilize it to quickly swap from one child to another depending on our needs.
Example of IndexedStack
The following code demonstrates how to use Flutter's indexed stack widget:
import 'package:flutter/material.dart';

void main() => runApp(MyApp());

//This Widget is the application's main widget.
class MyApp extends StatelessWidget {
  @override
  Widget build(BuildContext context) {
    return MaterialApp(
      home: MyStackWidget(),
    );
  }
}

class MyStackWidget extends StatelessWidget {
  @override
  Widget build(BuildContext context) {
    return MaterialApp(
      home: Scaffold(
          appBar: AppBar(
            title: Text("FlutterStack"),
          ),
          body: Center(
            child: IndexedStack(
              index: 0,
              children: <Widget>[
                Container(
                  height: 300,
                  width: 400,
                  color: Colors.red,
                  child: Center(
                    child: Text(
                      'This is First Widget',
                      style: TextStyle(color: Colors.white, fontSize: 25),
                    ),
                  ),
                ),
                Container(
                  height: 250,
                  width: 250,
                  color: Colors.green,
                  child: Center(
                    child: Text(
                      'This is Second Widget',
                      style: TextStyle(color: Colors.white, fontSize: 25),
                    ),
                  ),
                ),
              ],
            ),
          )),
    );
  }
}
Output
Frequently Asked Questions
How do you use Stack in Flutter?
In Flutter, the Stack widget allows you to overlay widgets on top of each other. By using the Stack widget, you can position multiple widgets relative to each other, creating complex layouts easily.
Is there a Stack in Dart?
No, Dart itself does not have a built-in stack data structure. However, Flutter, which uses Dart, provides the Stack widget for arranging widgets in a stacked layout.
What is the Stack widget?
The Stack widget in Flutter allows you to stack multiple widgets on top of each other. It positions its children relative to its top-left corner, allowing for complex layouts where widgets can overlap or be positioned precisely.
Is Flutter a tech stack?
No, Flutter is not a tech stack but rather a UI toolkit developed by Google for building natively compiled applications for mobile, web, and desktop from a single codebase. However, developers often use Flutter as part of their overall tech stack when building cross-platform applications.
Conclusion
In this article, we have discussed the Flutter stack. We have discussed its properties and how we can use it differently while developing applications. So basically, a Flutter widget holds a list of widgets and arranges them one on top of the other.
We hope this blog has helped you enhance your knowledge regarding Flutter Stack. If you want to learn more, check out our articles on Flutter Drawer, Flutter Horizontal List, and Flutter Carousel Slider.
Do upvote our blog to help other ninjas grow.
Happy Learning Ninja!


 9+ registered

