Creating an Android Frame Layout
In this section, we will see a step by step tutorial on how to create your Android Frame Layout. Before getting started, create a simple Android Studio project for developing this application. Refer to the blog Android App Components and Folder Structure on the Coding Ninjas Website to understand the basic components of an Android application and an Android project's directory structure.
Adding non coding assets
I will be using the following image (logo of coding ninjas) in the demo application created in this blog. You are free to use your own image or the same image as in this tutorial.

Add the image named coding_ninjas.png in the directory app/res/drawable.
The activity_main.xml file
The frame layout is declared in this file. All the child views are placed at the top of each other. In the code presented below, I have first added an image, and I have added a button over that image. You can easily adjust the child views inside the frame layout.
Code:
<?xml version="1.0" encoding="utf-8"?>
<FrameLayout
    xmlns:android="http://schemas.android.com/apk/res/android"
    android:layout_width="match_parent"
    android:layout_height="match_parent"
    android:background="@color/orange">

    <ImageView
        android:layout_width="300dp"
        android:layout_height="296dp"
        android:layout_marginTop="100dip"
        android:layout_marginLeft="60dip"
        android:scaleType="centerInside"
        android:background="@color/white"
        android:src="@drawable/coding_ninjas" />

    <Button
        android:layout_width="wrap_content"
        android:layout_height="wrap_content"
        android:text= "Click to like this blog"
        android:layout_marginTop="330dp"
        android:layout_marginLeft="95dp"/>

</FrameLayout>
The @color refers to the colors.xml file inside the app/res/values directory. The contents of this colors.xml file are also presented in the latter half of this blog.
The MainActivity.kt file
We don't need to change much in this file and just use the code which is provided when we create an Android application with an empty activity. This file contains the onCreate callback method, which loads the main activity layout.
Code:
package com.example.framelayout

import androidx.appcompat.app.AppCompatActivity
import android.os.Bundle

class MainActivity : AppCompatActivity() {
    override fun onCreate(savedInstanceState: Bundle?) {
        super.onCreate(savedInstanceState)
        setContentView(R.layout.activity_main)
    }
}
The values folder
The values folder is present under the app/res directory. It contains important information about our Android application, as shown below.
strings.xml
The contents of this file are presented below. In my demo application, this file only contains the name of my application.
Code:
<resources>
    <string name="app_name">Frame Layout</string>
</resources>
colors.xml
The contents of this file are presented below. It defines the various colors used in our application. The @colors/orange and @colors/white in the activity_main.xml refer to the values inside this file.
Code:
<?xml version="1.0" encoding="utf-8"?>
<resources>
    <color name="purple_200">#FFBB86FC</color>
    <color name="purple_500">#FF6200EE</color>
    <color name="purple_700">#FF3700B3</color>
    <color name="teal_200">#FF03DAC5</color>
    <color name="teal_700">#FF018786</color>
    <color name="black">#FF000000</color>
    <color name="white">#FFFFFFFF</color>
    <color name="orange">#FF8C00</color>
</resources>
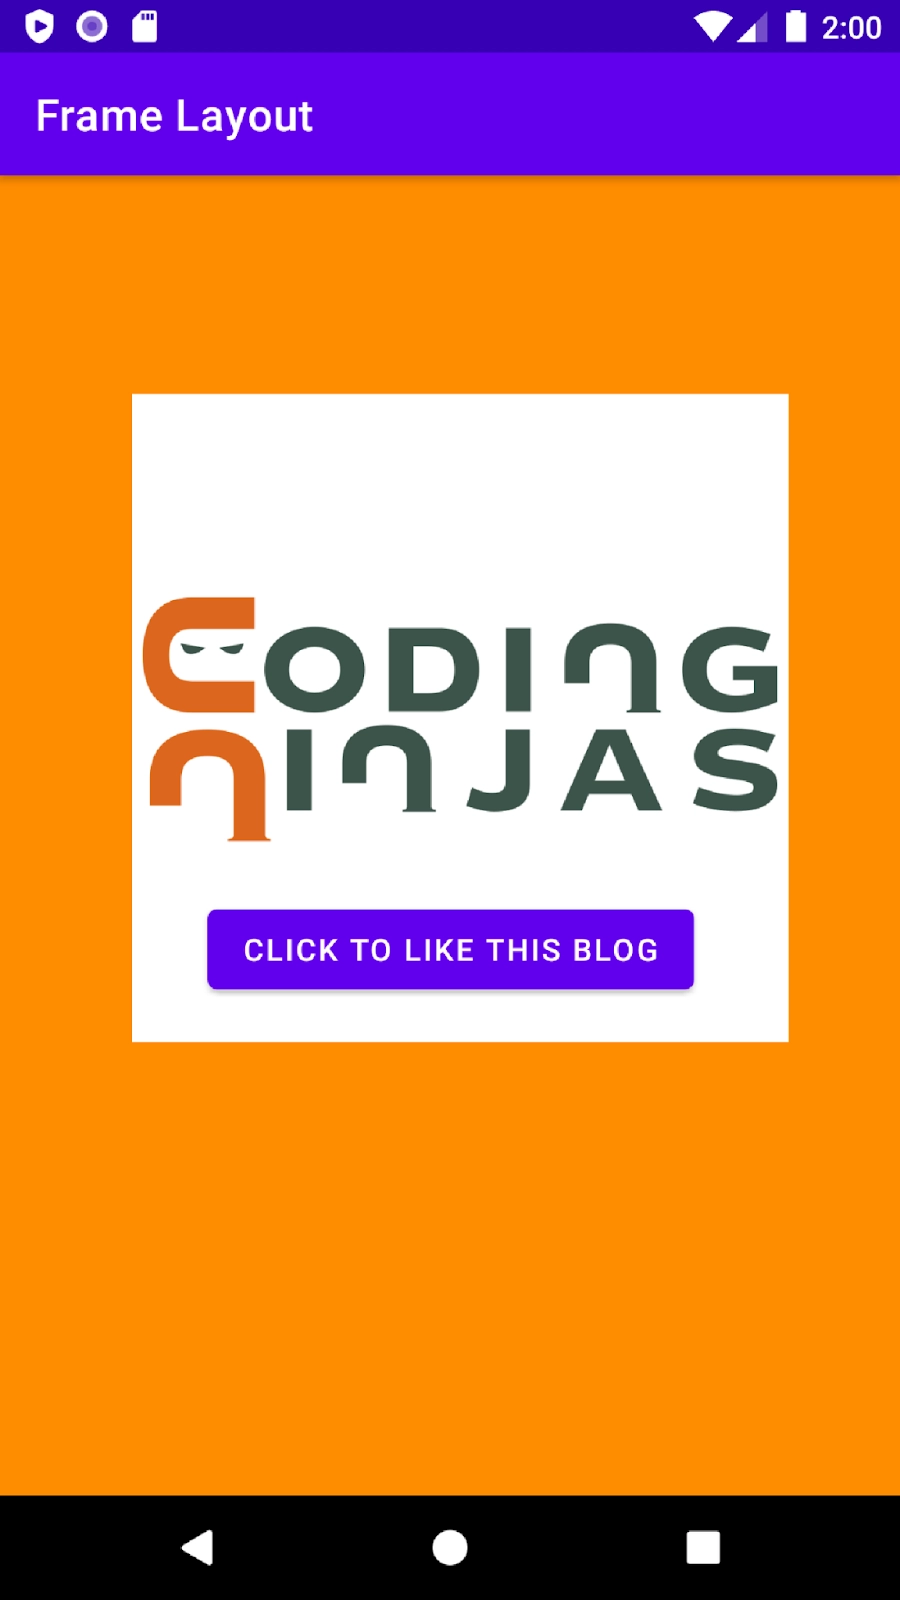
Final Frame Layout
After following all the steps written above, run your application using an AVD. The following image shows the final frame layout, which will be created after running the application.
FAQs
-
What are some commonly used AVD?
Ans: AVD stands for Android Virtual Device. Pixel 2 is a lightweight AVD that is pretty commonly used.
-
How is the size of a frame layout decided?
Ans: The size of a frame layout is decided by the size of its largest child, including the change in dimensions due to padding.
-
How can we control the position of children inside our Frame Layouts?
Ans: We can control the position of children inside our Frame Layouts by assigning gravity to each child. The android:layout_gravity attribute can be used to assign gravity to each child.
Key Takeaways
In this article, we have extensively discussed Frame Layouts and saw a demo application in which we implemented a simple frame layout using XML. There are many other layouts that you can try implementing in your Android application. For example, you can create Motion Layout and Relative Layout by referring to our Coding Ninjas Website blogs.
We hope that this blog has helped you enhance your knowledge regarding Frame Layouts and if you would like to learn more, check out our Android Development Course on the Coding Ninjas Website to learn everything you need to know about Android development. Do upvote our blog to help other ninjas grow.
Happy Coding!


 8+ registered

