Do you think IIT Guwahati certified course can help you in your career?
Introduction
Nowadays, GCC is widely used by the developers for the development of embedded systems and IoT devices due to its cross-platform nature and its supportive nature towards multiple architectures and operating systems. In this article, we will analyze its features.
This article will cover the GCC Compiler for Windows. We will guide you to install the GCC Compiler in Windows with the help of instructions and images. So Let’s begin with a brief introduction on GCC Compiler and its features.
The GNU Compiler Collection (GCC) is a collection of compilers that can be used to run programs of various languages such as C++, C, Fortran and many more. It is an open-source software developed by the GNU Project that may work on a variety of platforms, including Windows, iOS, ARM based embedded systems, Linux, PowerPC and others. The GCC Compiler offers numerous error checking and debugging tools which can save a significant amount of time and effort.
Features of GCC Compiler
It can integrate with several popular IDEs which helps us to choose our preferable development environment.
It provides us with Link-time optimization (LTO) features which analyze every bit of the code and helps us to optimize the code.’
It provides us with a wide range of compiler warnings which helps us to identify the bugs in the program.
It provides a code coverage analysis to identify which part of the code is not executed during testing.
It provides a wide range of built-in functions, libraries, and modules, making the code relatively more straightforward.
It provides us with the features to detect memory related bugs such as buffer overflows and invalid pointer usage.
How to Setup GCC Compiler for Windows
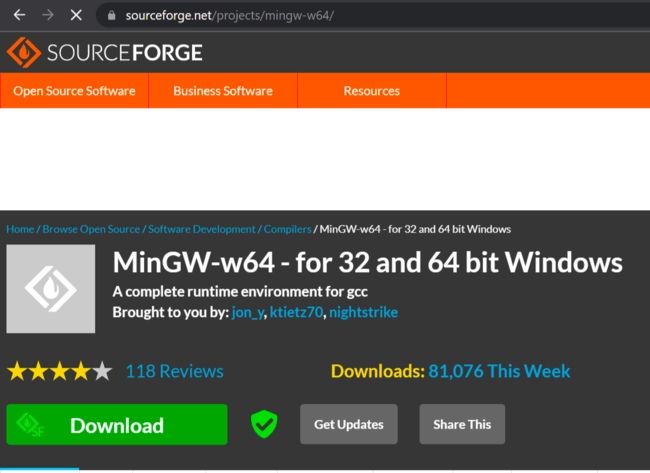
Step 1: Downloading MinGW-w64
Open this link: “MinGW-w64” in your browser and click the “Download” button to download the MinGW-w64 - for 32 and 64 bit Windows. MinGW-w64 is a development environment specifically designed for Windows, which uses GCC Compiler. The image below shows the site, which will open when you click the link above. You have to click on the download button given in the green box.
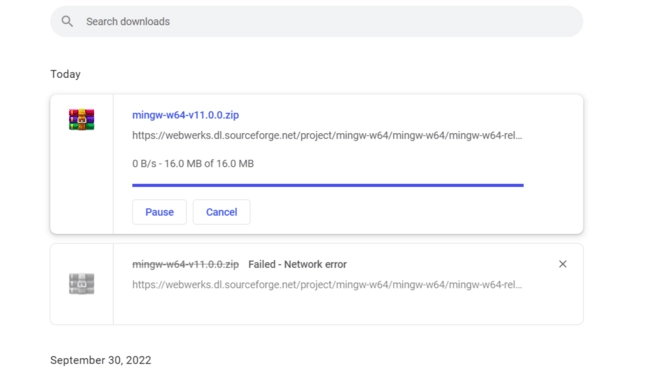
Step 2: Downloading Zip File
After this, the browser will download the zip file of “MinGW-w64”, The image below shows the zip file the browser is downloading.
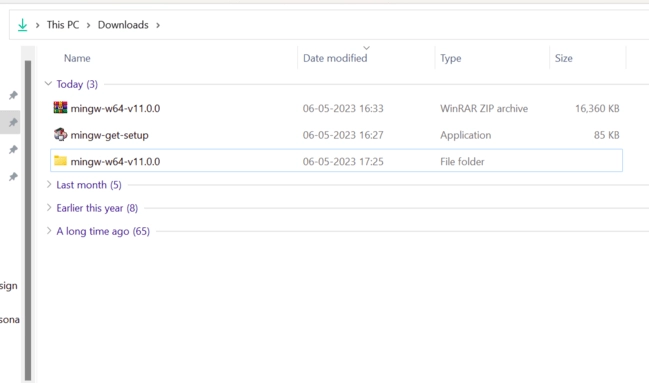
Step 3: Extract and Install
After downloading, you must extract the zip file and install the “mingw-get-setup.” In the image below, you can see the “mingw-get-setup” application.
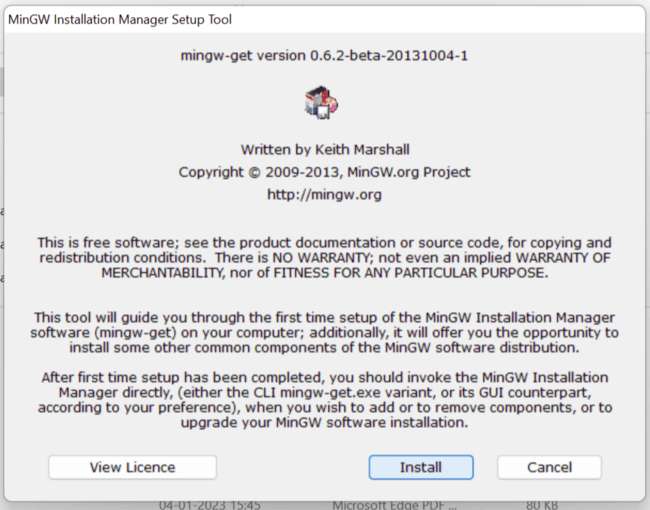
Step 4: Click Install
Now click the “Install” button highlighted by the blue box to install the MinGW Compiler.
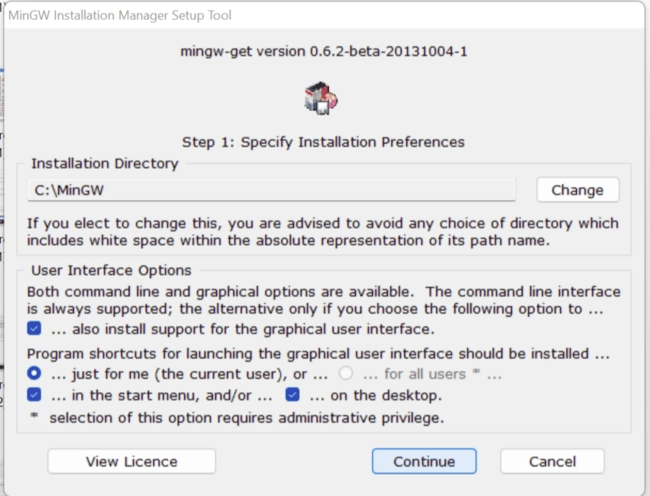
Step 5: Installation Preferences
Now you will see the Installation preferences. Keep this as default and don’t change anything. You have to click on the “Continue” button and it will move to the next page.
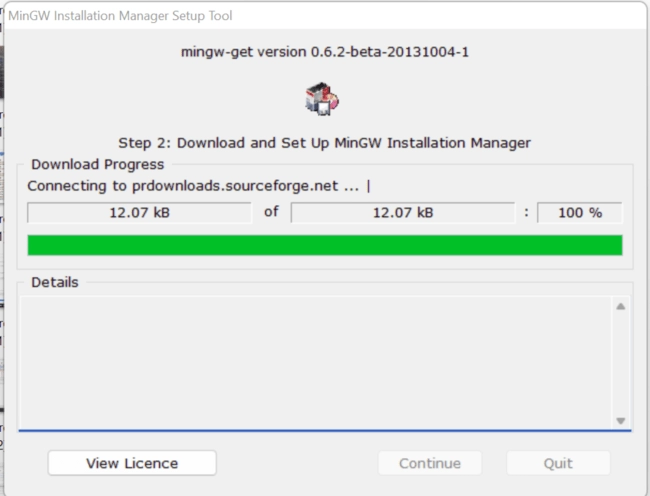
Step 6: Downloading MinGW Installation Manager
Now it will automatically start downloading the “MinGW Installation Manager” as shown in the image below.
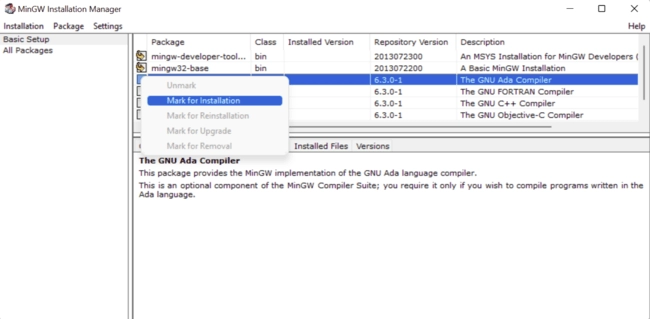
Step 7: Choose GNU Compilers
Now you have to mark the GNU Compilers which you want to download. It is mandatory to mark “mingw-developer-tool” (provide some necessary developer tools) and “mingw32-base” (basic MinGW installation). As you can see in the image below, there are multiple versions of GNU Compilers like “GNU FORTRAN Compiler”, “GNU C++ Compiler” and many more. It totally depends on your needs, and which compiler you want to install.
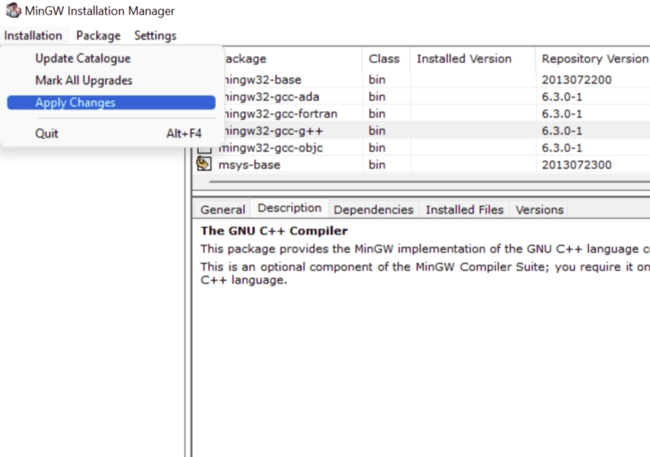
Step 8: Apply Changes
Now click on the “Apply Changes” (highlighted by the blue color) to install all the libraries, header-files and modules of the GNU Compiler selected by you.
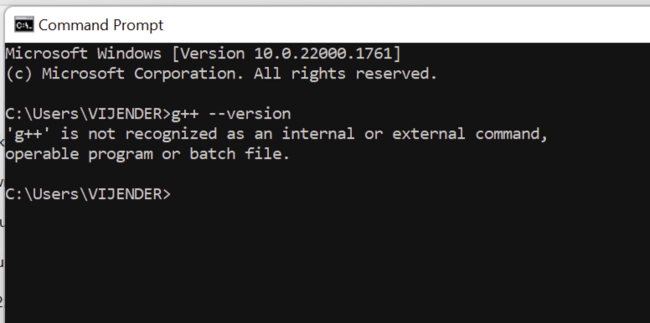
Step 9: Environment Variables
Now the GNU compiler is ready to run your codes. But there is a problem, you haven't added the path in the environment variables. Suppose you have installed the mingw32-gcc-g++ package which runs the C++ programs. When you’ll try to run the C++ program in your text editor, Windows will find the path of the gcc-g++ compiler in the environment variables. But you haven’t added the path. So you will get an error. You can see in the image below, the Windows do not recognize the g++.
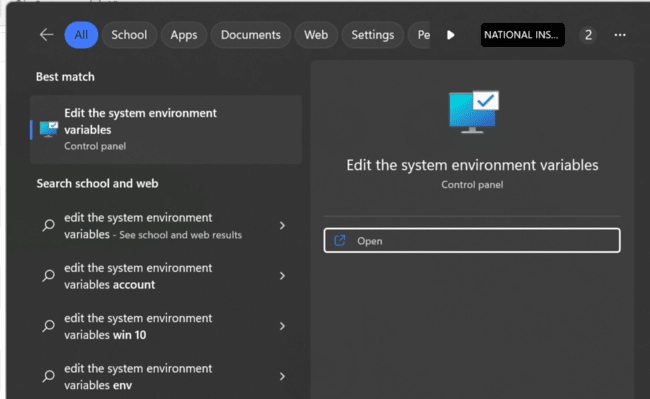
Step 10: Edit Environment Variables
The next step is to add the path to the environment variables. You have to open “Edit the system environment variables”, as you can see the image below.
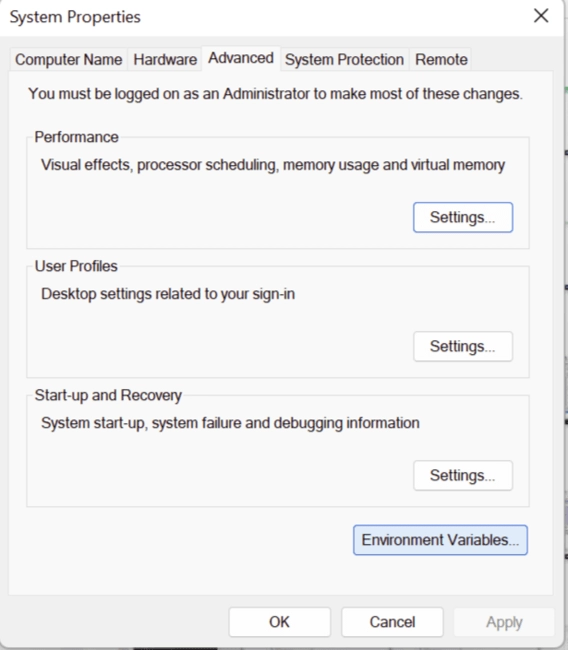
Step 11: Access Environment Variables
Now click “Environment Variables”.
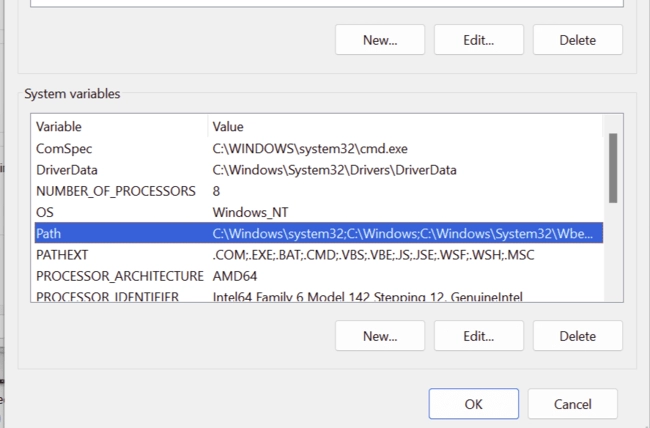
Step 12: Modify System Variables
Go to “System Variables” and click on “path”.
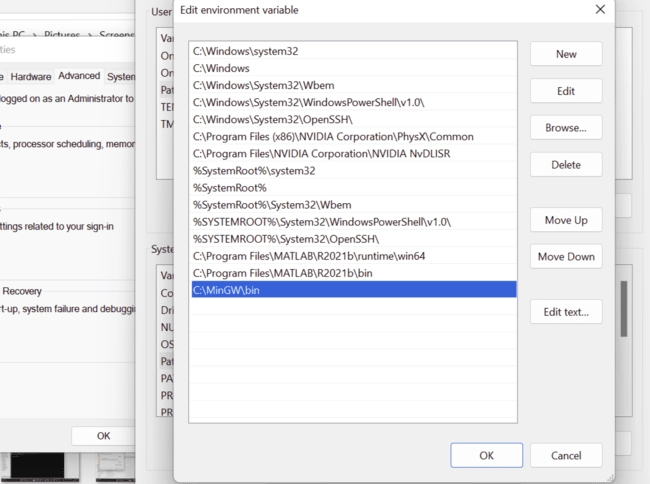
Step 13: Add MinGW Path
You can see all the default paths saved in the environment variables. You have to add the path of the MinGW folder along with its bin file.
Step 14: Ready to Use
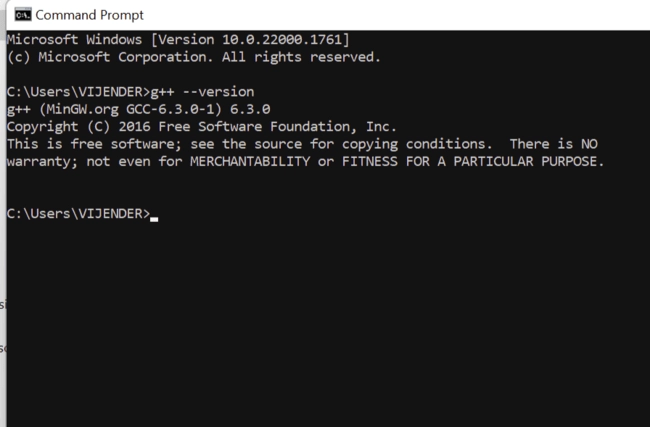
Now you are good to go. You can run your code in your IDE without any errors related to g++ being unrecognized. The image below shows the g++ version installed by following the mentioned steps.
Yes, GCC (GNU Compiler Collection) is available for Windows as "MinGW-w64," providing a development environment with C, C++, and other language compilers.
How do I download and install GCC compiler on Windows 10?
To download and install the GCC compiler on Windows 10, you can use "MinGW-w64." Download it from the official website, run the installer, and follow on-screen instructions.
How do I run GCC command in Windows?
To run GCC commands in Windows, open the Command Prompt or PowerShell, navigate to the directory containing your C/C++ source code, and use `gcc` or `g++` followed by your source file's name.
Conclusion
This article covers the GCC compiler for Windows with some amazing features of the GCC Compiler and the step by step instructions to install the GCC Compiler in Windows. We hope you have enjoyed the article and got some insight into this topic. You can refer to Compilers for C++ to learn more about GCC Compilers.


 8+ registered

