Do you think IIT Guwahati certified course can help you in your career?
Introduction
Golang/Go is one of the most popular programming languages worldwide. Go is used by various programmers and developers due to its versatility and benefits. Go is an open-source programming language developed by Google in 2009. Due to its efficiency, simplicity, and readability features, Go quick;y became popular among developers.
This blog will discuss building HTML, templates, and multi-Route Grouping in Go. But before this, we need to understand Gin.
Gin
Gin is an HTTP Web framework based on Go/Golang to develop microservices or webservices. Gin is a web framework, which we can use to create API or middleware. Gin is a higher-performance and lightweight framework, and they claim to be 40 times faster than the other HTTP web framework.
With the Gin, we will show you how to build HTML templates and create a multi-route grouping, so let's dive into it.
Gin in HTML
HTMLis the foundation of any web application or web page. You will know multiple web pages are linked if you are familiar with working on a web page. These web pages are created separately and linked together to simplify the working and reused as templates further, if necessary, in the application.
We will learn how to use these HTML pages as templates with the help of the Gin web framework. But before we dive into this, you need to initialize a project.
First, you must check whether Go is installed on your system.
go version
If you have installed Go in the system, it will show you the version; if it's outdated, you must update it.
Then, you need to create a root folder that will store your go files. In our case, it is named html-go, and you need to open that folder in your code editor; we will use VS CODE for this example.
Then open the terminal in the editor and type the following code to initialize the project,
go mod init your_project_name
Once you are done with that, you must install the Gin package in your project.
go get -u github.com/gin-gonic/gin
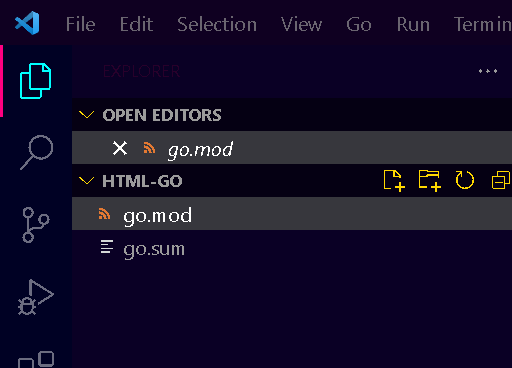
You will see two files in your project folder named go.mod and go.sum, which means everything is successfully installed in the project.
Now we are all set to implement our project.
Create a main.go file to in the root folder of your project. To check if your application is running, copy and paste the following code.
We will discuss the code further in the blog; for now, you need to check if it is giving the following output on localhost:8080/sample in your browser.
If it is running, then you are good to go and can create the HTML template for your project.
Let's create some HTML templates to show how to reuse these HTML in Go with the help of GIn.
Create a folder in the root folder of your project. We have named this folder an html-template. Then in the html-template folder, we will create four HTML files named header.html, footer.html, index.html, and navbar.html.
The above content is the header component in which we have included the bootstrap scripts and link in the head tag.
You may also notice a {{template “navbar.html” . }} statement; in the end, this is how we can embed an HTML component or file in another HTML file. In the double curly brackets {{ }}, we need to type the template and name of the template within “ “ and type. After the template name, like in the code.
Footer.html
</body>


</html>
In the footer file, we will close the body and html tag of the header.html file. So you can know how to use this method in your projects.
Index.html
<!--embedding the header file-->
{{ template "header.html" .}}


<!--writing some html tag between them-->
  <h1>Hello!</h1>
  <h2>Welcome to Coding Ninjas</h2>


<!--embedding the footer file-->
{{ template "footer.html" .}}
This is our main file which we will render in the server because we have structured our index.html as a complete html file. In the index.html file, we first included the header component, then the h1 and h2 tags; after that, we had the footer component.
If you replace the header and footer components with the content included in their files, you will see a complete html file. This method is used in Go or Gin to reduce the code complexity and increase the reusability of the code in the application.
Now, let's run our project. To run the project, you must type the following command in the terminal.
go run main.go
Here main.go is the name of our file; make sure you type your file name correctly.
Output
As you can see, our project is running and giving the desired output. This is just one of the ways you can use HTML in Gin; there are many other features you can implement with the help of Gin.
Gin with Multi-Route Grouping
Now, we will learn how to group multiple routes in Gin. But before that, we need to understand what the route is.
The "name" you use in the URL to access endpoints is called a route. Endpoints carry out a specified task while requiring a set of parameters and sending data back to the client. Depending on the HTTP verb, one or more endpoints connected with a route may be used.
For example,
router.GET("/sample", func(c *gin.Context){ } )
In the above example, we are using the HTTP GET method to access the func with /sample route.
Let's see how we can manage or group multiple routes in a project because when you work on a complex, you might deal with multiple HTTP requests and API endpoints which will make your code complex.
package main

import (
    "github.com/gin-gonic/gin"
)

var router *gin.Engine

func main() {


    router := gin.Default()

    // API Version1 endpoints and routes
    version1 := router.Group("/version1")
    {
        version1.GET("/Home", homeEndpoint)
        version1.GET("/Feed", feedEndpoint)
        version1.POST("/login", loginEndpoint)
    }

    // API Version2 endpoints and routes
    version2 := router.Group("/version2")
    {
        version2.GET("/Home", homeEndpoint)
        version2.GET("/Feed", feedEndpoint)
        version2.POST("/login", loginEndpoint)
    }

    router.Run( )
}
With the help of .Group() method, you can manage or group multiple routes as observed in the code.
First, you must create a variable and make it equal to the router.Group(“group-route-name”).
version1 := router.Group("/version1"){ }
Here, “/version” is the group route name, so if you want to access any of the endpoint or HTTP requests mentioned between the { } of the router.Group("/version1") we need type localhost:8080/version1/Home to access the homeEndpoint.
We have created another version with the same HTTP request and Endpoint to show that you can apply versioning with the help of multi-route grouping in Gin.
Frequently Asked Questions
What is Gin?
Various developers use Gin as an open-source web framework to create microservices and API endpoints.
Gin is based on which programming language?
Gin is based on Go/Golang programming language.
What is Multi-Route Grouping?
To group or manage multiple routes for various HTTP requests is known as a multi-route grouping.
What is the route?
The "name" you use in the URL to access endpoints is called a route
Conclusion
In this blog, we discussed making and using HTML files as templates in Gin to reduce complexity and increase code reusability. We have also learned how to manage or group multiple routes with the Gin.
To learn more about Gin, check out the following articles


 9+ registered

