Code360 powered by Coding Ninjas X Naukri.com. Code360 powered by Coding Ninjas X Naukri.com
Table of contents
1.
Introduction
2.
Head Element in HTML
2.1.
Various Elements in Head Tag
3.
Layout Element in HTML
3.1.
Various Elements in Layout Element
4.
Various Layout Techniques
5.
Frequently Asked Questions
6.
Key Takeaways  
Last Updated: Mar 27, 2024

Head and Layout In HTML

Author Raksha Jain
0 upvote

Introduction

Let’s discuss the Head and Layout of our HTML document, various elements that are a part of it, how to add images and links in our HTML file, and how to modify them by changing values of different associated attributes.

Using head and defining the proper layout of our web page helps in beautifying our website, hence enhancing the UI of our website. Let’s learn about them one by one.  

Head Element in HTML

Head element is the container that stores the metadata (i.e. data about data) of our HTML document and it is placed between <html> and <body> tag.

It contains <title>, <style>, <meta>, <link>, <script> and <base> elements.

Let's learn about these elements one by one: 

Various Elements in Head Tag

  • Title Element

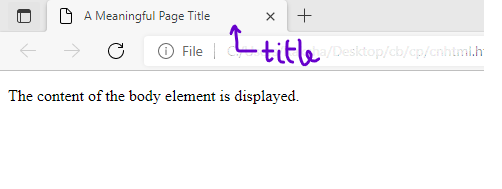
    It defines the title of our HTML document. It must be text-only and is shown in the browser’s title bar or the page’s tab.
    The title element is a must to be mentioned in Head Tag. 
    It is also crucial for search engine optimization (SEO) as the search engine algorithms use the page title to decide the order when listing pages in search results. Moreover, it also provides a title for the page when it is added to favorites.  

<!DOCTYPE html>

<html>

<head>

  <title>A Meaningful Page Title</title>

</head>

<body>


<p>The content of the body element is displayed.</p>


</body>

</html>


Output:


  • Style Element

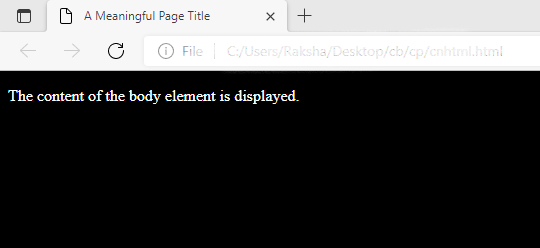
    It helps define the styling information for our HTML document.
    So, we could add various CSS properties to different tags and elements of our HTML document. 
    Adding CSS via style element is known as using internal CSS for our document. 

<<!DOCTYPE html>

<html>

<head>

  <title>A Meaningful Page Title</title>

  <style>

  body {

   background-color: black;

  }

  p {

   color: white;

  }

</style>

</head>

<body>


<p>The content of the body element is displayed.</p>


</body>

</html>


Output:


  • Link Element

    It helps define the relationship between the current document and an external resource. It is often used to link external style sheets (or CSS files), allowing us to modularize and beautify our code.
    So, we could add all the CSS properties to be used in a CSS document and then finally link it to our HTML document.


  • Script Element

    It helps us link our HTML document with client-side JavaScript files.


  • Base Element

    It specifies the base URL and the target for all relative URLs on a page. 
    It must have either an href/ target attribute and also, there could be only a single <base> element in an HTML document.
<base href="https://www.codingninjas.com/" target="_blank">

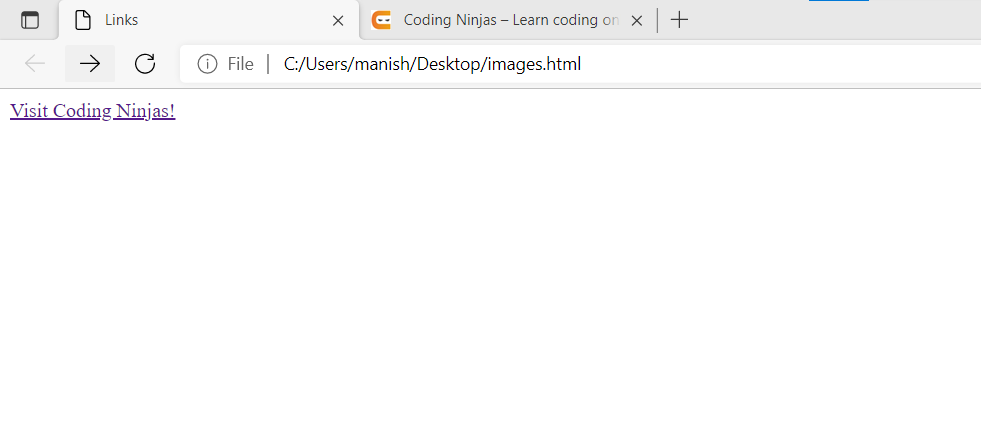
Here, on clicking any relative path image/link, it redirects us to the links/images on the https://www.codingninjas.com/ page and displays it.

However, we can specify where to open the linked page via the target attribute.

It can have the following values:

  1. _self: This is the default property, i.e., opens the linked page in the same tab/window where it was clicked.
     
  2. _blank: It opens the linked page in a new window/tab.
     
  3. _parent: It opens the linked page in the parent frame.|
     
  4. _top: It opens the linked page in the full body of the window.


Output:

Note: Coding Ninjas Website opens in a new tab.


  • Meta Element

    It specifies the character set, page description, keywords, document's author, viewport settings, etc.
    The metadata is not displayed on the web page but is used by browsers, search engines, and other web services.

Examples:

Define the character set used. 

<meta charset="UTF-8">


Define keywords for search engines 

<meta name="keywords" content="Head and Layout in HTML ">


Define the author of a page

<meta name="author" content="Head and Layout in HTML">


Layout Element in HTML

The layout helps decide how to display content on our website, i.e., number of rows/ columns to use, how to use, content that has to be divided amongst these, etc. 

Various Elements in Layout Element

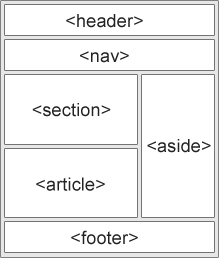
Layout Element further has various semantic elements that help in defining various parts of our web page.


  • header element

It defines a header for an HTML document or a section.

It is denoted by <header>.
 

  • navbar element

It defines a set of navigation links in an HTML document.

It is denoted by <nav>.


  • section element

It defines a section in an HTML document.

It is denoted by <section>.


  • Article element

It defines independent, self-contained content in our HTML document.

It is denoted by <article>.


  • Aside element

It defines content aside from content mentioned in an HTML document like a sidebar.

It is denoted by <aside>.


  • Footer element

It defines a footer for an HTML document or a section.

It is denoted by <footer>.


  • Details element

It defines additional details that a user can open/close on demand.

It is denoted by <details>.
 

  • Summary element

It defines the heading for the details element  in our HTML document.

It is denoted by <summary>.


Example:

<<!DOCTYPE html>

<html>

<head>

  <title>A Meaningful Page Title</title>

  </head>

<body>

<header>

   Head and Layout in HTML

</header>

<navbar>

    <!-- Navbar content →

</navbar>

<section> 

   <article>

      <aside>

          <!-- content -->

      </aside>

      <details>

          <!-- content →>

          <p>The content of the body element is displayed.</p>

      </details>

    <article>

<section>

<footer>

    <summary>

       Add summary

    </summary>

</footer>

</body>

</html>


Various Layout Techniques

Multiple techniques help a user create a multicolumn layout like - 

  1. CSS Framework - W3.CSS or BootStrap helps create a layout for our webpage extremely quickly.
  2. CSS Float Layout - Instead of using a framework, we can align our content using various CSS properties like float, clear, etc. 
  3. CSS Flexbox Layout - This helps us ensure how a particular webpage would appear on different screen sizes and display devices.
  4. CSS Grid Layout - It offers a grid-based layout system with rows and columns, making it easier for the user to design web pages without using CSS float and positioning properties. 

Frequently Asked Questions

Q1. What is the UI of a website?

Ans. The user interface (UI) is the “surface” of any application or website which represents the entire visual makeup of the software.


Q2. What is HTML?

Ans: HTML(HyperText Markup Language) is the standard markup language for creating Web pages. It describes the structure of a Web page. 


Q3. What are various layout techniques?

Ans. There are multiple techniques that help a user create a multicolumn layout like - 

→ CSS Framework

→ CSS Float Layout

→ CSS Flexbox Layout 

→ CSS Grid Layout

Key Takeaways  

In this blog, we learned about Head and Layout in HTML.

  • Head Element defines the information about our HTML document.
  • Some of the Head tag elements include title, style, link, script, base, etc.
  • Various elements in layout elements are header, navbar, aside, footer element, etc.

So, Head and Layout in HTML are extremely easy and essential in enhancing the website's appearance.

Check out more blogs on various concepts on HTML to read more about it in detail. And if you liked this blog, share it with your friends!

Live masterclass