


Introduction
Have you wondered what is behind a Ninja’s mask? How do Ninjas blend in or hide when on missions? Today we will learn how to hide and mask in a blender. It is an important art if you wanna be a great Ninja.
After entering a sculpt mode in Blender, we find the hide and mask modes. They have great uses too. Areas may be hidden beneath mesh or be too near to other elements while sculpting. It is helpful to isolate areas of a mesh to sculpt when working through these. It can be achieved by either concealing parts of the mesh completely or masking areas that cannot get sculpted on. Let's check into these.

Mask
Masking is used in Blender to regulate which mesh sections are modified by sculpting.
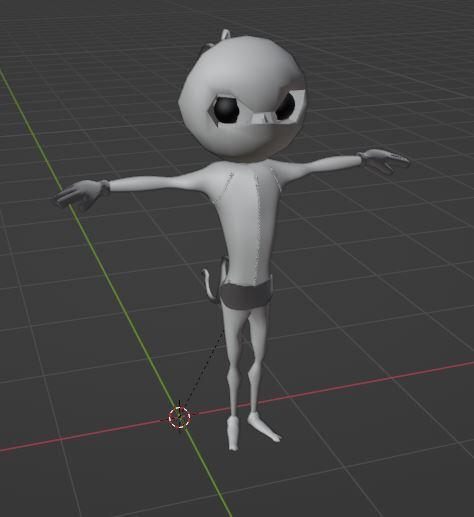
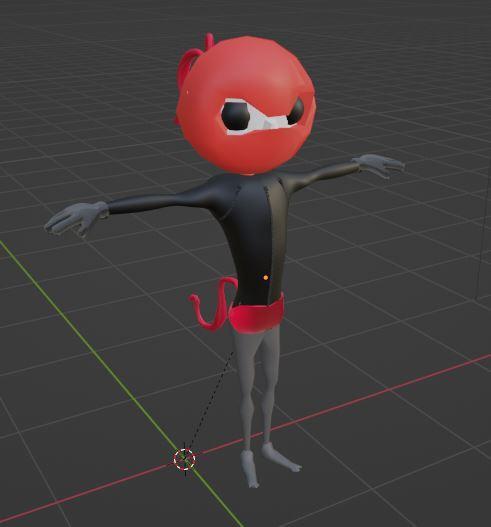
We can see our simple Ninja above. This one is untouched. However, we have another ninja below. This Ninja has only some parts of it coloured. It is because the Black part is masked.
Brush: To modify the mask, go to the Brush panel and pick the Mask Brush.
Editing: Masks can be changed or edited throughout the entire model.
Elements of Editing
Let us have a look into the elements of this.
Invert Mask: By hitting "Ctrl+I", we may invert our masked portion. It inverts an already existing mask.
Fill Mask: Fills the entire mask with the value 1.
Clear Mask: This is accessed using the shortcut "Alt+M." It Fills the mask with a value of 0. It completely removes the mask data layer from the mesh. At the same time, it does not give a significant gain. It can speed up sculpting if the mask is no more getting utilised.
Box Mask: This gets accessed through the keyboard shortcut "B". It functions similarly to the Box Select tool. It results in the creation of a rectangular mask zone. To clear the mask of the specified location, hold Shift.
Lasso Mask: The combination of "Shift+Ctrl+LMB" activates the Lasso Mask. It is similar to the Lasso Select tool in that it may be used to generate a free-form mask. In order to clean the Lasso Mask tool of the areas, invert the mask, put the Lasso Mask, and thereafter invert the mask again.
Selection Masking
When working with complicated geometry, it can be difficult to paint on all vertices in Weight Paint Mode.
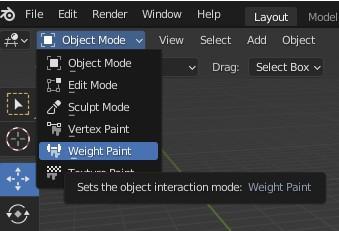
Assume we simply want to paint on a small portion of the mesh and leave the rest alone. Selection masking comes into play here. When this mode is activated, a brush will only paint on the vertices or faces that have got selected. The option is accessible from the 3D View's header. The following icons are circled in red:

Advantages of Select Masking
The Select Masking mode has the following advantages over Weight Paint Mode:
- Even when modifiers are activated, the original mesh borders are drawn.
- We can confine painting to the vertices of specified faces by selecting them.
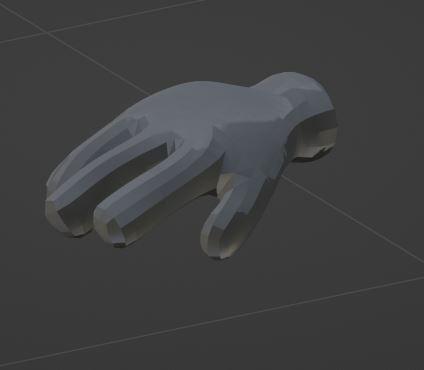
Vertex Selection Masking
We can select one or more vertices in this mode and then paint exclusively on the selection. Unintentional alterations are prevented for all unselected vertices.

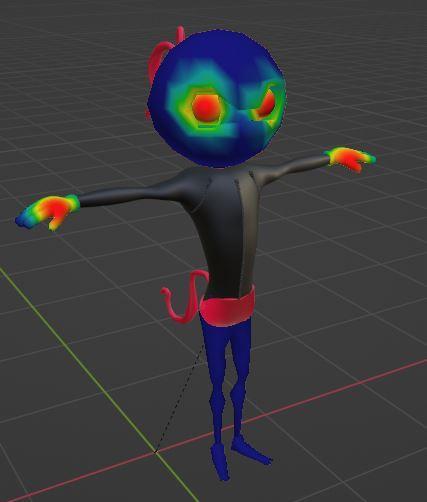
We can see in the example above that the glove has been selected under Vertex Selection masking.
Face Selection Masking
The Face Selection masking lets us choose faces and confine the weight paint tool to specific faces, quite similar to Vertex selection masking.
We can see in the example above that the Ninja model above has been selected under Face Selection masking.


 8+ registered

