Do you think IIT Guwahati certified course can help you in your career?
Introduction
Cropping is a basic image technique used in OpenCV. It involves cutting out unwanted portions from a picture. It involves selecting and extracting a particular part of the image, frequently referred to as the Region of Interest (ROI). Unlike a specific function of cropping, OpenCV uses NumPy array slicing. The system saves each image as a 2D array for each color component. To crop, specify the desired height and width of the area you wish to retain, measured in pixels.
This article will teach us how to crop an image in OpenCV Python.
OpenCV
OpenCV, short for Open Source Computer Vision, is a vast library committed to image processing. It contains domains driven by Artificial Intelligence or Machine Learning algorithms, including functions that need complex image processing. Therefore, it plays a crucial role in modern real-time systems.
Through OpenCV, we can manipulate images and videos for tasks ranging from object and face recognition to solving human handwriting. Its interfaces contain C++, C, Python, Java, and MATLAB, with related APIs described in the online documentation. OpenCV shows compatibility with various operating systems like Windows, Linux, Mac OS, iOS, and Android.
It initially originated for real-time applications, focusing strongly on computational efficiency. Since 2011, GPU (Graphics Processing Unit) acceleration into OpenCV has enabled significant advancements in real-time processing capabilities. When combined with libraries such as NumPy, Python analyzes the array structure OpenCV provides. Executing successful identification of image patterns and their corresponding features involves harnessing the concept of vector space and performing essential mathematical operations on these unique attributes.
BGR and RGB are color representations in images. RGB (Red, Green, Blue) uses additive color mixing, mixing red, green, and blue channels to make colors. BGR is a variation used in some image processing software, swapping the positions of red and blue channels, commonly in OpenCV.
How To Crop An Image in OpenCV Python?
There are some steps in which we can crop an image in OpenCV Python. We will examine each step in detail.
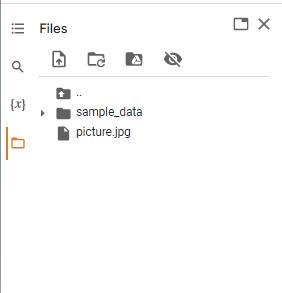
Here is the folder structure that contains the image. In this case, we are using the Google Colab platform.
Step 1: Import libraries
Here are the necessary libraries that we will be required to use.
Code
Python
Python
import cv2
import numpy as np
from google.colab.patches import cv2_imshow
You can also try this code with Online Python Compiler
This code uses three important libraries like cv2, numpy, and pyplot, imported from matplotlib. The OpenCV library 'cv2' furnishes functions for computer vision tasks. Developers use the ‘numpy’ library in Python for numerical computations. Additionally, the 'pyplot' submodule from matplotlib generates plots and visualisations.
Step 2: Read the image
In this case, we will read the input image using the following command.
Code
Python
Python
# Read the image
image = cv2.imread("/content/picture.jpg")
print(“Image read successfully.”)
You can also try this code with Online Python Compiler
In this command, the ‘cv2.imread()’ function reads an image from the drive. It would help if you replaced "/content/picture.jpg" with the path to your actual image file.
Step 3: Define the Region of Interest (ROI) Coordinates
In this case, we will define the Region of Interest (ROI) coordinates.
In this code, the coordinates and dimensions of the region of interest (ROI) within the image are defined. 'roi_x' and 'roi_y' establish the top-left corner of the ROI, while 'roi_width' and 'roi_height' determine its dimensions. The units for ‘roi_x’, ‘roi_y’, ‘roi_width’, and ‘roi_height’ are in pixels (px).
Step 4: Draw a rectangle around the ROI
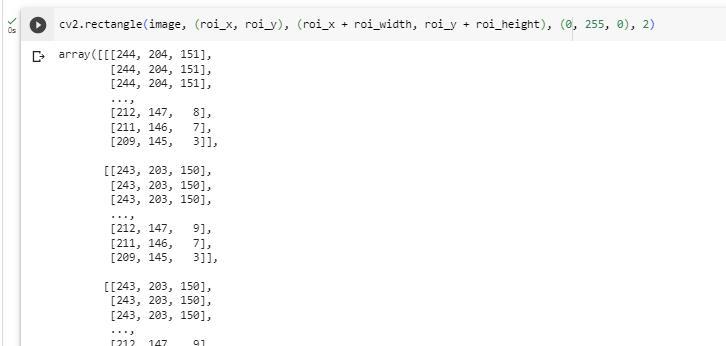
In this case, we have created a rectangular-shaped frame around the Region of Interest (ROI), for better identification of the cropped area.
This code's ‘cv2.rectangle()’ function sketches a green rectangle around the ROI on the original image. The rectangle's definition relies on the upper-left corner (roi_x, roi_y) and the lower-right corner (roi_x + roi_width, roi_y + roi_height). It uses the color (0, 255, 0) to depict green in the BGR format. The final parameter, configured as 2, establishes the border thickness of the rectangle.
Step 5: Crop the Region of Interest (ROI)
In this, we will be moving the cropped area from the whole image.
Code
Python
Python
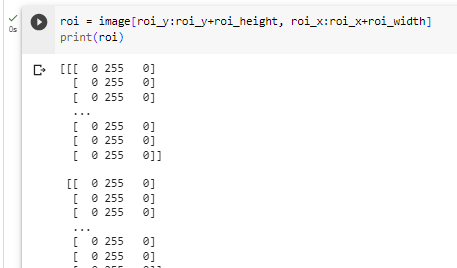
roi = image[roi_y:roi_y+roi_height, roi_x:roi_x+roi_width]
print(roi)
You can also try this code with Online Python Compiler
This code extracts the region of interest (ROI) from the original image using array slicing. It generates a new variable named "roi" that holds the cropped portion of the picture.
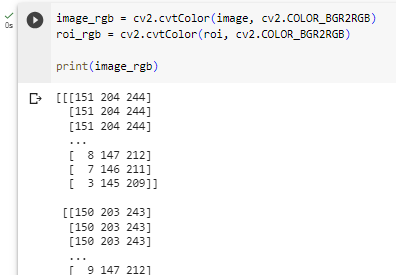
Step 6: Convert the BGR image to RGB
We have further defined the code if you want to convert a BGR image to an RGB image.
Since OpenCV uses the BGR color format by default and Matplotlib uses RGB, these lines convert the original image and the cropped ROI from BGR to RGB format.
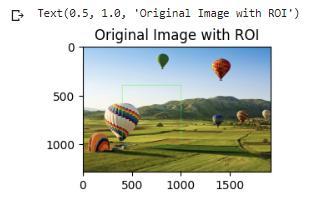
Step 7: Display the Original Image
We have printed the original image using the following command.
Code
Python
Python
plt.subplot(1, 2, 1)
plt.imshow(image_rgb)
plt.title("Original Image with ROI")
You can also try this code with Online Python Compiler
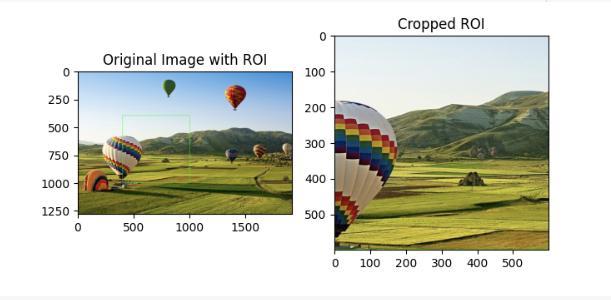
This code arranges a subplot to present two images alongside each other. The first image (original) is positioned on the left side. Subplots are typically used in data visualization libraries like Matplotlib to arrange multiple plots within a figure. The ‘imshow()’ function showcases the picture by taking the image_rgb as input, representing the original image in RGB color format. Moreover, ‘plt.title()’ assigns the title for this subplot.
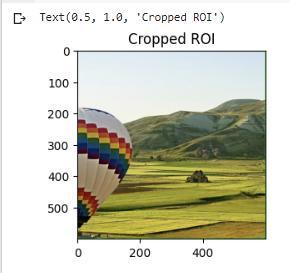
Step 8: Display the Cropped ROI
We have printed the cropped image using the following command.
The above commands will help you to arrange the subplot for the second image (cropped ROI) on the right side. It uses 'plt.imshow()' to exhibit the cropped ROI by employing the variable roi_rgb. Additionally, 'plt.title()' assigns the title to this subplot. The 'plt.tight_layout()' function is also used to fine-tune the spacing between subplots, while the 'plt.show()' function presents the ultimate plots featuring the original image and cropped ROI.
Frequently Asked Questions
What exactly is picture thresholding, and how does OpenCV use it?
The "image thresholding" process turns a grayscale image into a binary image in which pixels are assigned to the foreground or background depending on a threshold value. OpenCV's functions for various thresholding techniques make edge detection and image segmentation easier.
What is the function of cv2.findContours() in OpenCV?
The contours of objects in a binary image can be found and extracted using the cv2.findContours() function. The role of contours, which serve as an object's boundaries, is essential for object detection, form analysis, and character recognition.
What is the purpose of picture smoothing in OpenCV, and how does it work?
Gaussian and median blurs are two picture-smoothing methods provided by OpenCV that aid in reducing noise and detail in images. When using these approaches, preparing pictures before additional analysis or object detection is advantageous.
How can OpenCV help with object tracking and detection?
OpenCV offers pre-trained models and tools like the Haar Cascades and deep learning-based detectors for object recognition.
What do you mean by image threshold?
Putting pixel values above and below a predetermined threshold, known as image thresholding, turns a grayscale image into a binary image.
Conclusion
In this article, we learn how to crop an image in OpenCV Python. We also discuss aspects related to OpenCV. Different steps are involved in cropping an image, like importing libraries. Reading the image, setting the region of interest (ROI), highlighting the crop area, converting the BGR image to RGB if you want to do so, and then displaying the original and cropped images to see the difference.


 8+ registered

