Do you think IIT Guwahati certified course can help you in your career?
Introduction
Pandas is a popular open-source data analysis library for Python that provides powerful tools for data manipulation, cleaning, and analysis. This article will go through “How to Install Pandas in Python”. It provides a flexible and easy-to-use data structure called a DataFrame, similar to a table in a relational database. With Pandas, you can easily clean, transform, and analyze data in various formats, including CSV, Excel, SQL databases, and more. To start using Pandas in your Python projects, you must install the library on your system. This article will walk you through installing Pandas on your computer. We’ll cover a variety of installation options depending on your operating system and Python environment, including pip for windows, Linux, and mac.
Pandas
Pandas is an open-source Python library for data manipulation, analysis, and cleaning. It provides various data structures for efficiently storing and manipulating large datasets, such as Series (1-dimensional labelled arrays) and DataFrame (2-dimensional labelled arrays). Pandas are widely used in data science and machine learning for their powerful data processing capabilities. It can handle various data formats, including CSV, Excel, SQL databases, and JSON.
Prerequisites
The following Python installation requirements must be met:
Python 3.6 and above
Pip or Conda
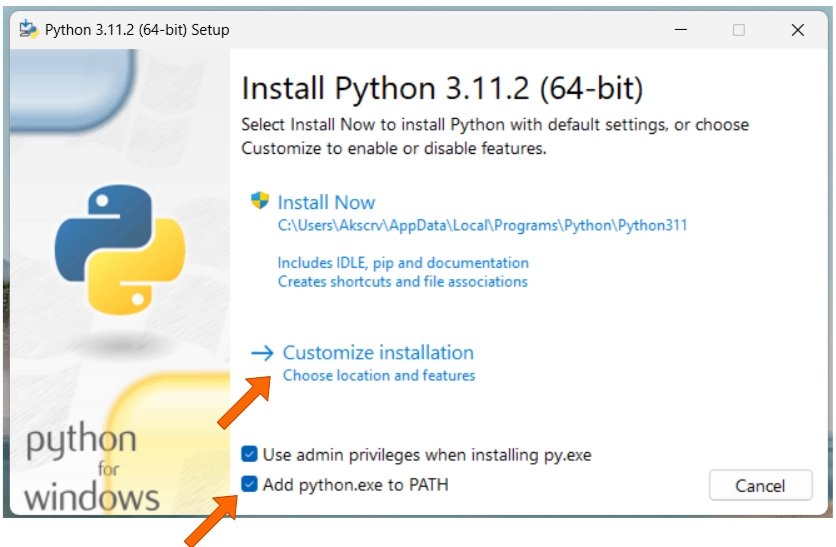
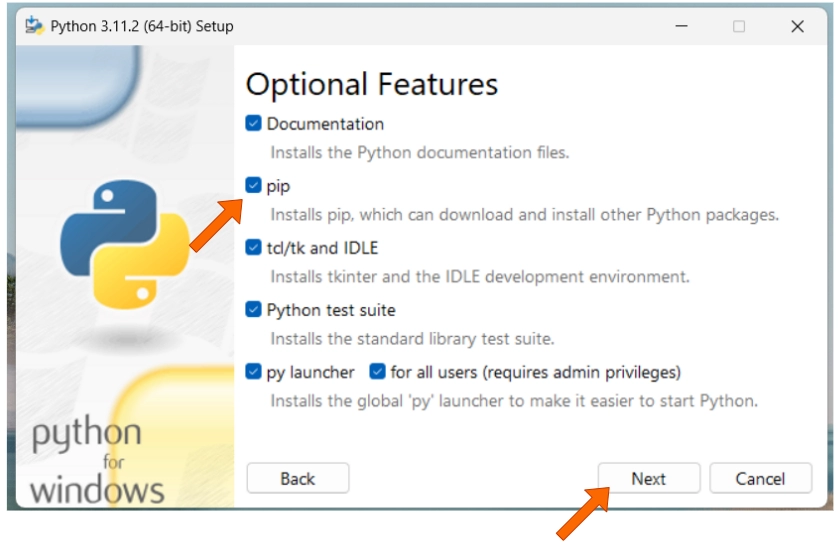
If you don't already have it installed, Python can be downloaded from the website.
Installing pip or Conda is possible after installing Python. Installing Python packages from the Python Package Index (PyPI) on the website is made possible via the package manager Pip. A package manager created exclusively for managing Python packages is called Conda.
Pandas Installation on Windows
Here are the steps for “How to Install Pandas in Python”
Using Conda, follow these steps to install pandas in Python:
Start the terminal window.
The Conda environment that you intend to use to install Pandas must be activated.
Run the conda install pandas command.
For instance, you would issue the following command to install pandas in the default Conda environment:
conda install pandas
After the install keyword, you can provide the environment name if you wish to install pandas in a specific Conda environment. For instance, you would issue the following command to install pandas in the myenv Conda environment:
conda install pandas -n myenv
You can start utilising pandas in your Python code after it has been installed.
Pandas Installation on Linux
Here are the steps for “How to Install Pandas in Python”
Method 1 - Using pip
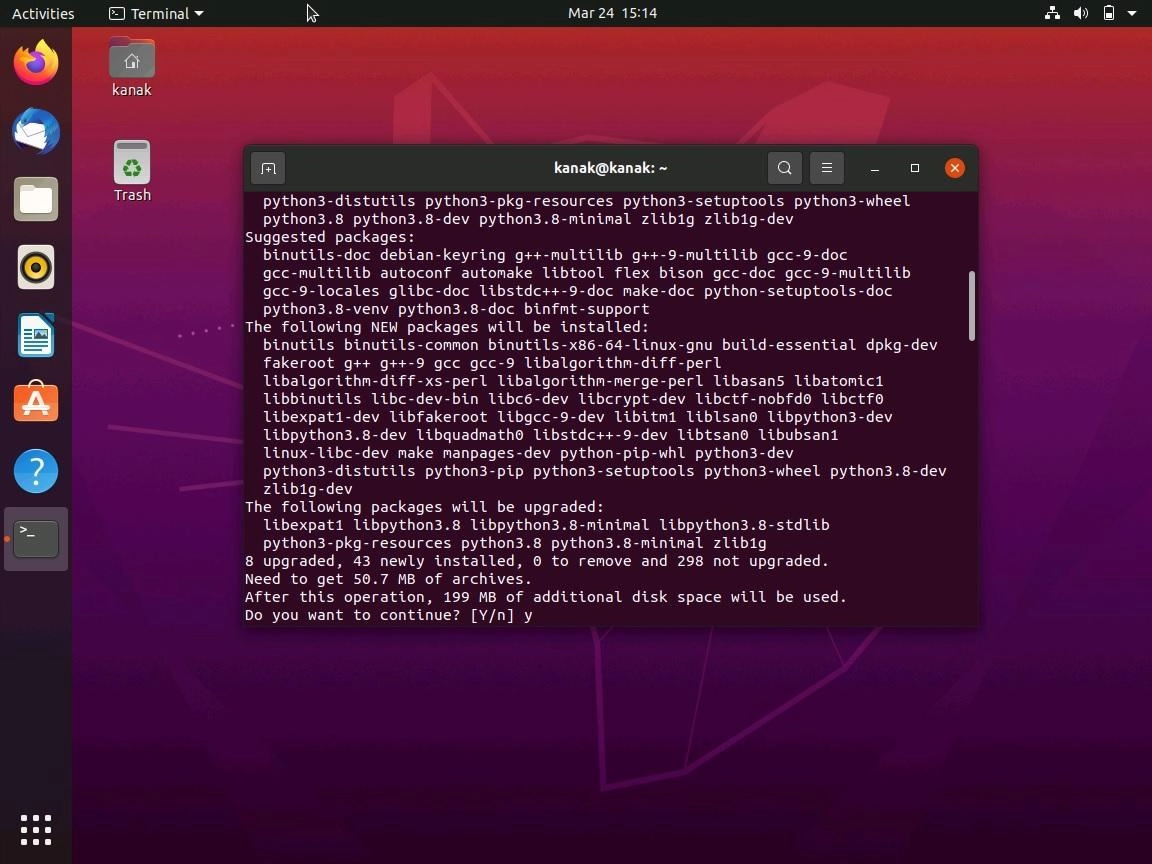
Step 1. First, we need to install python-pip in Linux. You may use Terminal to install python-pip. Type the below command to install python. Also, check the below image.
sudo apt install python3-pip
Step 2. Meanwhile, it will ask permission to continue the installation. You have to type “y” to confirm.
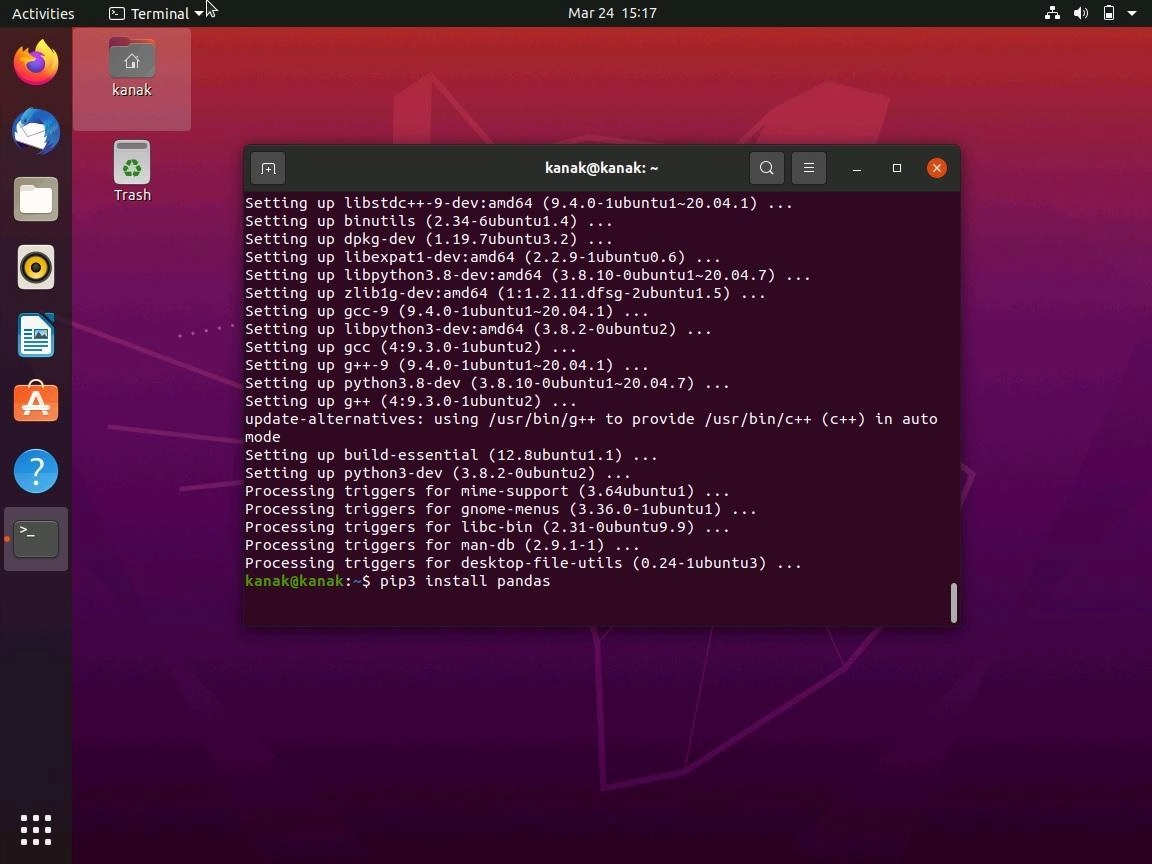
Step 3. Now we install pandas using pip. Write the below command to install pandas using pip.
pip3 install pandas
Check the below image for clear instructions.
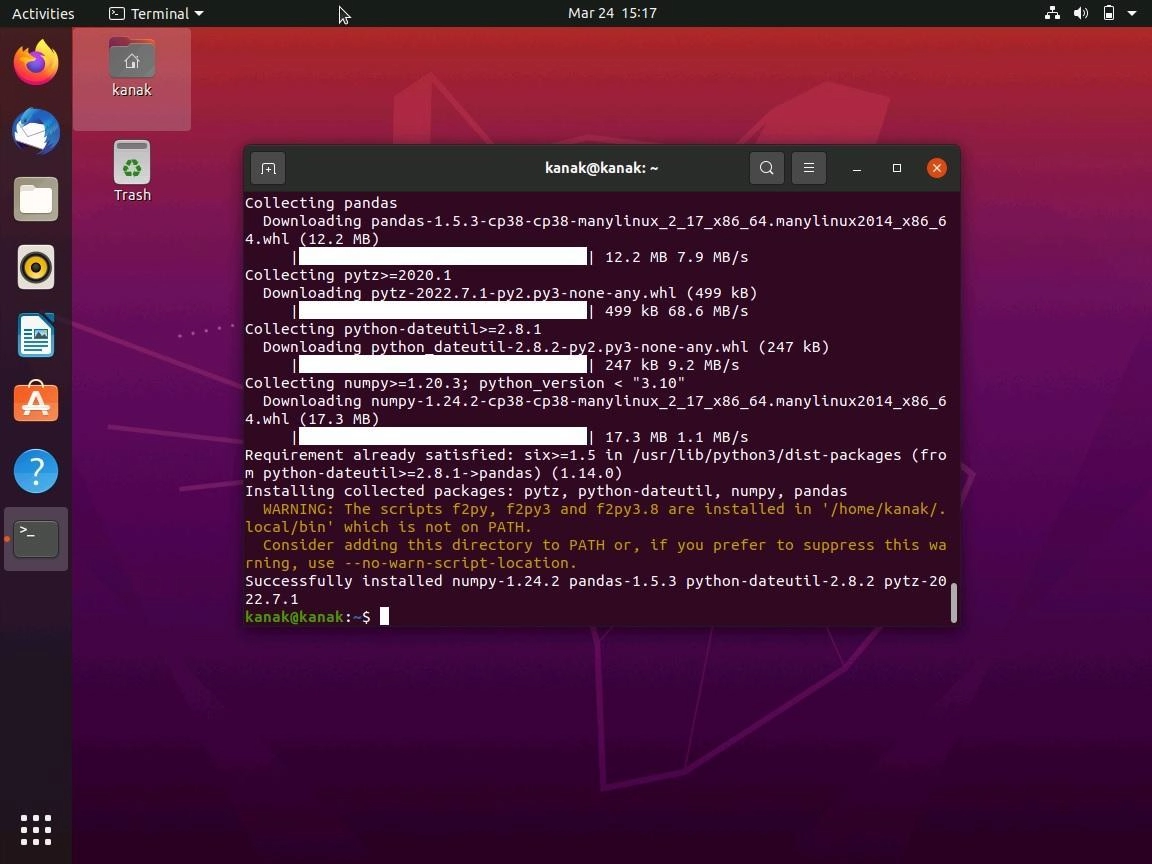
Step 4. It will take a few seconds to install it. Check the below image.
Yaa huu!!! we have successfully installed pandas into Linux.
Method 2 - Using conda
Conda, a package manager frequently linked to the Anaconda distribution, can be used to install pandas in Python on a Linux device. The steps are as follows:
On your Linux computer, launch a terminal window.
Conda environments can be activated, so if you're using one, do so. Skip this step if you don't use Conda environments:
conda activate myenv
Your Conda environment's name should be replaced for myenv.
To install pandas using Conda, enter the following command:
conda install pandas
After resolving the dependencies, Conda will install Pandas and any other necessary packages. To continue with the installation, follow the instructions. When the setup is finished, you can check for the installation by running a python script.
Pandas Installation on Mac
Here are the steps for How to Install Pandas in Python.
Step 1. Install Homebrew
Homebrew is one of the most famous package managers for Mac, which makes it easy for the Operating System to install and manage software packages. If you still need to install Homebrew, you can install it using the terminal by entering the following command:
Pandas is a Python library, so we must install python on our Mac before installing Pandas. You can skip this step if your system has installed Python. Otherwise, you can install Python using Homebrew by entering the following command in the Terminal:
brew install python
Step 3: Install Pandas using pip
Once you have Python installed, you can use pip. PIP is the package installer for Python to install Pandas. To install Pandas using pip, enter the following command in the Terminal:
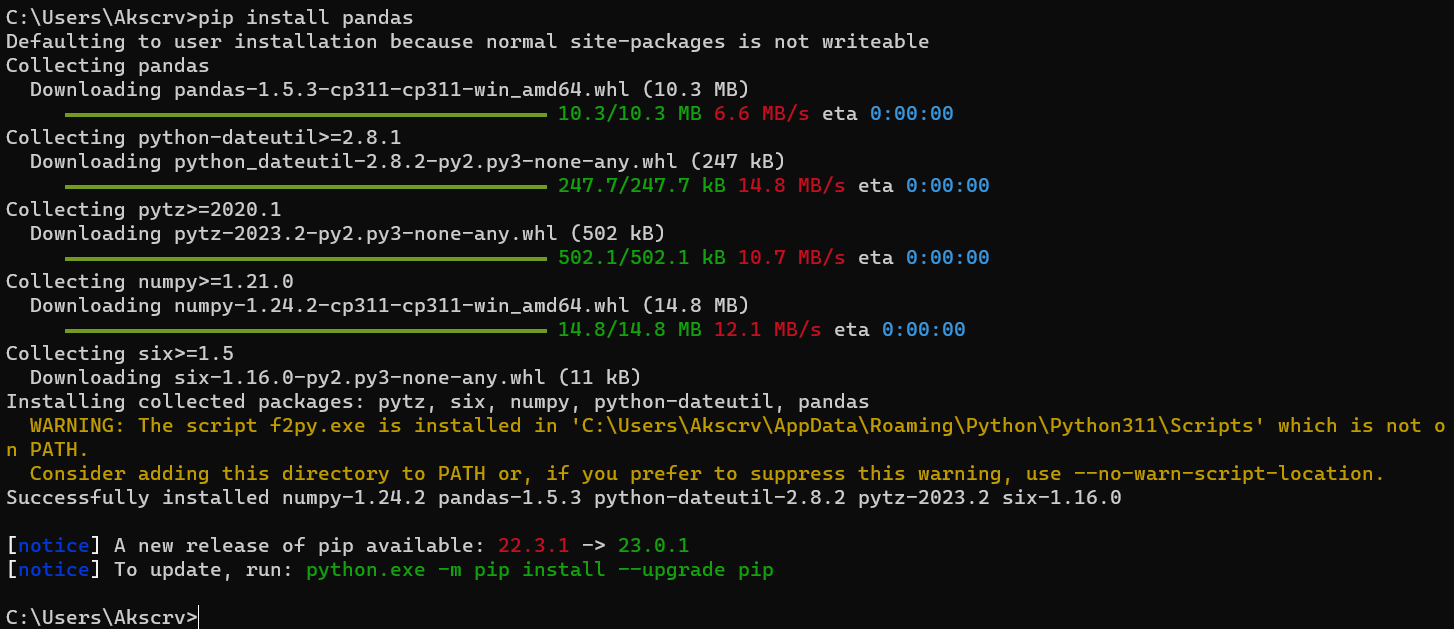
pip install pandas
Step 4: Verify the Installation
To verify that Pandas is installed correctly, open a Python console or a Jupyter Notebook and enter the following command:
import pandas as pd
If there are no errors, Pandas has been successfully installed, and you can start using it for data analysis.
Anaconda is a distribution of Python that includes many popular Python packages, including pandas. It is a good choice for beginners who want to get started with data science and machine learning.
To install pandas using Anaconda, you can follow these steps:
Download and install Anaconda from the Anaconda website.
Open a terminal window.
Activate the base environment by running the following command:
conda activate base
Run the following command to install pandas:
conda install pandas
Once pandas is installed, you can start using it in your Python code.
Using Miniconda
Miniconda is an Anaconda variant that just contains the essential Python packages. For experienced users who desire more control over their Python environment, it is a suitable option.
Use Miniconda to install pandas by doing the following steps:
Download and install Miniconda from the Miniconda website.
Open a terminal window.
Create a new environment by running the following command:
conda create -n myenv python
Replace myenv with the name of your environment.
Activate the new environment by running the following command:
conda activate myenv
Run the following command to install pandas:
conda install pandas
Once pandas is installed, you can start using it in your Python code.
Frequently Asked Questions
How do you install pandas in Python?
Install pandas using pip:
pip install pandas
It allows data manipulation and analysis.
What is import pandas in Python?
import pandas loads the pandas library, enabling structured data handling, analysis, and manipulation tools in Python.
How to pip install NumPy?
Install NumPy using pip:
pip install numpy
This installs the library for numerical computations and array processing.
Conclusion
In this article, we have covered the different methods of installing Pandas on your computer. We have shown you how to install Pandas using pip. We have also demonstrated how to verify that Pandas is installed correctly and given you some tips on how to get started with using Pandas in your data analysis projects.
Suppose you want to know more about “How to Install Pandas in Python” and topics like this. In that case, refer to the following articles:


 6+ registered

