Do you think IIT Guwahati certified course can help you in your career?
Introduction
HTML provides various form input types to collect different kinds of user data efficiently. These input types help enhance user experience by offering appropriate fields such as text, password, email, number, checkbox, radio, date, and more. Each type serves a specific purpose, ensuring accurate data collection and validation.
In this article, you will learn about different HTML form input types, their usage, and practical examples.
Input Type "text"
This type is used for single-line text input.
<input type="text" name="username" placeholder="Enter your name">
Example Output
A text box where users can type their name.
Input Type "password"
Used for entering passwords. It hides characters for security.
<input type="password" name="password" placeholder="Enter your password">
Example Output
A password field with hidden characters.
Input Type "submit"
This button submits form data to a server.
<input type="submit" value="Submit">
Example Output
A clickable submit button.
Input Type "color"
Allows users to pick a color.
<input type="color" name="favcolor">
Example Output
A color picker.
Input Type "date"
Allows users to select a date.
<input type="date" name="birthdate">
Example Output
A date picker.
Input Type "email"
Validates email input.
<input type="email" name="useremail" placeholder="Enter your email">
Example Output
An email input field that ensures proper email format.
<input type="checkbox" name="agree" value="yes"> I agree to terms
Example Output
A checkbox for user agreement.
Input Type Month
The `month` input type is used to let users select a specific month and year. It’s helpful when you need to collect data like birth months, project deadlines, or any event scheduling. This input type provides a user-friendly interface where users can pick a month from a dropdown calendar instead of typing it manually.
To use the `month` input type, you need to set the `type` attribute of an `<input>` element to `month`. For example:
1. The `<input>` element has its `type` set to `month`. This tells the browser to display a month picker.
2. The `id` and `name` attributes help identify the input field when the form is submitted.
3. A `<label>` is added to make the form accessible. It links to the input using the `for` attribute.
4. The `submit` button allows users to send their selected month to the server.
When you open this code in a browser, you’ll see a small calendar icon next to the input field. Clicking on it opens a dropdown where users can choose a month and year.
This input type saves time as users don’t have to type the month manually. It also reduces errors since the format is standardized. However, keep in mind that not all browsers support this input type fully. For unsupported browsers, it falls back to a simple text input.
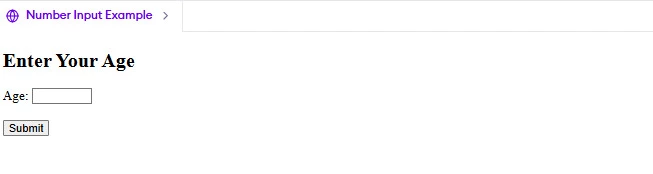
Input Type Number
The `number` input type is designed to let users enter numeric values. It’s commonly used for fields like age, quantity, or ratings. This input type ensures that only numbers can be entered, making it easier to handle data validation. Additionally, it provides up and down arrows (spinners) to increase or decrease the value, which improves user experience.
1. The `<input>` element has its `type` set to `number`. This restricts the input to numeric values only.
2. The `min` attribute specifies the smallest value a user can enter. In this case, it’s set to `1`.
3. The `max` attribute sets the highest allowed value, which is `120` here.
4. The `step` attribute defines the interval between valid numbers. A `step` of `1` means only whole numbers are accepted.
5. The `id` and `name` attributes help identify the field when the form is submitted.
6. The `submit` button allows users to send their entered number to the server.
When you open this code in a browser, you’ll see an input field with up and down arrows. Users can either type a number or use the arrows to adjust the value. If they try entering a non-numeric value or a number outside the specified range, the browser will show an error message.
This input type is useful because it prevents invalid data from being submitted. For instance, if you’re collecting ages, you don’t want users entering negative numbers or text. The `number` input type handles these issues automatically.
Input Restrictions
Input restrictions are rules you can apply to form fields to control what users can enter. These restrictions ensure that the data collected is valid and meets specific criteria. For example, you might want to limit the number of characters in a text field or ensure an email address follows the correct format. Using input restrictions helps reduce errors and improves the overall quality of the data.
There are several attributes you can use to add restrictions to form inputs. Let’s discuss some common ones with examples:
Example Code for Input Restrictions
<!DOCTYPE html>
<html>
<head>
    <title>Input Restrictions Example</title>
</head>
<body>
    <h2>Registration Form</h2>
    <form>
        <!-- Text Field with Character Limit -->
        <label for="username">Username (Max 10 Characters):</label>
        <input type="text" id="username" name="username" maxlength="10" required>
        <br><br>

        <!-- Email Field with Format Validation -->
        <label for="email">Email Address:</label>
        <input type="email" id="email" name="email" required>
        <br><br>

        <!-- Password Field with Minimum Length -->
        <label for="password">Password (Min 6 Characters):</label>
        <input type="password" id="password" name="password" minlength="6" required>
        <br><br>

        <!-- Submit Button -->
        <input type="submit" value="Register">
    </form>
</body>
</html>
Output
In this Code:
1. Text Field with `maxlength`:
The `maxlength` attribute limits the number of characters a user can enter. In this example, the username field only allows up to 10 characters. If a user tries to type more, the browser will stop accepting additional input.
2. Email Field with Format Validation:
The `type="email"` ensures that the input follows a valid email format (e.g., `example@domain.com`). If the user enters an invalid email, the browser will show an error when they try to submit the form.
3. Password Field with `minlength`:
The `minlength` attribute sets the minimum number of characters required. Here, the password must be at least 6 characters long. If the user enters fewer characters, the form won’t submit.
4. Required Attribute:
The `required` attribute makes sure the field isn’t left empty. If a user tries to submit the form without filling in a required field, the browser will display an error message.
Why Use Input Restrictions?
Input restrictions save time for both users and developers. They prevent invalid data from being submitted, which reduces the need for additional validation on the server side. For example, if you’re collecting email addresses, using the `type="email"` attribute ensures that only properly formatted emails are accepted. This improves the accuracy of the data and enhances the user experience.
Frequently Asked Questions
What is the purpose of different input types in HTML?
Each input type is designed to handle specific types of data, making forms more user-friendly and functional.
How do I choose the right input type?
Choose an input type based on the data you want users to enter. For example, use email for email addresses and number for numeric values.
Can input types affect form validation?
Yes, some input types, like email and number, enforce validation, ensuring correct data format before submission.
Conclusion
In this article, we discussed HTML form input types, which define the type of data users can enter in a form. Common input types include text, password, email, number, date, checkbox, radio, and file. Choosing the right input type improves user experience, ensures data validation, and enhances form accessibility in web development.


 6+ registered

