


Introduction:
An HTTP server is used to open a file in the server and send the requested content to the user. We can create an HTTP Server using Node.js is an open-source backend JavaScript runtime environment.
To know more about HTTP, check out the blog What is HTTP?
This article will learn about creating an HTTP server using Node.js that gets information from the server port and sends it to the clients.
To know more about Node.js checkout the blog, "Introduction to Node.js."
Creating the Server:
Let us start building our HTTP server using Node.js:
- The first step is to include the node.js HTTP module.
const http = require("http");
2. Our server will have a host and a port. Let us define both:
const host = 'localhost';
const port = 8000;
Localhost is a special private address that refers to the computer itself. It refers to the internal IP address of 127.0.0.1, which is only available to the local computer. The port is the door to the IP address. We have used port number 8000 in our code.
3. We will now create a request listener function. It takes two arguments: Request Object (req) and Response Object (res). The request object contains things such as the requested URL. The response object is used to send headers and content of the response back to the user.
const requestListener = function (req, res) {
// Setting status code for the response
res.writeHead(200);
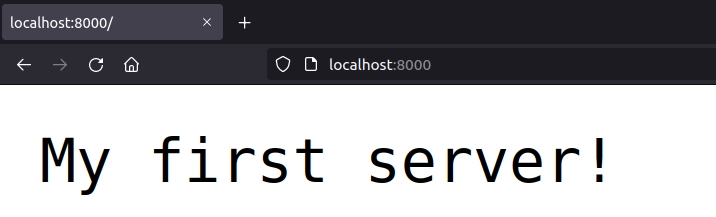
res.end("My first server!");
};
This function returns the data that the server has to return. In this case, we returned "My first server!" as the response to the client.
If the result is a JSON file, then a header should be added to our HTTP server using Node.js to specify so.
const requestListener = function (req, res) {
   // Header
   res.setHeader("Content-Type", "application/json");
   res.writeHead(200);
   res.end(`{"message": "This is a JSON response"}`);
};
For specifying the response time as CSV (comma-seperated values) in our HTTP server using Node.js.
const requestListener = function (req, res) {
   // Header
   res.setHeader("Content-Type", "text/csv");
   res.writeHead(200);
   res.setHeader("Content-Disposition", "attachment;filename=sample.csv");
};
For specifying the response type as HTML in our HTTP server using Node.js.:
const requestListener = function (req, res) {
   // Header
   res.setHeader("Content-Type", "text/html");
   res.writeHead(200);
   res.end(`<html><body><h1>This is HTML</h1></body></html>`);
};
4. The final step is creating the server.
const server = http.createServer(requestListener);
server.listen(port);
This createServer method calls the requestListener function whenever a request is received and we return a status code 200, which signals a successful response, along with the body.
The listen method asks the server to wait at the specified port.
In these steps, we can create a simple HTTP server using Node.js. We can also add files to this function and modify them according to our needs.


 9+ registered

