Do you think IIT Guwahati certified course can help you in your career?
Introduction
In this blog, we will learn about the concept of images in pyglet. Pyglet is a simple but powerful library for creating visually rich GUI applications such as games and multimedia on Windows, Mac OS, and Linux. This Python-only library includes many features such as windowing, user interface event handling, joysticks, OpenGL graphics, loading images, and videos, and playing sounds and music. Pyglet is distributed under the BSD open-source license, which allows you to use it freely in commercial and open-source projects.
Images in pyglet
Pyglet provides many functions for loading and saving images in various formats using native operating system services. If we install the Pillow library, many additional formats of images can be supported. pyglet also comes with built-in codecs for loading Portable Network Graphics(PNG) and bitmap image file(BMP) without external dependencies.
Loading an image in pyglet
Images in pyglet can be loaded using the pyglet.image.load() function:
rabbit = pyglet.image.load('rabbit.png')
NOTE: Consider using the pyglet.resource module if you're distributing an application with images.
By giving the file keyword option, we can load an image from any file-like object with a read method:
The filename rabbit.png is optional in this scenario; however, it informs the decoder about the file format (it is otherwise unused when a file object is provided).
The following image decoders are available in pyglet:
Pyglet.image.codecs.dds: Reads Microsoft DirectDraw Surface files containing compressed textures
Pyglet.image.codecs.gdkpixbuf2: Uses the GTK-2.0 GDK functions to decode images
Pyglet.image.codecs.quicktime: Uses Mac OS X QuickTime to decode images.
Pyglet.image.codecs.bmp: BMP decoder is written in pure Python.
Supported image formats in pyglet
Extension
Description
Windows
Mac OS X
Linux
.bmp
Windows Bitmap
X
X
X
.dds
Microsoft DirectDraw Surface
X
X
X
.exif
Exif
X
.gif
Graphics Interchange Format
X
X
X
.jpg .jpeg
JPEG/JIFF Image
X
X
X
.jp2 .jpx
JPEG 2000
X
.pcx
PC Paintbrush Bitmap Graphic
X
.png
Portable Network Graphic
X
X
X
.pnm
PBM Portable Any Map Graphic Bitmap
X
.ras
Sun raster graphic
X
.tga
Truevision Targa Graphic
X
.tif .tiff
Tagged Image File Format
X
X
X
.xbm
X11 bitmap
X
X
.xpm
X11 icon
X
X
The picture formats that can be loaded on each operating system are shown in the table below. Any extra formats that Pillow supports can be read if it is installed. A list of similar formats can be found in the Pillow docs.
Working with images in pyglet
The function pyglet.image.load() returns an Abstract Image. The object's exact class is determined by the decoder used, although all loaded photos will have the same attributes:
height- The height of the image( in pixels).
width- The breadth of the loaded image(in pixels).
anchor_x- Distance of the point from the left edge of the loaded image.
anchor_y- Distance of the point from the bottom edge of the loaded image( in pixels).
Although some image formats may have an intrinsic anchor point, the default anchor point is (0, 0). When sketching an image, the anchor point is utilized to align it to a point in space.
We could simply need a piece of the entire image. To get an image of a rectangular region of a loaded image, we can use the get region() method:
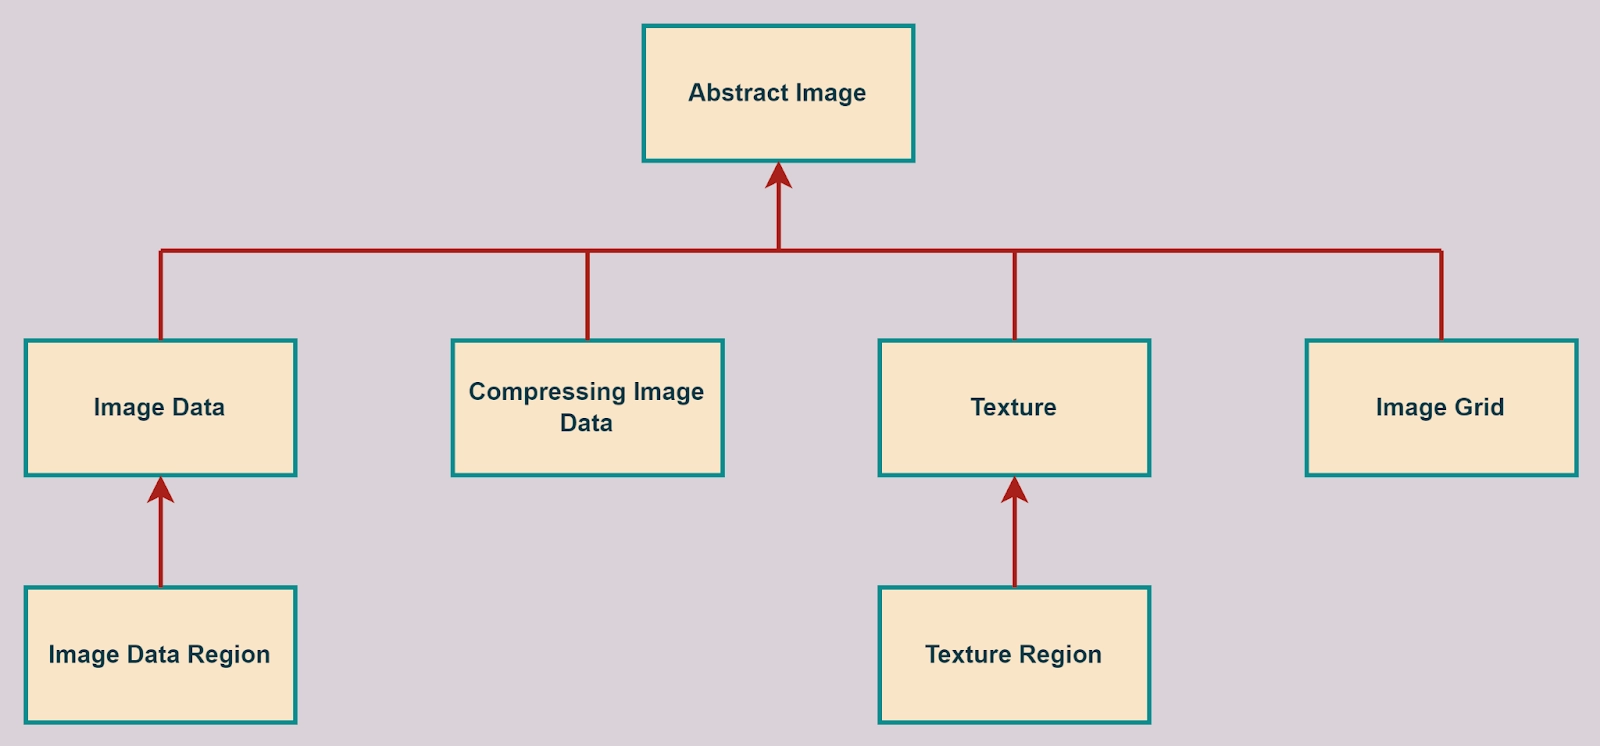
This sections deal with the various concrete image classes. All images belong to the AbstractImage class, which provides the basic interface described in the preceding sections.
Using the get image data() and get texture() methods defined on AbstractImage, an image of any class can be converted into an ImageData or Texture.
Accessing or providing pixel data
An image is represented by the ImageData class as a string or sequence of pixel data or as a ctypes pointer. The class also stores information like pitch and component layout. With get image data(), we can obtain an ImageData object for any image:
ImageData is designed to allow applications to access detail in the format they prefer, rather than understanding the various formats used by each operating system and OpenGL.
How the bytes are arranged is determined by the pitch and format properties. The number of bytes between each and every consecutive row is given by pitch. Unless pitch is negative, the data is assumed to flow from left to right, bottom to top. Rows do not need to be densely packed; larger pitch values are frequently used to align each row to machine word boundaries.
The number and order of color components are specified by the format property. It is a string consisting of one or more of the letters listed in the table below:
R: Red
G: Green
B: Blue
A: Alpha
L: Luminance
I: Intensity
For example, A "RGBA" format string corresponds to four bytes of color data in the order red, green, blue, and alpha. It is important to note that machine endianness has no effect on the interpretation of a format string.
Image sequences and atlases
Occasionally, a single image is used to hold many images. A "sprite sheet," for example, is a picture that contains all of the animation frames needed for a character sprite animation.
As a simple Python sequence, pyglet provides convenient methods for extracting the separate images from such a composite image. Texture bins and atlases can also be used to pack discrete images into one or bigger textures.
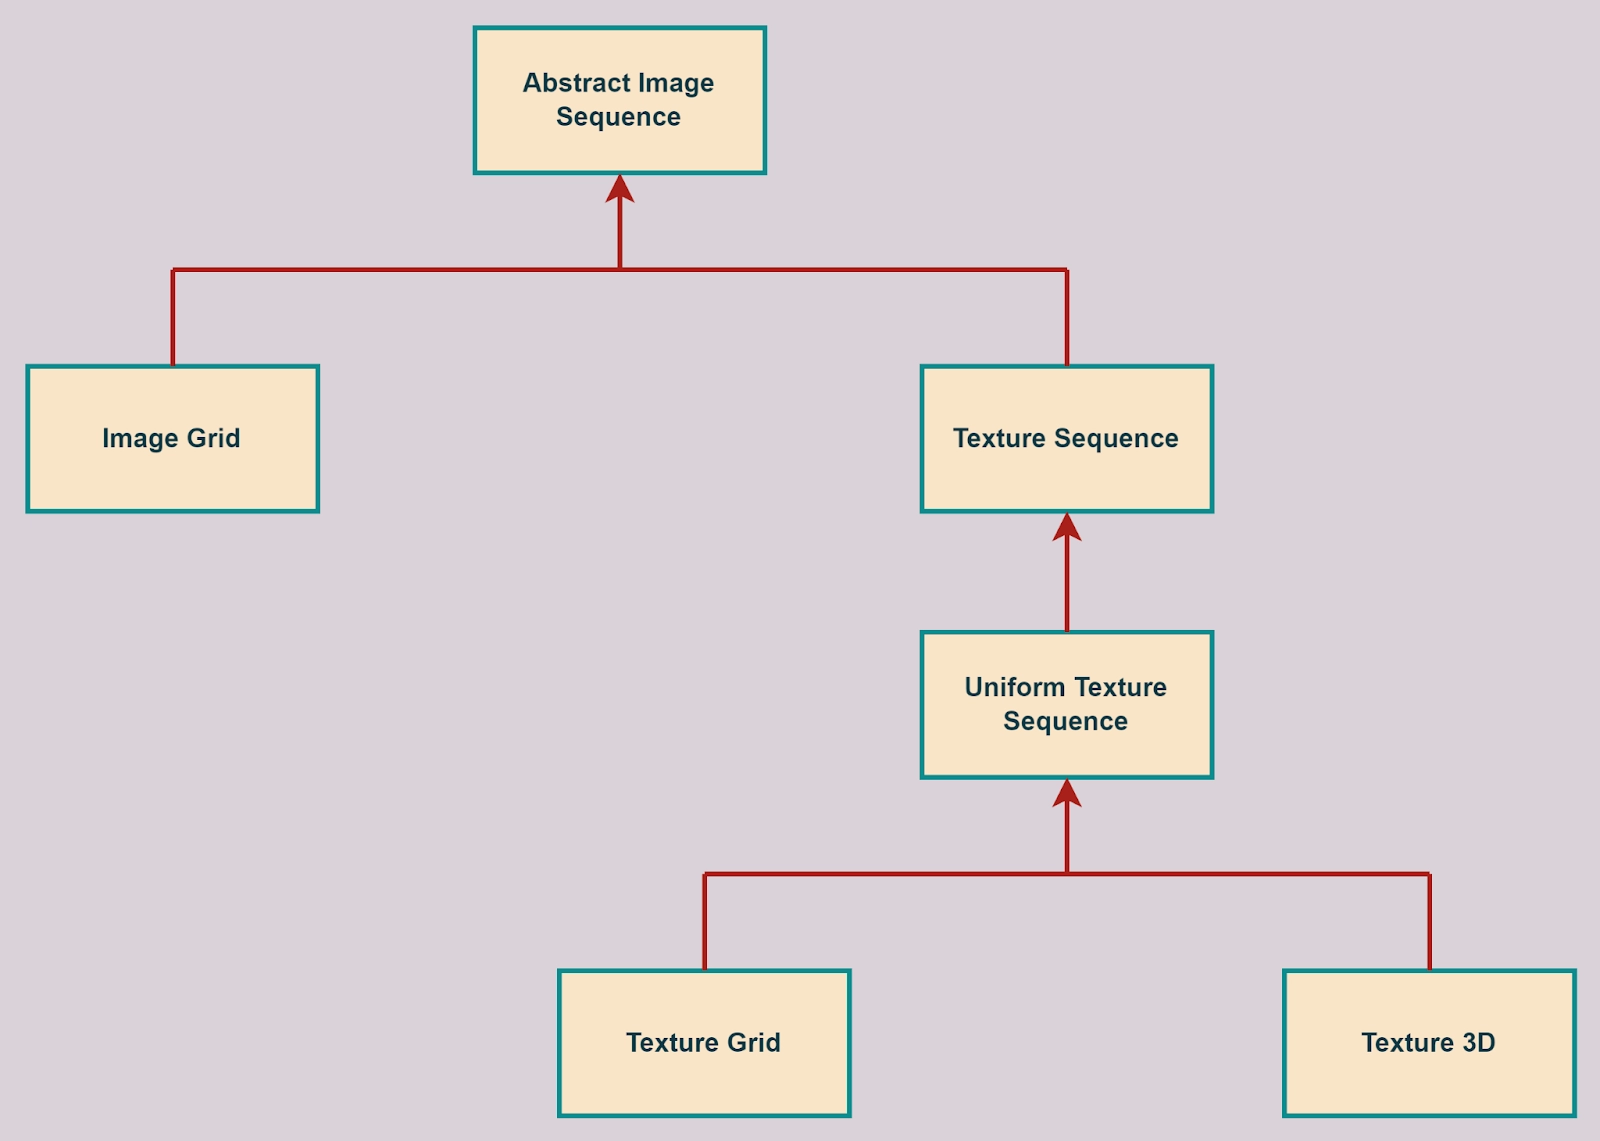
The AbstractImageSequence Class hierarchy
Image grids
An "image grid" is a single image that has been divided into multiple smaller images using an imagined grid. The image used for the explosion animation in the Astraea example is shown below:
An image that has eight animation frames arranged in a grid.
TextureGrid is very efficient at drawing multiple sprites from a single texture. However, you may experience bleeding between adjacent images.
Whenever OpenGL renders a texture to the screen, it obtains the color of each pixel by interpolating nearby texels. Switching to the GL NEAREST interpolation mode disables this behavior, but you lose the benefits of smooth scaling, distortion, rotation, and sub-pixel positioning.
We can avoid this issue by leaving a 1-pixel clear border around each image frame. However, if you are using mipmapping, this will not solve the problem. At this point, you'll need a 3D texture.
A 3D texture can be generated from any image sequence or ImageGrid. The images must all be the same size, but they do not have to be a power of two.
The above explosion texture is uploaded into a 3D texture in the following example:
Image grids are useful when we have good tools for creating larger images of the appropriate format, and all of the contained images are the same size. However, it is easier to keep individual images on disc as separate files and only combine them into larger textures at runtime for efficiency.
A TextureAtlas starts out empty, but images of any size can be added at any time. The atlas is responsible for tracking "free" areas within the texture and placing images in appropriate locations within the texture to avoid overlap.
The TextureBin class makes it easy to manage multiple atlases. The example below loads a list of images before inserting them into a texture bin. The resulting list contains TextureRegion images that map into larger shared texture atlases:
Internally, the pyglet.resource module (see Application resources) uses texture bins to automatically pack images.
img = [pyglet.image.load('img1.png'),pyglet.image.load('img2.png'),]
bin = pyglet.image.atlas.TextureBin()
img = [bin.add(image) for image in img]
Animations
While image sequences and atlases store-related images, they are insufficient to describe a complete animation.
The Animation class keeps track of a collection of AnimationFrame objects, each of which refers to an image and a duration (in seconds). The application developer decides how to store the images: they can be discrete, packed into a texture atlas, or any other method.
When you use pyglet.resource to load an animation, the frames are automatically packed into a texture bin.
Buffer images
Pyglet provides a basic representation of the frame buffer as AbstractImage hierarchy components. This representation is currently based on OpenGL 1.1, with no support for newer features such as frame buffer objects. Of course, you can still use frame buffer objects in your programs – pyglet.gl provides this functionality – it's just that they're not represented as AbstractImage types.
The BufferImage hierarchy
A framebuffer consists of
One or more color buffers, represented by ColorBufferImage
An optional stencil buffer, where each bit is represented by BufferImageMask
An optional depth buffer, represented by DepthBufferImage
Any number of auxiliary buffers, which are also represented by ColorBufferImage
NOTE: You cannot create the buffer images directly; instead, you must obtain instances via the BufferManager.
Displaying images
Image drawing is typically performed in the on draw() event handler of the window. Individual images can be drawn directly, but you'll usually want to create a "sprite" for each appearance of the image on-screen.
Sprites
A Sprite is a full-featured class that can be used to display instances of Images or Animations in the window. Image and Animation instances are primarily concerned with image data (size, pixels, and so on), whereas Sprites include additional properties. These include x/y coordinates, scale, rotation, opacity, color tint, visibility, and horizontal and vertical scaling. The same image is sharable among multiple sprites; for example, hundreds of bullet sprites may share the same bullet image.
A Sprite is created from an image or animation and can be drawn directly with the draw() method:
Pyglet is a distributed system under the BSD open-source license, which allows you to use it freely in commercial and open-source projects.
Is pyglet more efficient than pygame?
Pyglet is unquestionably faster than pygame out of the box, and speed is always an issue when developing with pygame (you have to update the smallest parts of the screen, and remembering what has changed can be tedious).
PyGame contains how many modules?
Although the exact number varies between distributions, the Python standard library contains well over 200 modules.
What exactly is Python image processing?
Image processing enables us to manipulate and transform thousands of images while extracting useful insights. It has numerous applications in almost every field. Python is a popular programming language for this purpose.
Conclusion
In this article, we have extensively discussed the concepts of Images in Pyglet. We started by introducing Images in Pyglet, loading images in Pyglet, supported image formats in Pyglet, working with images in pyglet, abstract image hierarchy, image sequence, and atlases, image grids, textures in 3D, animation, buffer images then concluded with displaying and saving the Images in Pyglet.
We hope that this blog has helped you enhance your knowledge regarding semi-structured data and if you would like to learn more, check out our article on the popular python libraries.
For peeps out there who want to learn more about Data Structures, Algorithms, Power programming, JavaScript, or any other upskilling, please refer to guided paths on Coding Ninjas Studio. Enroll in our courses, go for mock tests and solve problems available and interview puzzles. Also, you can put your attention towards interview stuff- interview experiences and an interview bundle for placement preparations. Do upvote our blog to help other ninjas grow.


 9+ registered

