Let’s get started with Webpack
To begin using webpack, make a new folder and move into it to build an NPM project:
mkdir webpack-tutorial && cd $_
npm init -y

You can also try this code with Online Javascript Compiler
Install webpack, webpack-cli, and the webpack-dev-server once inside:
npm i webpack webpack-cli webpack-dev-server --save-dev
You can also try this code with Online Javascript Compiler
Open package.json and create a "dev" script to execute webpack from an NPM script quickly:
"scripts":{
    "dev": "webpack --mode development"
},
You can also try this code with Online Javascript Compiler
This script tells Webpack to run in development mode, which is useful for working locally.
Webpack Configuration
Webpack may work without a configuration for basic tasks, but you'll eventually reach your limit. Create a webpack.config.js file in the project folder to configure Webpack via a file:
touch webpack.config.js
You can also try this code with Online Javascript Compiler
Webpack is built in JavaScript and runs on Node.js, which is a headless JavaScript environment. You'll need at least a module.exports in this file, which is the Node.js Common JS export:
module.exports = {
    //
};
You can also try this code with Online Javascript Compiler
We may adjust how webpack behaves by adding or modifying the following in webpack.config.js:
An entry point for webpack is where all of a frontend project's dependencies are gathered. In fact, it's just a JavaScript file.
These dependencies form a dependency graph.
Webpack's default entry point (since version 4) is 'src/index.js', which can be modified. There are several entrance points for webpack.
During the build process, the generated JavaScript and static files are collected in the output.
Webpack's default output folder (from version 4) is dist/, which is also configurable.
The bundle is made up of the resulting JavaScript files.
Loaders are third-party extensions that assist Webpack in dealing with a variety of file formats. There are loaders for CSS, pictures, and txt files, for example.
A loader's job is to convert files (other than JavaScript) into modules. Webpack can utilize the file as a dependency in your project once it has been converted to a module.
Plugins are the third-party extensions that modify webpack's behaviour. There are plugins for extracting HTML, CSS, and setting up environment variables, for example.
Code splitting, often known as lazy loading, is a strategy for avoiding larger bundles.
With code splitting, developers can choose to load entire blocks of JavaScript only in reaction to certain user interactions, such as mouse clicks or route changes (or other conditions).
When a piece of code is broken into pieces, it becomes a chunk.
For example, to alter the entry point path, we can do the following:
const path = require("path");

module.exports = {
  entry: { index: path.resolve(__dirname, "source", "index.js") }
};
You can also try this code with Online Javascript Compiler
Webpack will now seek for the first file to load in ‘source/index.js’. Without changing the output of our code, we can do the following changes:
const path = require("path");

module.exports = {
  output: {
    path: path.resolve(__dirname, "build")
  }
};
You can also try this code with Online Javascript Compiler
With this setting, webpack will place the bundle in ‘build’ rather than ‘dist’.
Modes of Webpack
There are two modes of operation for webpack:
The primary distinction is that production mode applies minification and other optimizations to your JavaScript code automatically.
Development Server in Webpack
To install the webpack-dev-server, we need to run the following command:
npm i webpack-dev-server --save-dev
You can also try this code with Online Javascript Compiler
‘webpack-dev-server’ is a useful development package. We can start a local server to serve our files after everything is set up.
Open package.json and add a "start" script to configure webpack-dev-server:
"scripts": {
    "dev": "webpack --mode development",
    "start": "webpack serve --open 'Firefox'",
  },
You can also try this code with Online Javascript Compiler
We can easily operate the server with this script. Now go ahead and run:
npm start
You can also try this code with Online Javascript Compiler
Your default browser should now be up and running. You should also see a script tag in the browser's console, with our main JavaScript bundle injected:
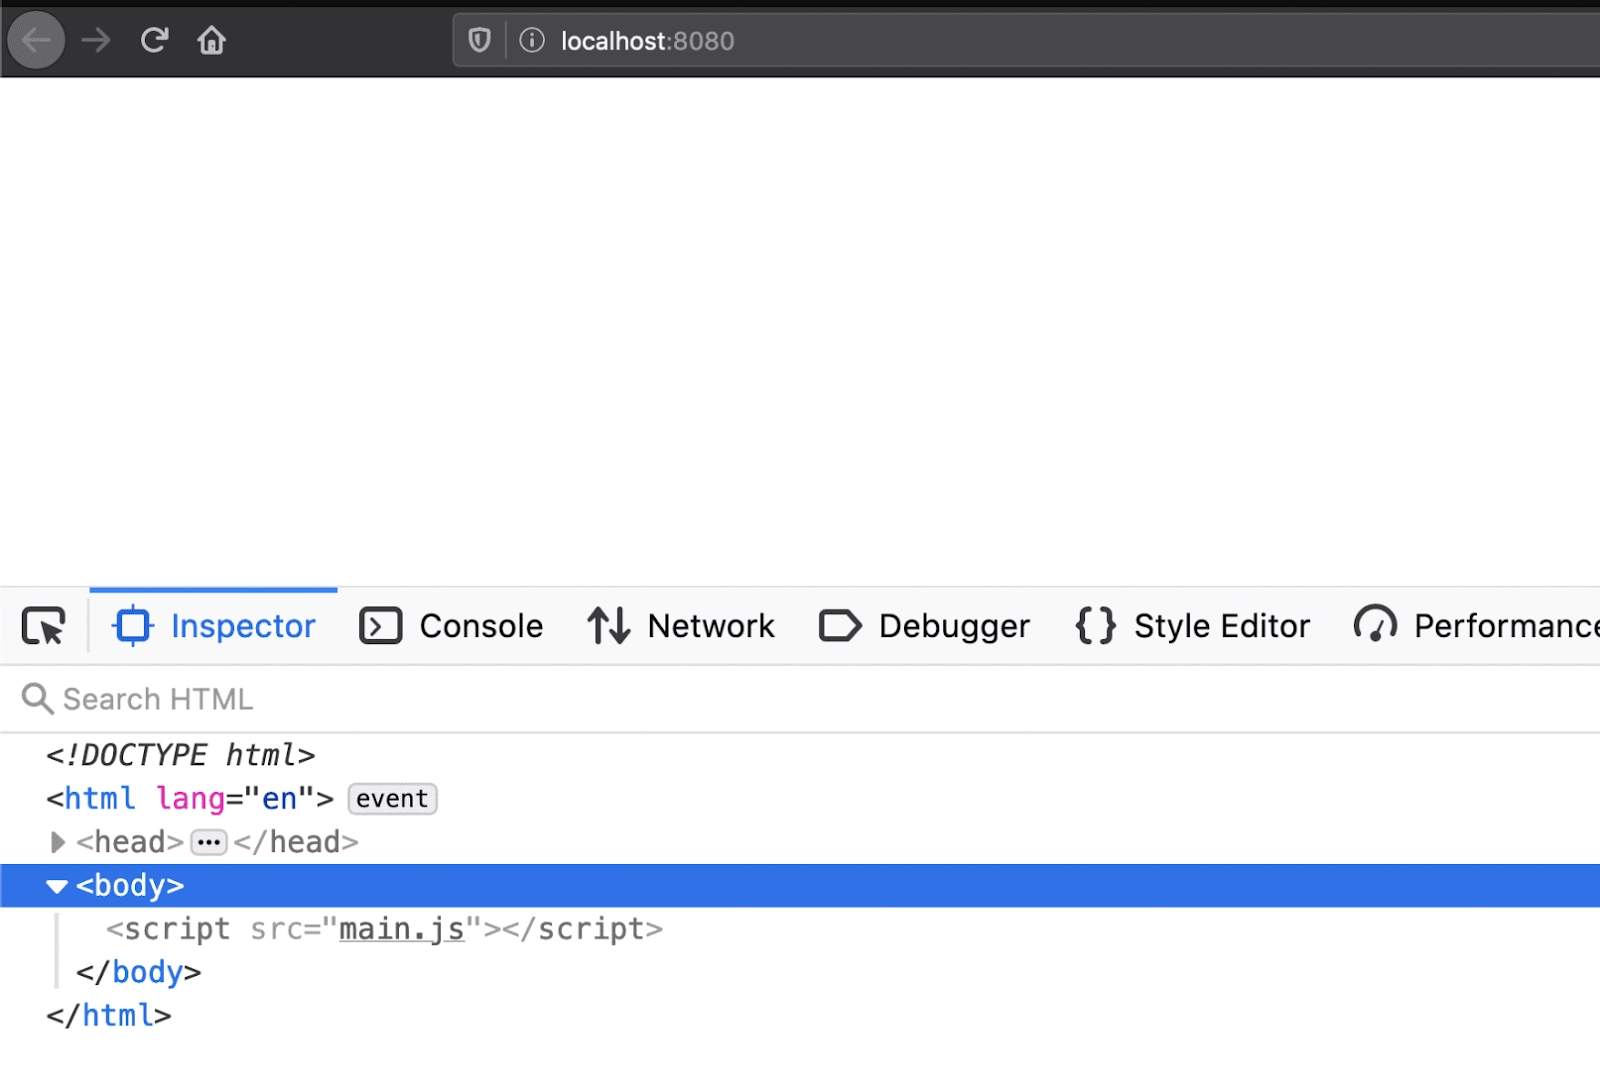
<script> tag in the console of the browser indicating the application is running
Frequently Asked Questions
- What is the objective of webpack?
Ans: Webpack's ultimate objective is to unify all of these different sources and module types so that you can import everything in your JavaScript code and produce a shippable output.
Webpack can ingest dependencies from the common JS modules, AMD modules, CSS import, ES modules and Images URL.
Webpack is widely used modular bundler for Javascript applications.
2. What are some benefits of webpack?
Ans: In a dependency graph, using Webpack and static assets has a lot of advantages. Here are a few examples:
- Dead asset elimination
- Code splitting becomes easier
- Will be able to control how assets are processed
- It will help in stable production deploys
- Webpack will slow you down at first, but when utilized correctly, it will provide significant speed gains. You'll notice that the page is reloading quickly. CSS handling at its finest. Webpack automatically converts file names to hashes of the file contents, etc., causing CDN(Content Delivery Networks) cache-busting.
3. Can we use React without webpack?
Ans: Webpack is a fantastic tool with a variety of configuration choices. Everything is feasible with the right plugin, including live reloading, hot reloading, and multithreaded transpiling. However, as a natural trade-off for its adaptability, Webpack lacks simplicity and ease-of-use.
We can use React without webpack. We don't even need JSX; we can write React without it. If you like, you can use React.createElement. If you want to use JSX, you'll need Babel, which works great with grunt.
Key Takeaways
In this blog, we went over the fundamentals of webpack. We learned about how to get started with webpack and how to configure the webpack. We learned about modes of webpack and webpack as a modular bundle.
We also learnt about the development server of webpack. That's all when it comes to setting up webpack with React for both general and particular configuration needs. If you wish to know about this even more, the webpack docs may provide you with more information on how to do so.
Enroll in our Advance Front-end Web Development Course- React.js to deeply understand the concept of webpack in Web Development.

Credits: GIPHY
Happy Developing!


 8+ registered

