


Introduction
Let's ensure we understand the foundational concepts before delving further into the subjects. Here is a brief introduction if you are unfamiliar with Junit-Tools.

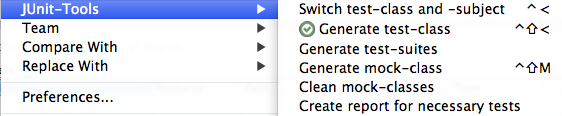
The primary function of JUnit-Tools is to produce JUnit test-elements (packages, classes, methods, test cases, and mocks) based on logic and an existing Java class. This supports the Test-After Development. After writing or changing application code, create JUnit-tests. It is possible but not yet viable to use additional input channels (such as UML models) to generate test items to facilitate test-driven development.
This article explains the details of Junit-Tools in Eclipse, in which we talk about Installation and testing using Junit Tools in Eclipse.
Without further ado, let's get started.
Installation
To the IDE You can download and install the plug-in called Eclipse using one of the following methods:
☑️ Eclipse Marketplace
☑️ Update site
☑️ Manual
It is advised to use the Eclipse Marketplace or the update site to install JUnit-Tools.
Eclipse Marketplace
💁 Steps that are used to download and install the plug-in called Eclipse by eclipse marketplace:
1️⃣ You can use the Drag and Drop install capability by moving the Drag to your running Eclipse workspace to install the JUnit-Tools button to your active Eclipse workspace.
2️⃣ Drop the install button, for instance, into Eclipse's toolbar or package explorer. If you drag the button to the editor, nothing happens. This eliminates the need to manually look for the JUnit-Tools plug-in in the Eclipse Marketplace.
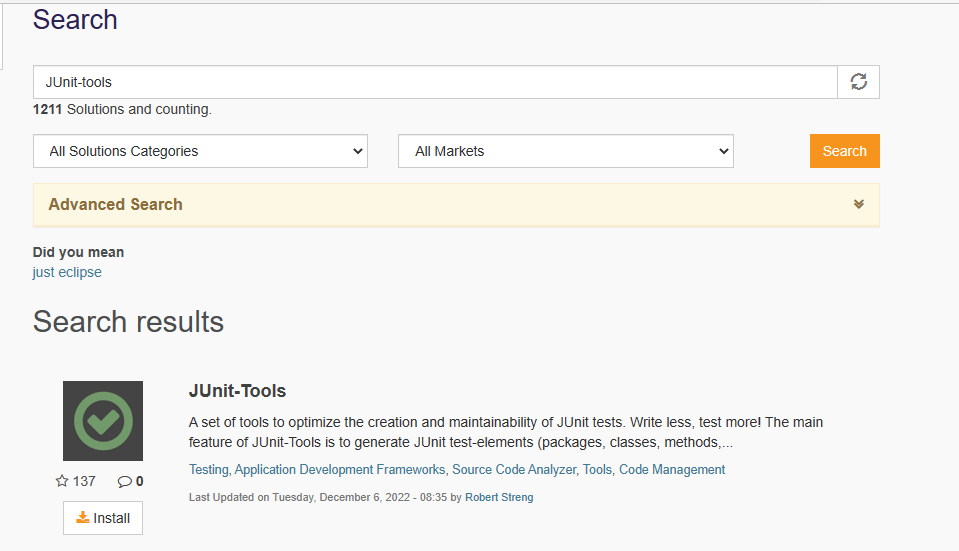
3️⃣ Select Help/Eclipse Marketplace from your Eclipse menu to launch the marketplace. Next, enter "junit-tools" in the search box and choose the returned result:
Update site
💁 Steps that are used to download and install the plug-in called Eclipse by update site:
1️⃣ Choose Help/Install New Software from your Eclipse menu to add the update site and download the plug-ins.
2️⃣ To add the repository for junit-tools, click Add.
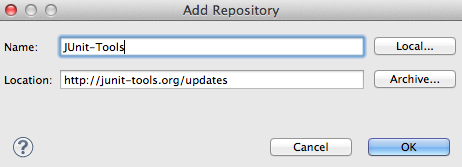
Source:- http://junit-tools.org
3️⃣ Start the installation by checking JUnit-Tools:
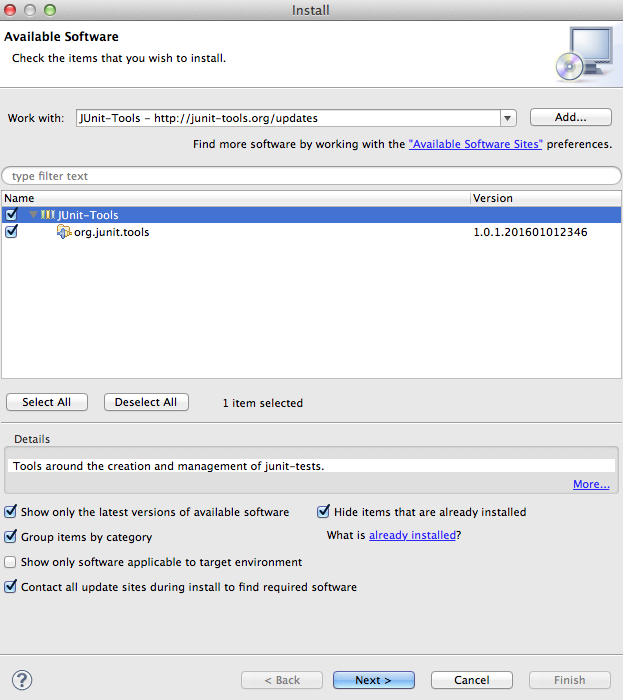
Source:- http://junit-tools.org
Manual
💁 Steps that are used to download and install the plug-in called Eclipse by manual:
1️⃣ Download the most recent JUnit-Tools version.
2️⃣ Unzip the package in your Eclipse installation's plugins or dropins folder.


 18+ registered

